

This little write up marks the end of the first week of the One Room Challenge, which may or may not be what brought you here. And while it may look at a glance like I am revealing the finished kitchen, there are still five weeks to go.
I know, it’s mind blowing.
Behold, the power of paint!
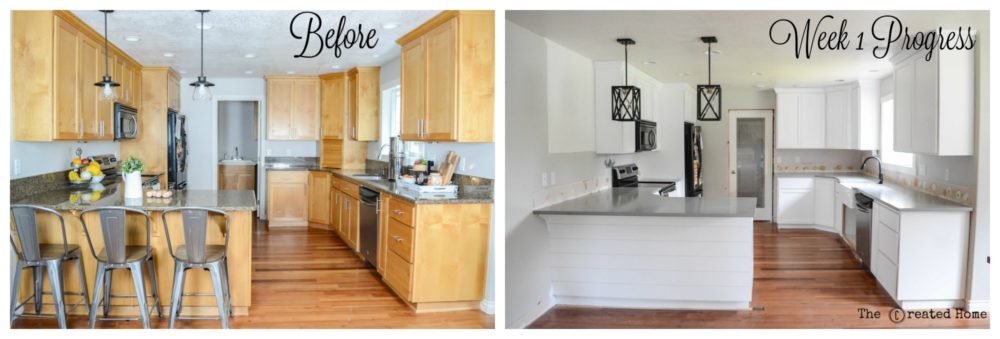
Now before someone says something, yes, those are the same photos. The floors look different because the before image has post processing, and the after doesn’t really. And it was different lighting, blah blah blah.
Anyway, the floors are going, too, so let’s not get stuck on that.
But seriously, how incredible is that transformation already?!
The only part of this kitchen remodel that the husband and I are not personally doing is the countertops, as cutting quartz from the earth and mixing it with resins and polymers is not yet on my DIY list. So feel free to ooh and aah at those, but we are a learn to do it yourself blog here, folks, so we are going to focus on things we can do.
So here’s how we painted our kitchen cabinets like regular professionals, and you can, too.
Grab that blue tape and listen up.
Here are the supplies we used to mask off and paint our kitchen. We used every last bit of this list.
*This post contains affiliate links so I can pay my water bill each month. My kids flush the toilet a lot. If you want to know more about affiliate links you can read my disclosure statement here.
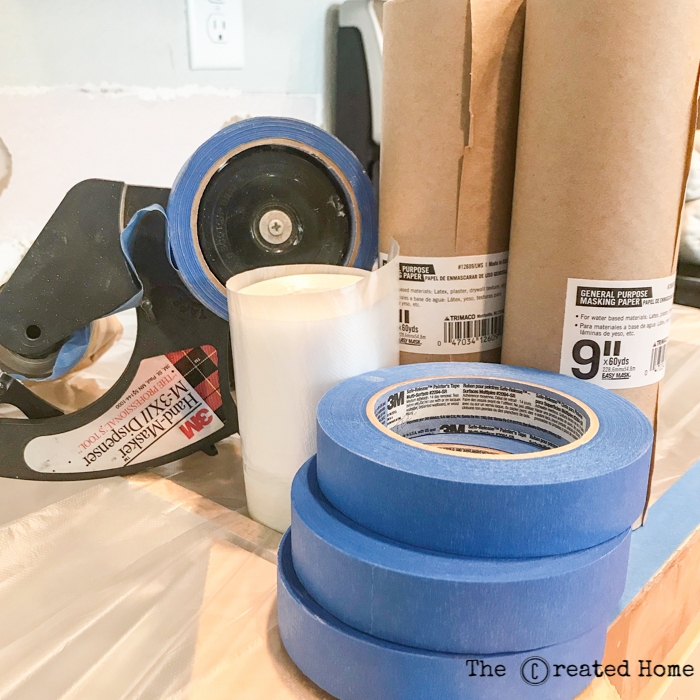
painter’s tape
sanding sponge
brown kraft paper roll
Pre-taped masking film
respirator mask
masking paper
masking dispenser
caulk
caulking gun
wood filler
orbital sander
shop vac
mouse sander
deglosser
small pry bar (for removing trim)
tacks (for securing the paper to the ceiling, because that tape will not stay up there without it)
paint pyramids
stacking tools (I didn’t use these and slapped myself for it later because they are genius)
And, of course…
Oh, hey, this is important…
*This post is sponsored by Wagner SprayTech. I’m happy to partner with Wagner to show how accessible a paint sprayer really is. I’m also happy to showcase Sherwin Williams paints, which makes for one killer combination. All opinions are, as always, strictly my own. Which is cool because, frankly, I work with brands I love already.
How to paint your kitchen like a professional
There are two parts to a professional paint job:
- The prep
- The paint
The Prep
Repeat after me: It is worth it. It won’t last forever. You can do this.
Because you will want to quit.
Simply put, the best way to get a smooth, professional, flawless finish is to do all the prep work. I spent days sanding every last door and drawer, and more days sanding the boxes, and more days wiping down and deglossing the boxes just to be safe. And then more days masking and taping off anything and everything that was not going to be painted.
And then it took like 10 minutes to spray the entire kitchen. No joke.
Let’s get into the nitty gritty of that.
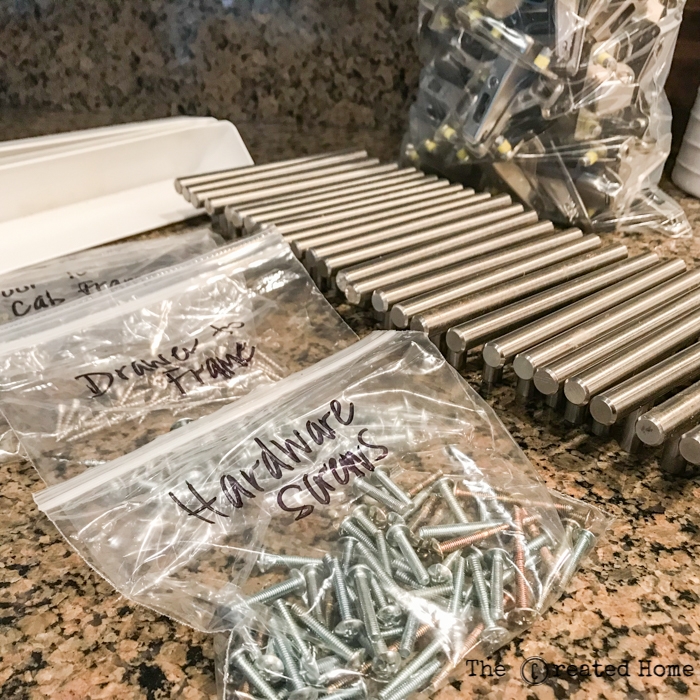
Demo:
Remove all hardware. Organize them by bag and label.
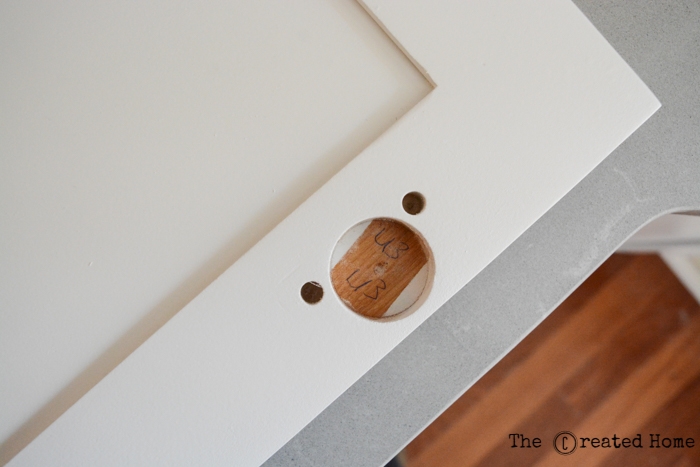
Be sure to number your cabinets so they go back where they belong. You won’t remember, trust me. I made myself a key on a piece of paper and wrote the numbers where the hinges go. Just be sure to place painter’s tape over them before painting.
Sanding:
Look, I get it. No one likes sanding. Do it anyway.
A lot of people (I’m looking at you, bloggers) like to claim that you can paint your kitchen with no prep! Uggggh, don’t even get me started. Do it right, do it once. Besides the argument that ‘No, Sally, your cabs will NOT actually hold up as well as ones that are properly prepped,’ there’s the fact that unless you never actually use your kitchen, they probably don’t look so hot to begin with.
The ugly truth:
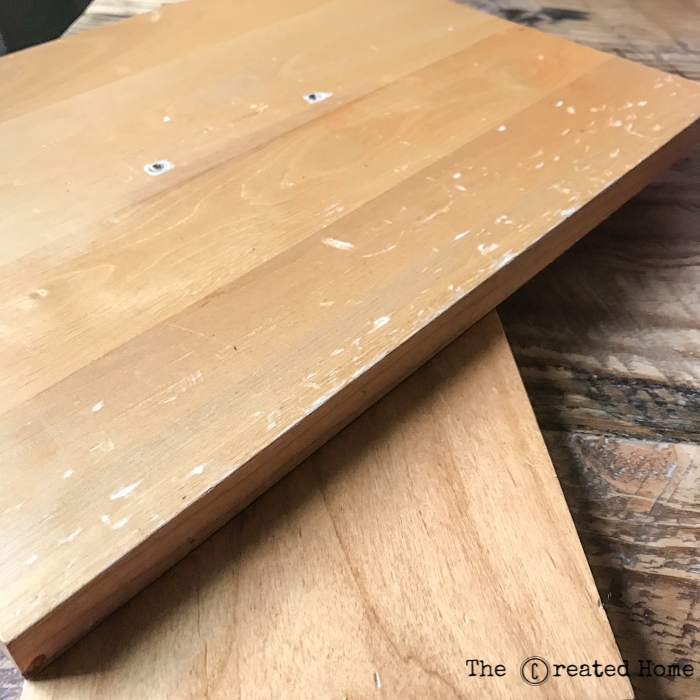
These cabs are 10 years old. The finish is giving up the ghost, and they have developed lots of dings and scrapes, and they have been climbed on by ruthless, savage toddlers. Sanding is an opportunity to smooth some of those memories, not just paint over them.
Newsflash: Painting will only emphasize those imperfections, folks. Paint is not a filler. Say it with me: Paint is not a filler.
So take off every last drawer and door, haul them outside, and lightly sand. You don’t necessarily need to take them clear down to nothing, but the scuffing of the finish is what will help the paint adhere. I used my random orbit sander, and a mouse sander to get into the corners. Our doors are shaker style, which works well for sanding. If we had raised panel doors I would have sanded the flat surfaces and used deglosser everywhere else.
At the conclusion of this fun little exercise in will power and self restraint I concluded that our kitchen was far, far too large.
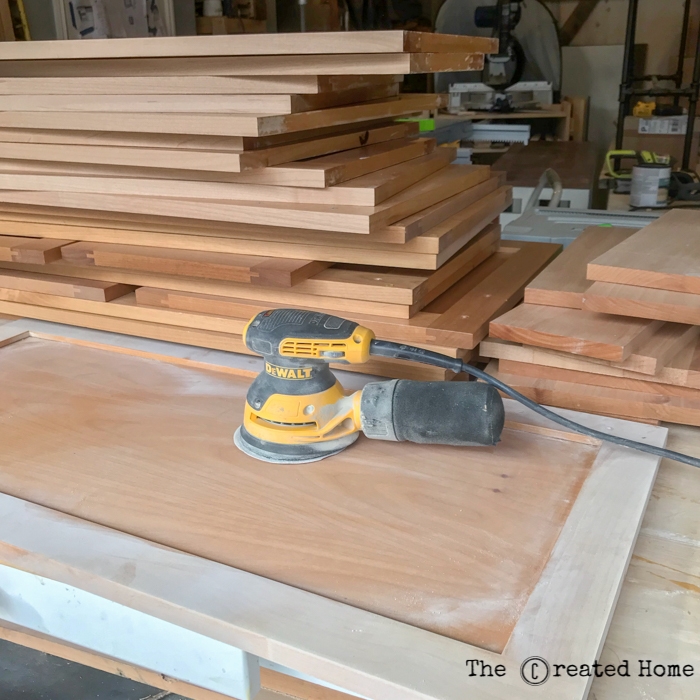
And then it was time to sand the boxes.
We hauled the shop vacuum in the house and attached it to the sander. This catches a surprisingly large amount of the dust, and I absolutely recommend doing it this way. Again, you don’t need to get down to bare wood. Just scuff that surface up and smooth any damaged parts of the cabinetry that you possibly can.
Prep work: Part 2
Oh, we are not done. I know, I’m doing a lousy job selling you on this, aren’t I?
Now it’s time to get out all the masking supplies and wrap your kitchen up like a big, happy present you are giving yourself. Use paper to cover the floor, the counters, the walls, the ceiling…everywhere within a few foot radius of the cabs. These masking dispensers for applying pre-taped paper are a big time saver.
Our kitchen joins the main part of the house to the back hallway, garage, and upstairs. So we hung a large plastic sheet to block out the paint from the other rooms. It wasn’t so fun for a week or so, but it kept the mess contained.

The Paint
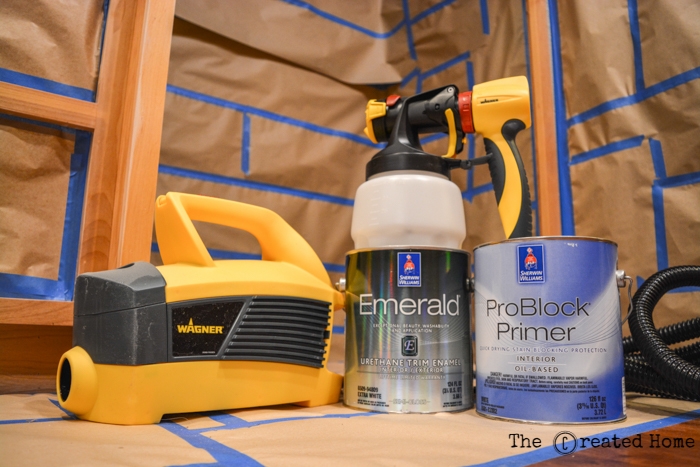
We chose to prime our cabinetry with Sherwin Williams ProBlock oil based primer. Why an oil? Simply put, it creates a super hard, smooth foundation for the paint. Oils cure fast and they are exceptionally good at blocking whatever you are putting them over, be it raw wood or stains or what not. It’s really the best solution for places like cabinetry that are going to take a lot of handling. Paired with the fact that we sanded and prepped our cabinets beforehand, we now had a fantastic base for painting.
One word about ProBlock. It’s thick. Like, really thick. I mean, you know the stuff is going to cover well when you open it and it’s like pea soup. Only white. And not food. That thickness is great for painting, but a bit rough on all but high efficiency airless sprayers. So if you go this route you might consider renting a sprayer, which is what we did for this first coat.
After that it was on to the paint. We used Sherwin Williams Emerald line in Alabaster white. Alabaster is a popular color for cabinetry, for good reason. And yes, I see all of those lovely colorful painted cabinets out there, and I love them. But there’s not way I’m doing all of this work again in five years because the latest fads say blue and greens are out and purples and pinks are in. Nope.
We loaded up the paint in our own Wagner sprayer and were off to the races.
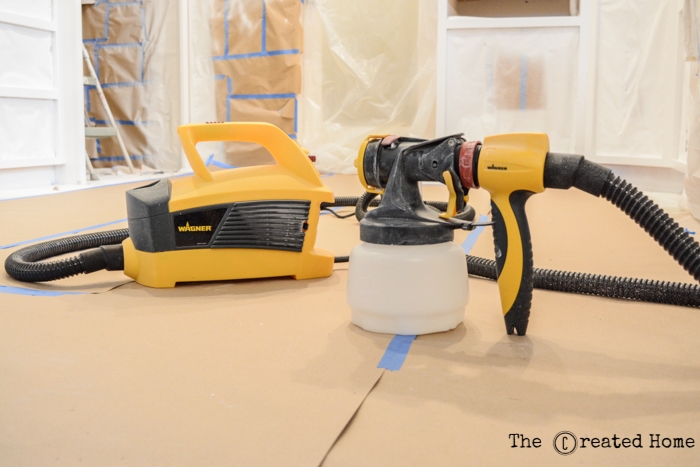
You may recall I first showed you how we used a sprayer to paint our new window trim. If not, check it out.


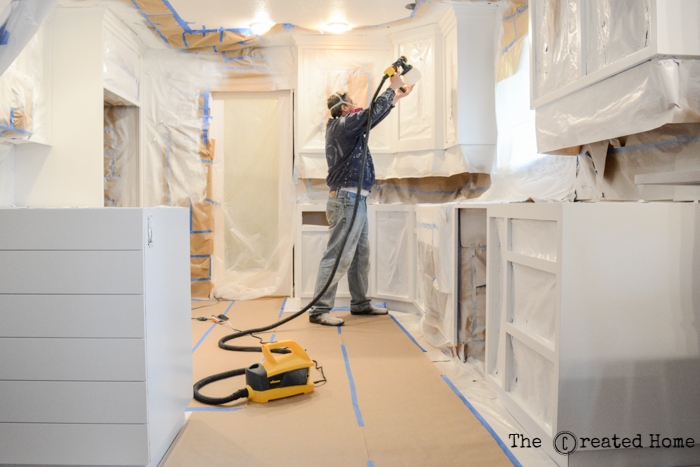
For this we used the Wagner Flexio 4000, which is a little smaller than the Studio Pro, but every bit as easy to use and – dare I say it? – fun. Set up is really simple (says someone who doesn’t like reading directions). I mean, I don’t even look stressed out in this photo checking the settings.
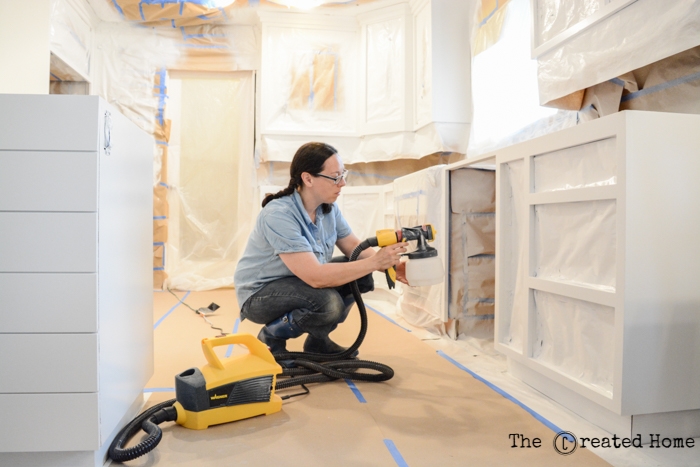
Sometimes I have to remind myself that I’m working when I’m using the sprayer. After all of that prep work it feels so good to shoot some paint and watch a room transform before your eyes.
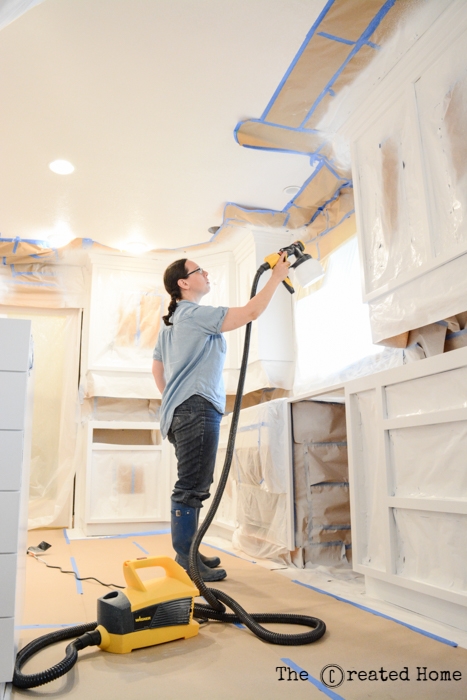
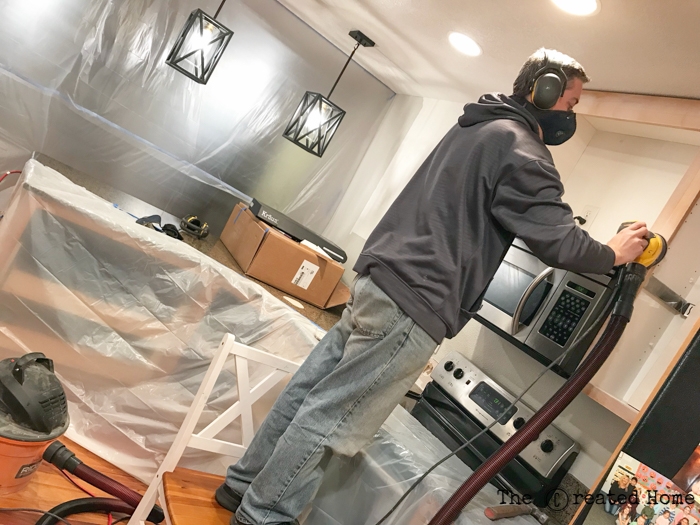
Despite this clearly staged photo (ahem, we laid down new paper first, and I wear a hat and a mask when I paint), I have to own that my husband is a deft hand with a paint sprayer, and his skills are superior to my own. Yes, it hurts a bit to admit, but there it is. Here he is, getting started on the first coat of paint after primer.
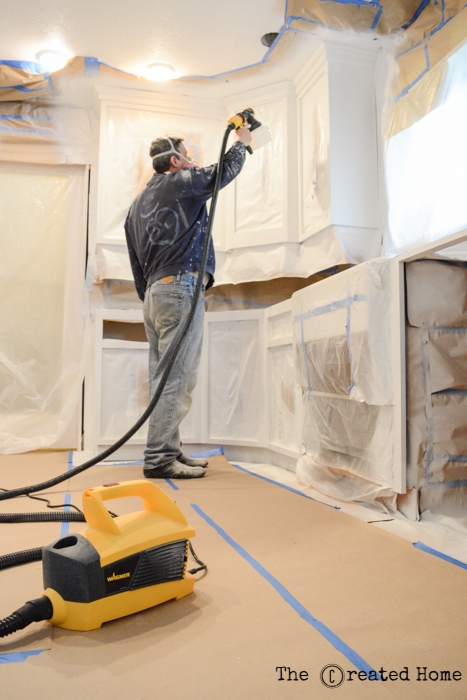
Note the respirator mask. Show your lungs some love and wear one. I took this photo right as he got started. Like I said, in a closed off room, that much paint makes conditions a bit hazy.
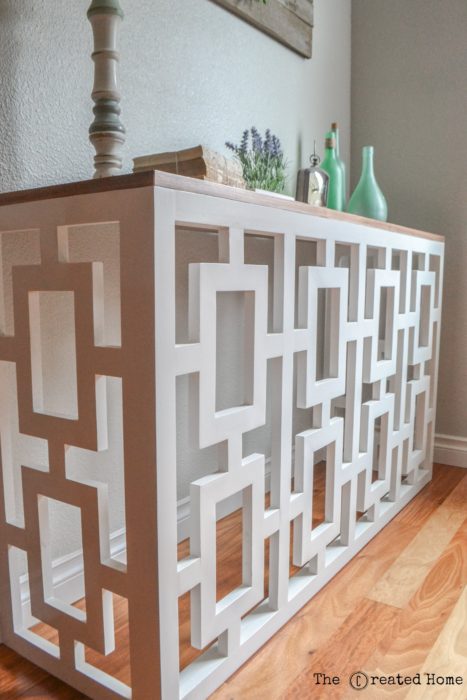
Confession time: I actually really like painting. But I get that it is not everyone’s cup of tea. If you are not such a fan, a little sprayer like this is pretty well the greatest thing since sliced bread. Get a simple spray tent, like this one, and you have an easy way to paint a piece of furniture faster than it takes to actually set up said spray shelter.
Example. Think I hand painted this? Uh, no.

Back to the kitchen. We painted three coats of paint after the primer, which was probably overkill. But it gets a bit misty in a room with that much paint and it we wanted to be sure there were no light spots. (Spoiler: there aren’t.)
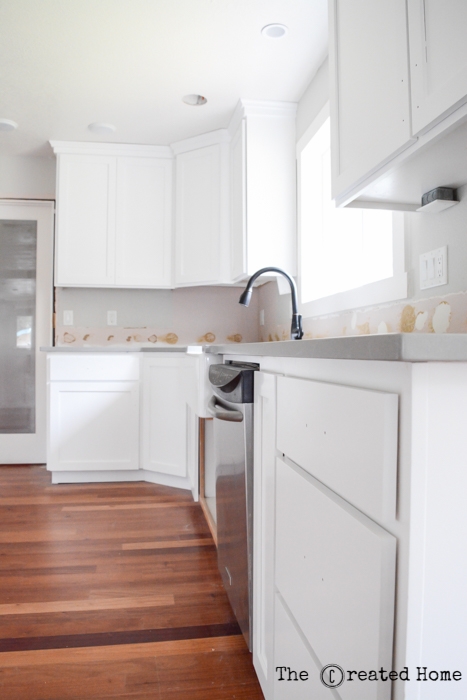
Check out that finish!
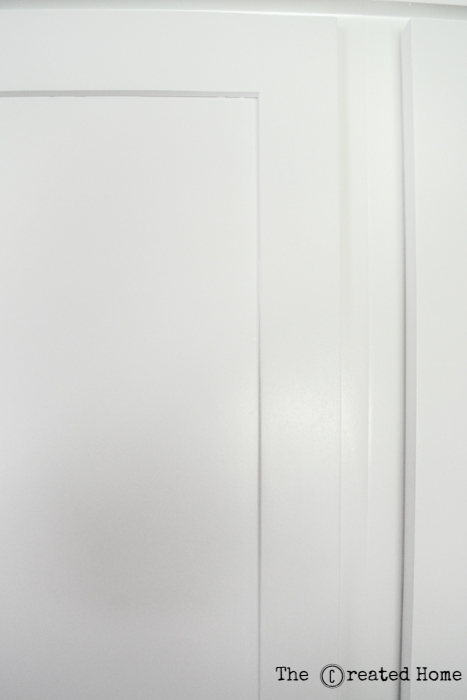
Okay, it’s a bit hard to tell. Here’s another close up:
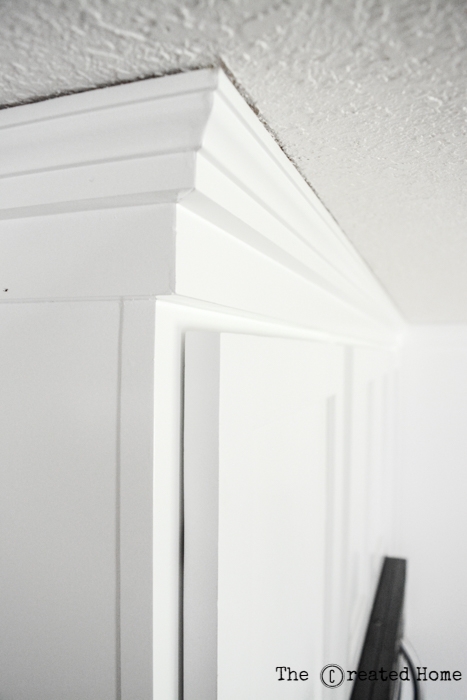
We will add some caulking where the crown meets the ceiling. I also plan to write up a tutorial on how we made that crown, so if you have that task on your to do list, stay tuned.
The kitchen boxes were done well before the doors, owing to the whole front and back thing going on. We let them dry in the house and made sure they had a good day between coats.
I waited another 24 hours before rehanging the doors and attaching the drawer faces. I’m giving it another week or so before the hardware goes up. The Emerald paint fully cures in just two weeks, so we won’t need to spend the next month worrying about dinging up the paint work.
If you noticed the gap at the base of the cabinetry (very impressive), that is because we pulled the quarter round up. We will spray that with the Flexio later and reattach it after replacing the flooring.

That’s it! I hope this was helpful and didn’t scare you away from spraying your kitchen cabinets. Yes, it’s a good deal more work than grabbing a roller and going at it like some rouge painting ninja, but it really is worth it. Your cabinetry sees a good deal of action, and as with everything, you can either do it well, or do it over and over.
I hate doing things over and over.
Wait, one more thing!
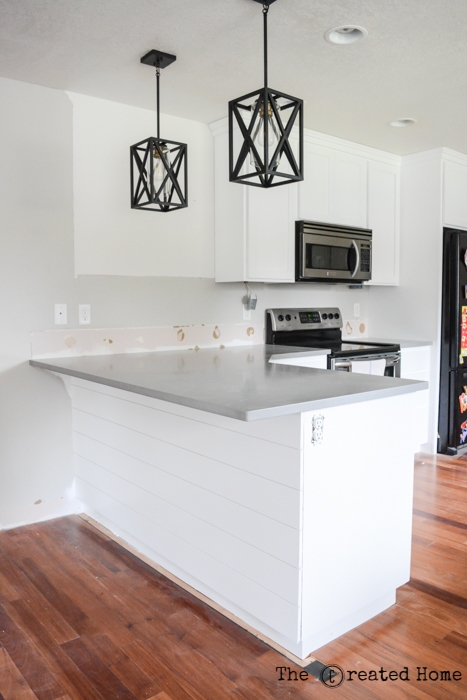
You totally noticed the lights, didn’t you? I’m sooo excited about them and cannot wait to show off the rest of the incredible lighting we are adding to this space and over the dining table. They are made by Kichler and I am so in love with them I can’t even. As in I cannot finish the sentence. They are that good. I’m partnering with Kichler to show you how lighting can transform a space, but lighting sort of feels like the grand finale, doesn’t it? So I’m saving a couple cards up my sleeve to show you later.
As far as what the coming weeks will bring:
*We have decided to add a sort of butler’s pantry to the hallway just outside the kitchen on that far side. So that will be a fun bonus that will probably pop up somewhere in the next five weeks. The current pantry is down the hall, where our future 13′ mudroom will be. I can’t wait to share the new pantry plans with you.
*The flooring will be replaced in the next week or two. Probably two. So no more than three…
*I’ve finalized the design for a couple custom corbels based on an Eastlake Victorian corbel I have that is too large for the space. They will be so good the heavens will open and angels may well descend.
*I’m fixing some broken glass in a 1910 farmhouse door that will replace the white door at the far end of the kitchen. We will shift that doorway over so it’s centered and that natural wood will look aaaa-mazing.
*The sink is not actually hooked up (the faucet is totally just sitting there), so that will be done and I will build a custom wood bump out in that spot. I’m really excited for this part.
*I am planning for cement tile as the backsplash, with the portion at the front over the peninsula to go all the way to the ceiling. There will be a couple small open shelves there replacing a cabinet that actually opened into the light. And I solemnly swear not to fill said shelves with white dinnerware.
What do you think?! Would you consider spraying your cabinetry? Don’t be intimidated! I promise it is worth it, and the results will look like a million dollars. (But cost, you know, a lot less.)
Stick around for more renovation awesomeness, and let me know what you think!
DIY Kitchen Renovation Reveal - The Created Home
Sunday 16th of February 2020
[…] […]
DIY Kitchen Renovation: One Year Later - The Created Home
Sunday 16th of February 2020
[…] the smartest thing we did was to properly prep and paint our kitchen cabinetry. I don’t believe in shortcuts when it comes to this task, and I’ll preach that soapbox […]
Britney
Friday 24th of August 2018
Um, first of all... You're hilarious! I love how you write.
My husband and I are trying to get motivated to paint our kitchen cabinets. Well, my HUSBAND is really just trying to motivate ME to paint the cabinets because I'm the painter in this relationship. I don't trust him. No way no how. He'd screw it up on purpose just so he wouldn't have to do it. SMH. Lol, I'm only kind of kidding.
This post was very helpful. I'm just so daunted by the whole project and process but you made it sound do-able. I want to do our cabinets right... no shortcuts. Hopefully ours will turn out as beautiful as yours. Love the whole finished look!
Sarah
Friday 23rd of November 2018
Haha! Fortunately my husband and I are both a bit obsessive about the details when it comes to painting. Thank heavens, because it is a ton of work! Please share the results once you are finished with yours!
Matthew Towles
Tuesday 8th of May 2018
Your kitchen is really looking amazing. I have been thinking to paint my kitchen cabinets. So glade to find your blog. I must follow this when i am going to paint my kitchen cabinets. Hope so it will be going to gorgeous one. Can you tell me what color do you use in your kitchen? Thanks in advance for helping me also for your great article.
Sarah
Thursday 24th of May 2018
The color is Alabaster, by Sherwin Williams. Good luck with your kitchen!
Ruthie
Monday 7th of May 2018
Your kitchen is looking great! I sprayed mine too and it's hard to go back to hand painting after you've used a sprayer!
Sarah
Thursday 24th of May 2018
Agreed! Sprayers are amazing. Thanks!