
You know those people on the HGTV house shows that talk about how they want a home with “character”? You know what they are really talking about? Trim. They are talking about trim work.
If your home could use some character, here’s a rather inexpensive way to get it. In this tutorial I am specifically addressing how to add trim to a rounded (bullnose) window corner, so if yours are square already you can skip ahead a few steps and save yourself some time. The rest of us unfortunate souls will have to do a little more prep work. But it sure makes for some great before and afters!
Here’s a video for those of you who have no intention of reading much farther. You can check the written tutorial after that if you have additional questions.
How to trim rounded window corners
*This post contains affiliate links for your convenience. You can check out more about what that means here.
Materials
lining board – we used 1/4″ plywood strips
trim wood – we used 1×4 premium pine wood from Lowes
caulk
filler and/or joint compound
Tools
Miter saw (or circular saw)
Table saw (to rip the lining board)
Paint Sprayer
Brad Nailer
Utility knife
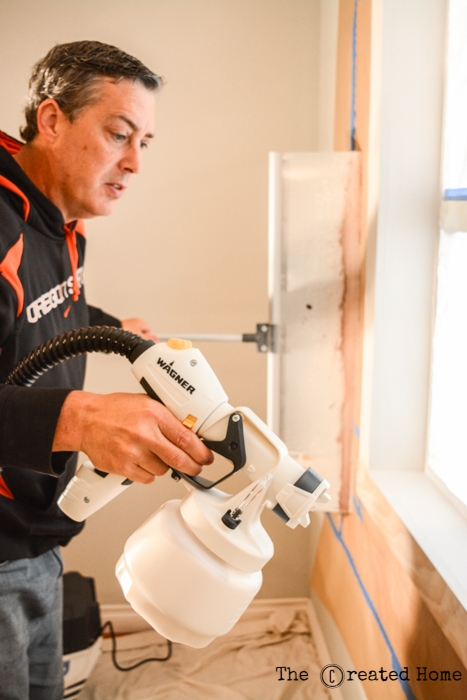
*This is a sponsored post, though as will always be the case, all opinions are absolutely my own. We used the Wagner Studio Pro Paint Sprayer to create this gorgeous craftsman style look. I’ll share more about our experience doing so a bit later, but I’ll say that I was new to Wagner sprayers until I had the chance to try one out a few months ago. Since then I have replaced our previous sprayer from another brand with this sprayer, and am more than happy with the switch, for reasons I will outline below. I am not a representative of the brand, just a girl that loves paint and building!
Step 1:
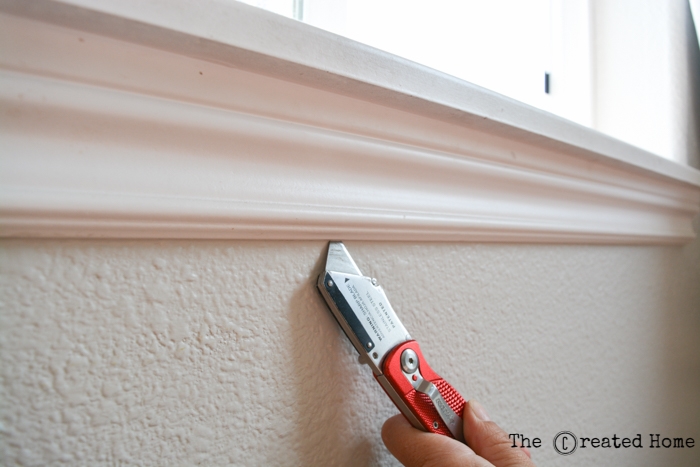
Deconstruction. Remove existing window trim. Use a utility knife to gently cut the seal between the existing molding and the wall to prevent tearing of the paint and sheet rock.
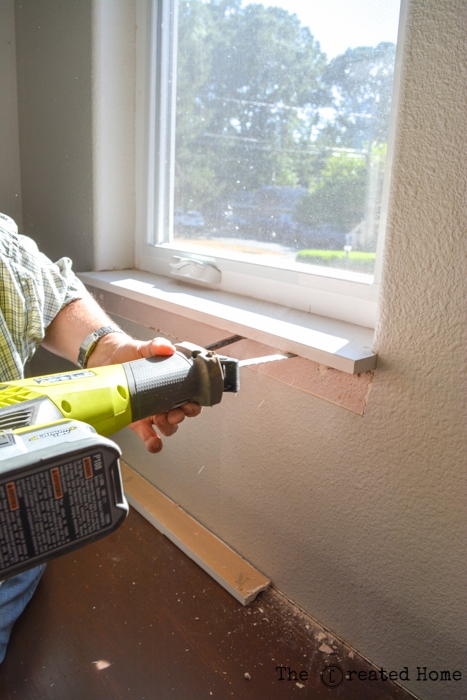
Our window ledges extended a little more than an inch out from the frame. We moved them and ripped them on the table saw before sliding them back into place. A word of caution: Be careful not to pry against the window frame or you may break it. We found it helpful to use the sawzall to cut the finish nails that held it in place.
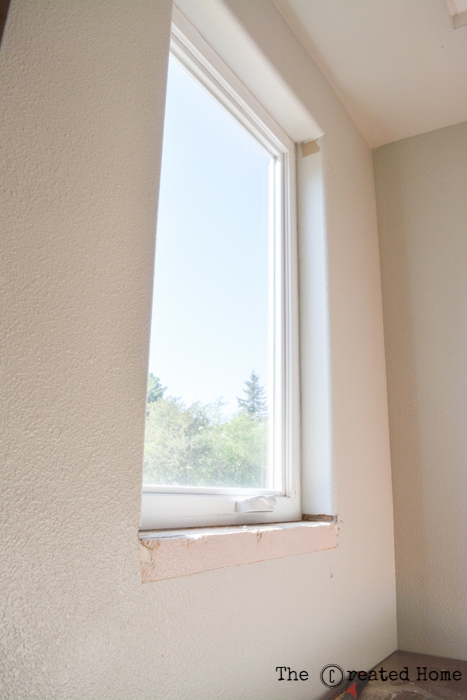
Once the ledge, trim, and any window coverings are removed you are ready to build it back up! For the record: I had nothing to do with that pink color under where the trim work sat.
Step 2:
Replace the window ledge.
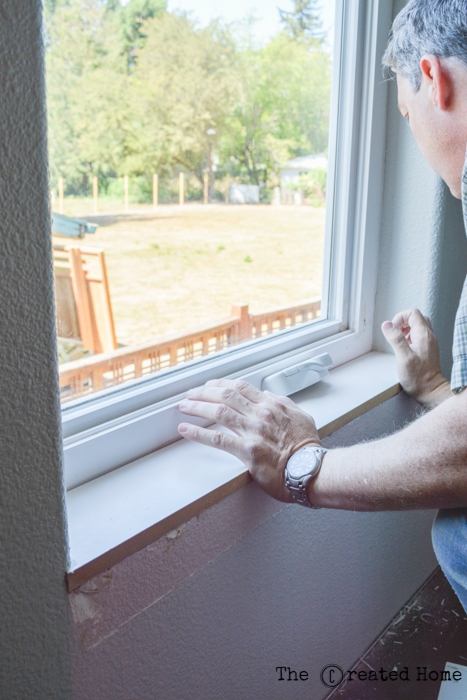
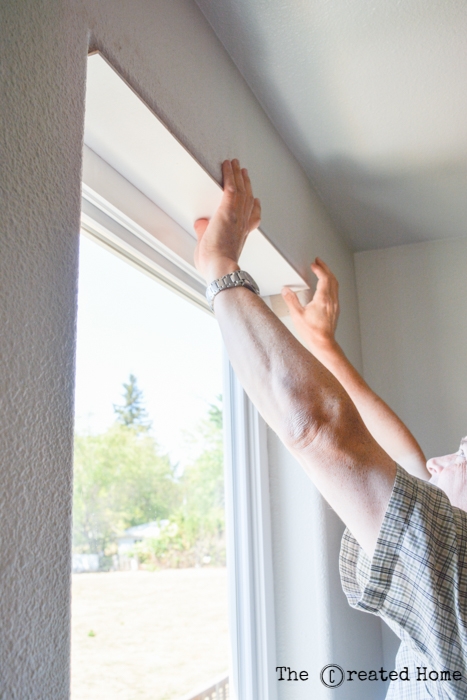
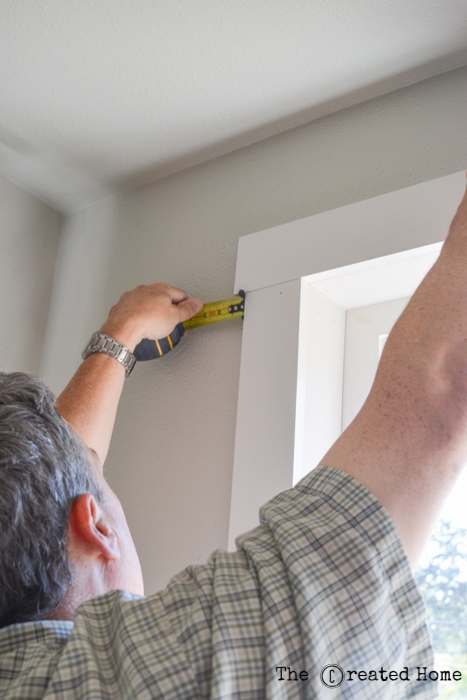
Measure the window carefully for the inside trim. You will need a width measurement. A helpful trick if you are dealing with rounded corners is to hold a piece of wood flush against the wall and measure out to that piece, as shown:
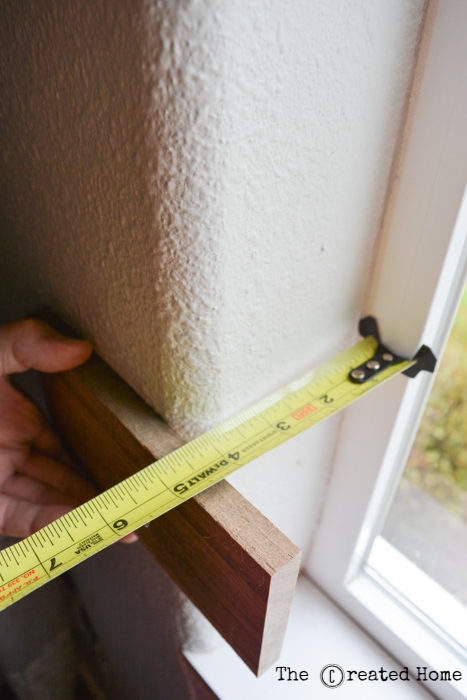
You will also need a length measurement. We found it easiest to get an approximate, then go back and cut them exact as we fit them, starting with the top board, then fitting the sides under it.

Step 3:
Paint and fit the inside trim. Let’s talk about what kind of wood to use for the inside trim. If possible, we would have preferred something a little thicker than 1/4″, though the cost was definitely good. However, we simply didn’t have the room to add thicker wood. On a couple windows there are cranks to work around, and it is necessary to leave some reveal around the window, so 1/4″ it was. That said, it was a bit flimsy, which both helped with fit and made it a pain when we needed to shim a little.
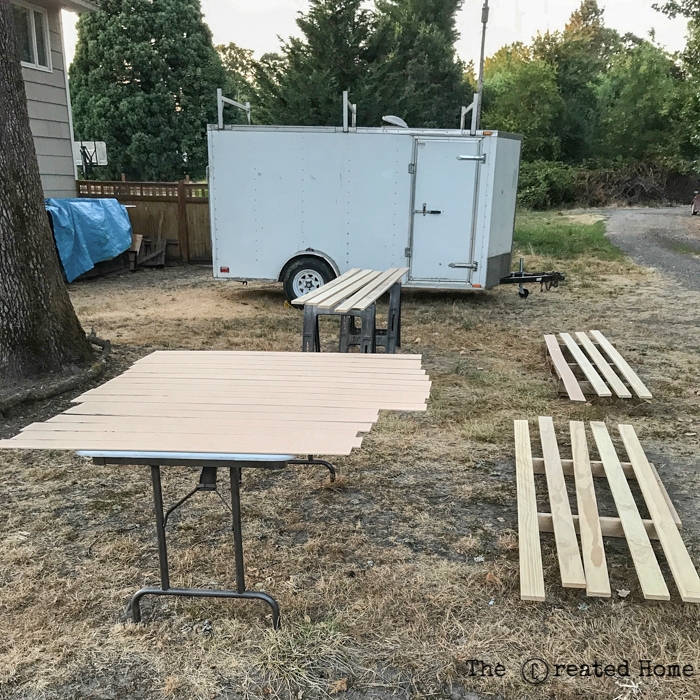
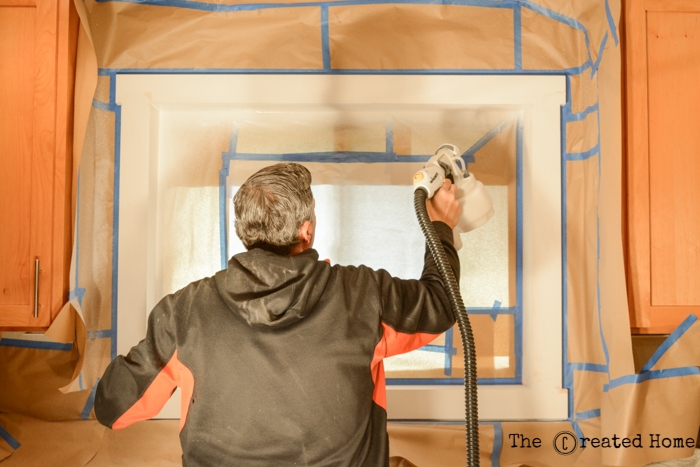
We primed all of the inside and outside trim together using the Wagner sprayer. I recommend painting all of your wood outside before attaching it as well. We did the painting in place, which, no joke, is a lot more work. I’ll get to why we went that route in just a moment.
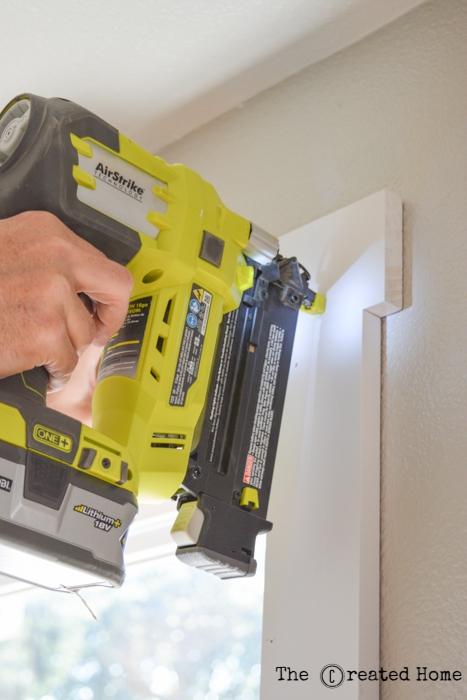
Then we fit the trim around the window, nailing each piece with the brad nailer. There’s no hard and fast rule, but we did the tops first and the sides next.
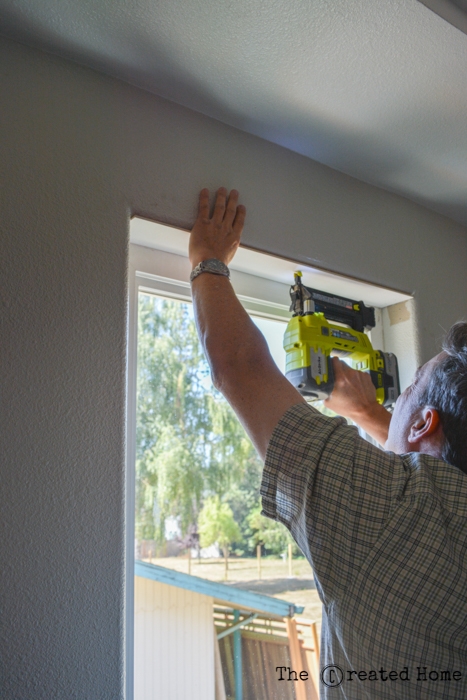
You’ll want a fairly snug fit here, and hopefully you’ll find that your windows are more square than ours.

Step 4:
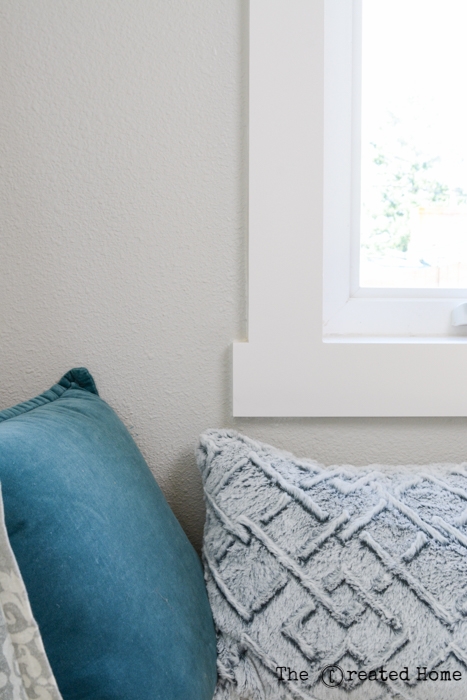
Attach the outside trim. We chose to go with premium pine for the outer trim. We didn’t want the rounded corners of MDF, and less expensive wood options tend to not be as crisp and straight. Start with the side boards, then the bottom.
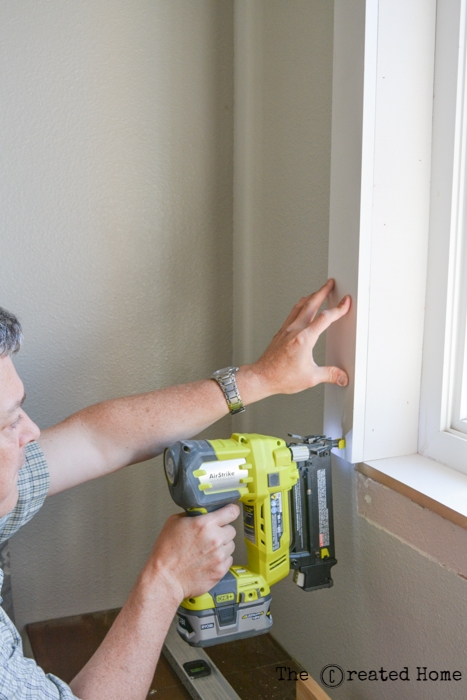
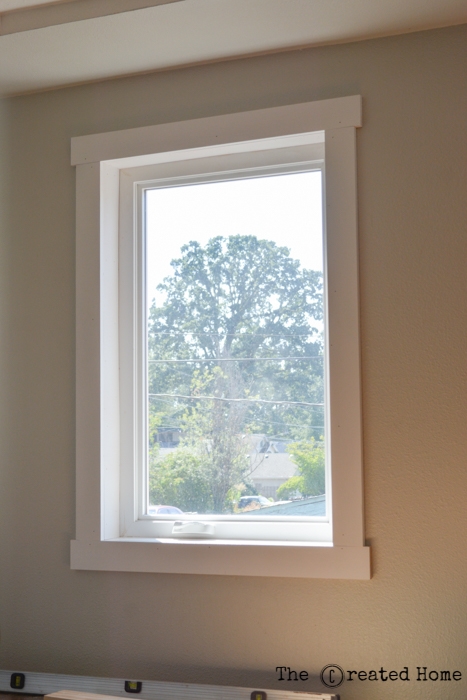
We went for a very simple design that had the top and bottom piece extending 3/4″ on either side of the side pieces.
Like so.
Step 5:
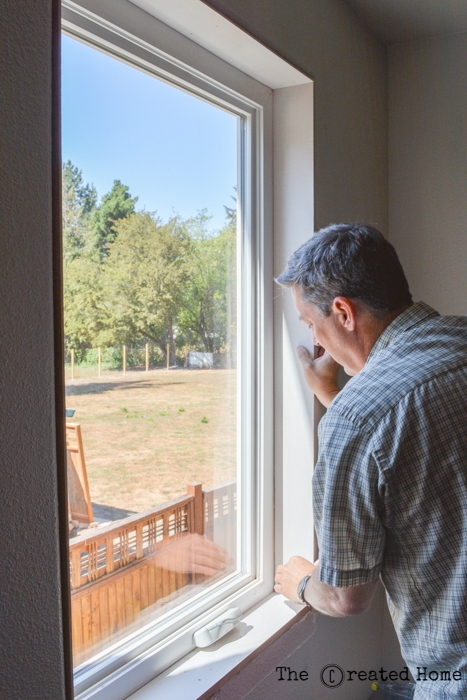
About those reveals: You may notice at this point that we do not have a reveal between the inside trim and the outer trim. Typically you would want to leave a little gap. In this case the 1/4″ ply wouldn’t allow for that, and problems with everything be out of square made this the best option.
I’ve mentioned this before, but before I met my husband he purchased this home from a developer who would otherwise have had to tear it down, and moved it on a semi to where it is now. That’s resulted in every wall – and apparently window – being ever so slightly out of square. It’s totally unnoticeable…unless you are doing carpentry. That caused some more work for us as we had to shim and work to get it all square and level. So if you run into any problems and have questions, please ask!
Step 6:
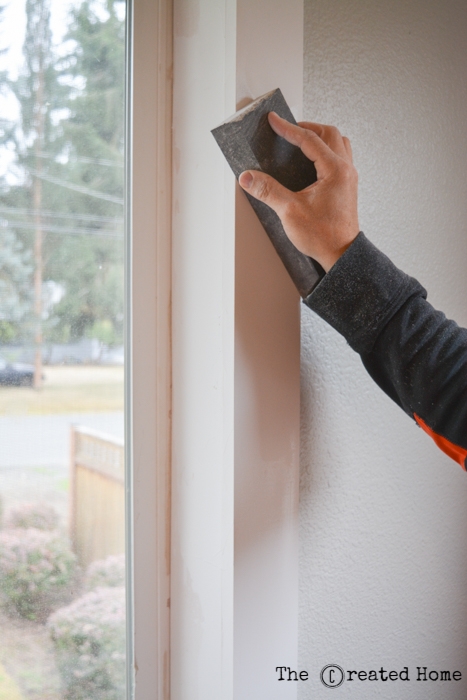
Fill in all the nail holes and do any touch ups. We used drywall mud as a filler because it works great, and we had a bunch on hand. Sand it smooth, being sure to take care of any imperfections, because they will show right through the paint.
Step 7:
As I mentioned, we painted the trim in place. This had everything to do with things being out of square here. I know I make it sound like we live in a Dr. Suess home, but in reality we are not talking about a lot. However, the slight differences in measurements around our windows added up to a good deal more work, and ultimately as we walked through it before starting the project, we decided to paint in place. Doing so did allow us to get a beautiful finish, and I’m very happy with how it turned out, but it was definitely more work.
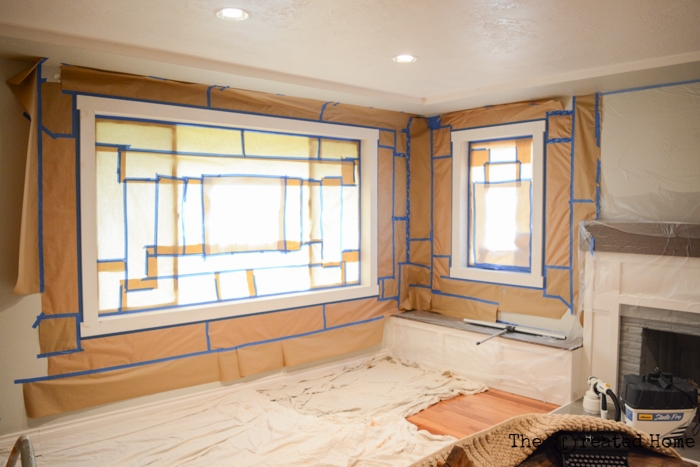
If you end up needing to paint in place as well you will want to set aside a good amount of time for masking work. Tape and paper off the windows, and a few feet around each window.
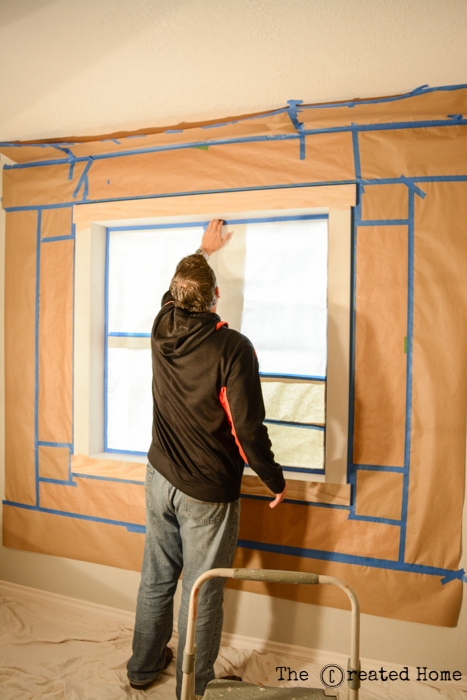
We also used plastic sheeting and old sheets to protect everything.

Step 8:
I’m a Sherwin-Williams girl, all the way. My personal preference is to use their Harmony paint anytime I’m painting indoors. It’s low odor and I believe actually cancels out other odors or something to that effect. I just think it’s great to use if you have kids. And I think paint is just one of those things you shouldn’t skimp on. We choose to use a semi gloss for the trim. The color has no real significance. It’s just the color my husband used on the trim before we met, and I kept it consistent. At this point we are realizing that every bit of trim in this house will be entirely replaced, but the color works fine.

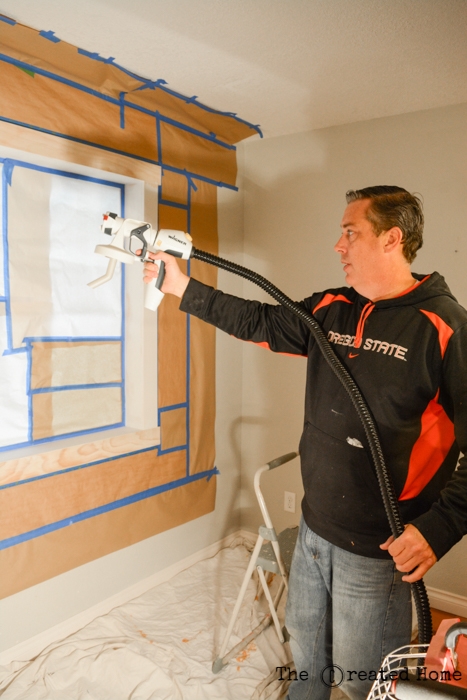
We used the Wagner Studio Pro to paint all of the trim. As I mentioned, we had another sprayer, and I am so much happier with this. I should probably tell you some reasons why, but as I write this I just want to scream “Cleaning! It’s so easy to clean!” Truth, I tend to get over excited about cleaning, and this one is really simple to clean up, mostly because it doesn’t have six zillion parts to take disassemble and scrub. Can I get a hallelujah for that?!
Now that I got that out of the way, this is simply an easy to use, consistent, and smooth sprayer. I was hooked the moment I tried it. I actually love to paint (I know, that’s probably crazy to some people), and I love a good finish. My husband is crazy detail conscious as well, having learned under the tutelage of his grandfather, a developer and builder. Actually, it’s funny, I am the one who fell in love with the sprayer, but he’s the one who won’t hand it over when it’s time to work. Oh well, I’m picky about taking the photos anyway!

Before you fill up the sprayer my husband’s recommendation (I hadn’t thought of this) is to run through how you are going to approach spraying. That’s a pretty solid idea, really. Because once you are spraying you need to be able to confidently get every angle covered.
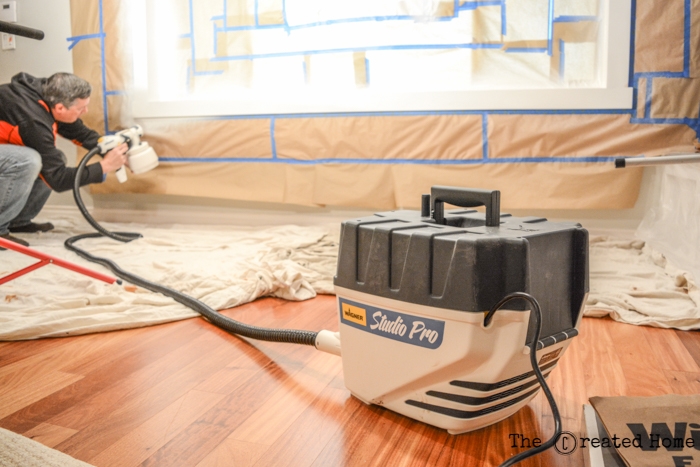
The Wagner sprayer container holds a lot of paint. Our tip is to not fill it all the way, at least at first. It’s pretty heavy, and easier to maneuver without a full load of paint.

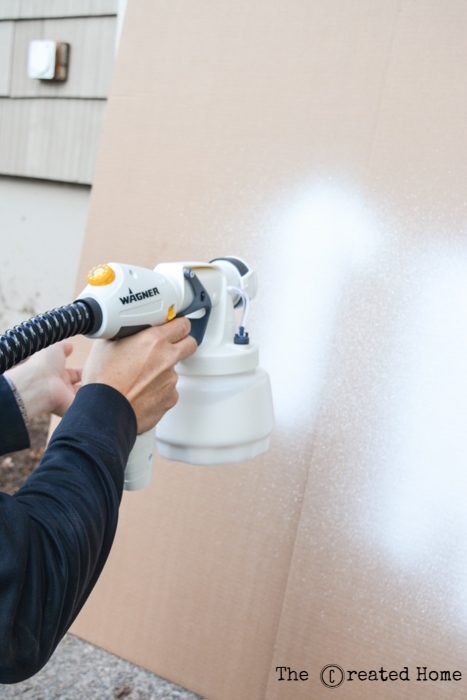
Of course, any time you are going to spray something you should take a moment to run it on some scrap cardboard and get the hang of it, find the right flow, etc.
Per the Wagner instructions, you’ll want to turn the knob to 45 degrees, rather than having it spray vertically or horizontally. Window trim needs to be sprayed at a lot of angles, and the diagonal spray allows you to switch between angles without changing the way it sprays.
Do not try to do it all in one coat! Thin, even coats are best. The flow is so nice and even that we were actually able to do all of our windows in only two coats, which was a huge time saver.
The sprayer motor for the Studio Pro is in the case where the sprayer itself and the hose is stored. There are actually two sprayers. The larger iSpray nozzle allows you to spray undiluted paint, and the finer nozzle is great for finish work with thinned paints. We decided to go with undiluted paint and found the finish was great.
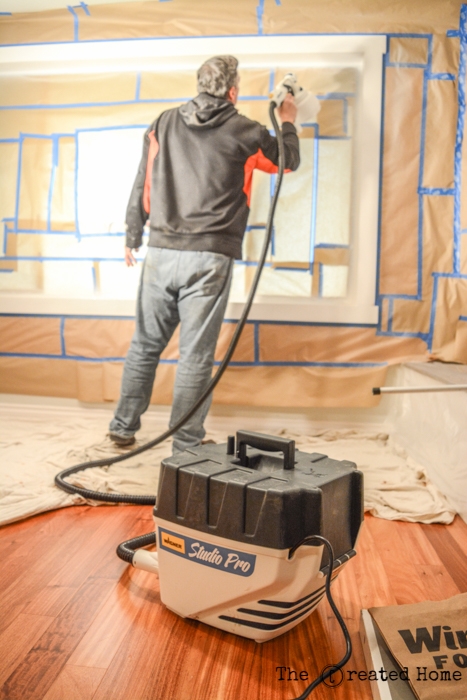
I actually really like not having the motor right on the tool itself, as it eliminates unnecessary bulk and weight. The hose is plenty long enough, and was easy to work with.
Step 9:
Caulk the trim. You will need to calk around the inside where the trim meets the window…

…And around the outside. Caulking is what makes your work look truly professional. It hides the seam and gaps.

Tip: Cut the tip of the tube at a 45 and high up enough so only a little caulk is released at a time, otherwise you’ll end up with too much at once. Do a small section at a time and run your finger over it to clean up the line.
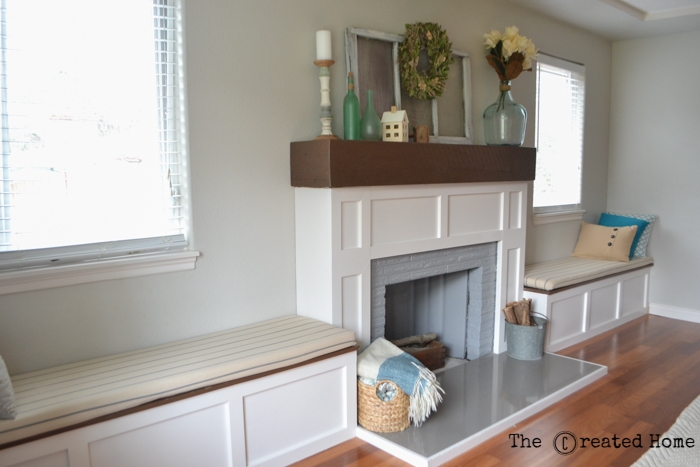
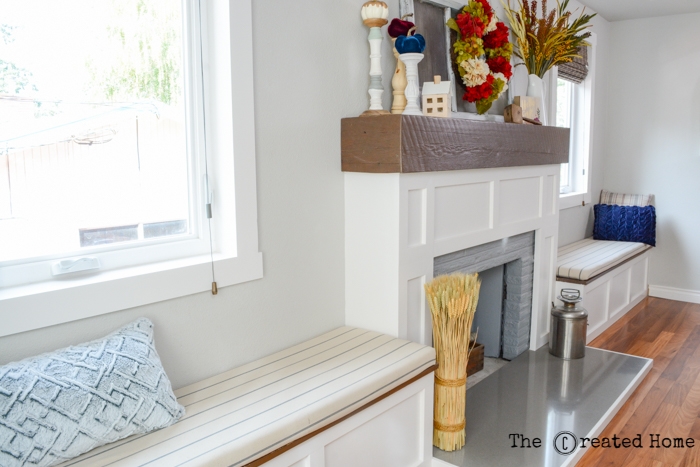
The Grand Reveal
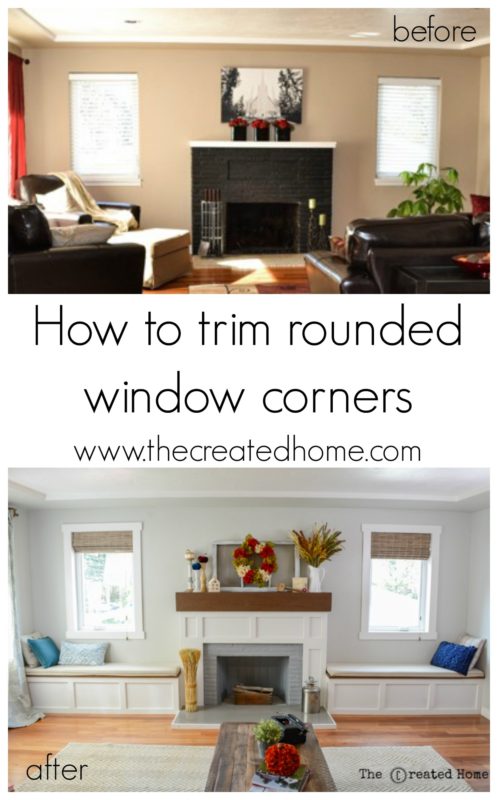
I LOVE how the new window trim looks. It’s something I have been meaning to do for some time, and adds a whole level of interest and character to our home. When my husband and I first married this is what the living room looked like. Since then we made over the fireplace, added build ins, painted, and changed up the decor.

The fireplace is one of my favorite projects to date. I designed it to fill the awkward space at the front of the room, add seating and storage, and bring some character to the room. But after it was done those windows just didn’t carry the weight they needed. They needed trim!
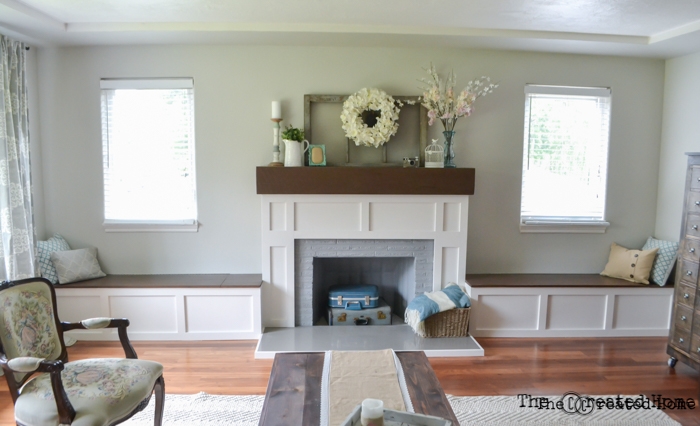
BAM! Can you see what a difference trim makes?!
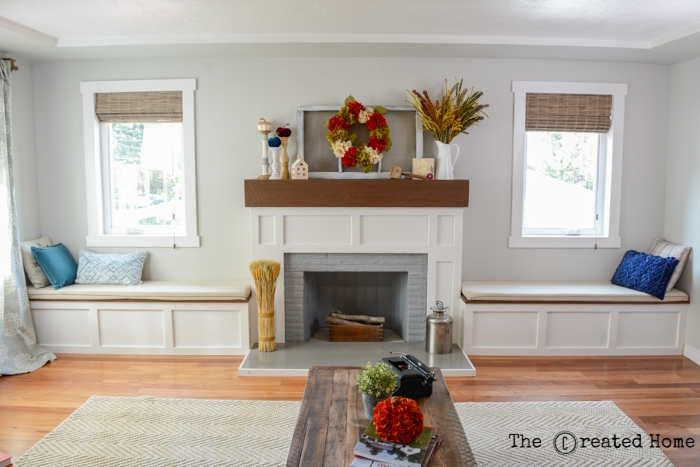
Here’s another look at the before…
After!
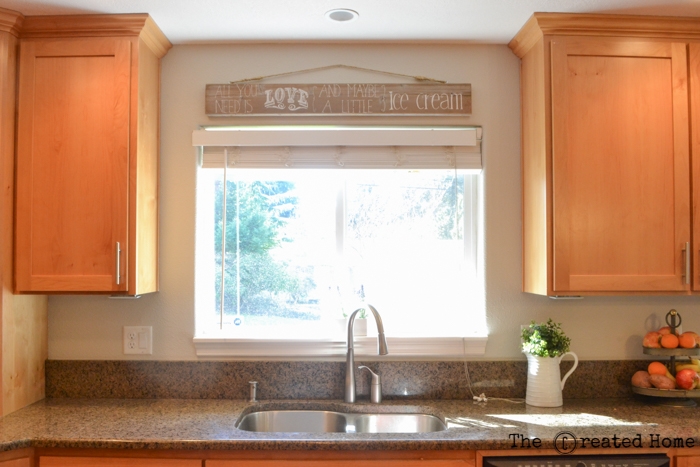
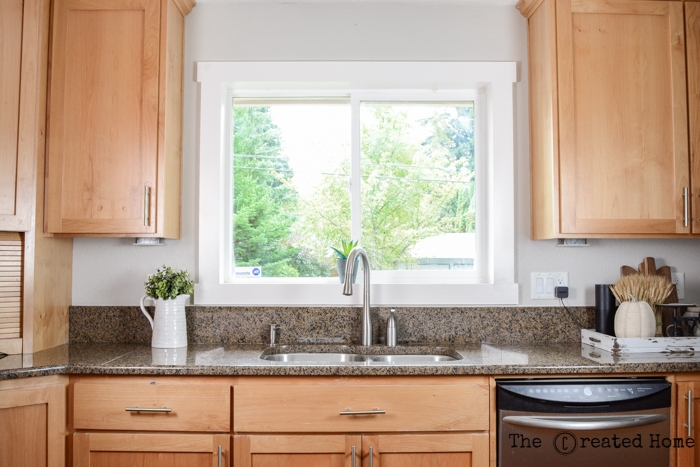
We also trimmed the dining area and kitchen. Here’s a look at the kitchen window before:
And after. The window feels so much larger now.
This project ended up being a little larger than we originally imagined, entirely because of the issues with uneven walls. Would we do it again? Absolutely, in fact we plan to! We plan to trim all of the other windows in the house, working in phases. Cost-wise, this was a very inexpensive project. We had the 1/4″ ply on hand already, and we spent around $150 to purchase the rest of the trim wood. There are not a lot of changes you can make for $150 that are so big!
Thanks for reading, and please let me know if you have any questions!
Pin it so you don’t forget it!↓
Shawna
Saturday 17th of August 2019
Found you while searching for ways to trim/frame think bullnose windows. This looks so good!!! I'm definitely showing this to my husband and then I'm off to buy myself some power tools. ??
Sarah
Monday 23rd of September 2019
Yessss! There's always a reason to buy more tools. :D Best of luck with your project!
Jeremy
Friday 6th of April 2018
Did you fill and sand the seam in the picture linked below? Or do they not stand out that much?
https://imgur.com/a/gtRCl
Thanks for the post!
Sarah
Thursday 24th of May 2018
We did, yes. Of course, you can leave the seems, but we preferred to smooth them as much as possible.
Andrew Miguelez
Friday 13th of October 2017
You make it look too easy, Sarah... and Sarah's husband. Sheesh.
That said, cleanup is the worst part of spraying finish for sure. I'm interested in upgrading my spray gun to a high quality one like this and I'll definitely consider it if I ever pony up the cash.
Sarah
Thursday 23rd of November 2017
Haha! Thanks! Admittedly, I might have skimmed over some of the difficulties inherent in a house that has been moved. I didn't want to bore or scare anyone! :) You are right, cleanup can be fun. I like the Wagner sprayer, for sure. It's my second sprayer, and definitely the better of the two.