When I was a kid my best friend and I would regularly tote our Barbie collections back and forth between our houses…that is until I got the Barbie Dream House. And then, well, you know.
Later, as an adult I realized something – for me playing with Barbies was not about some sort of plot or story line – it was about decorating that silly three story pink doll house over and over. Since that realization I have had an idea bouncing around in my mind that abstractly involves a doll house that can be decorated in different ways.
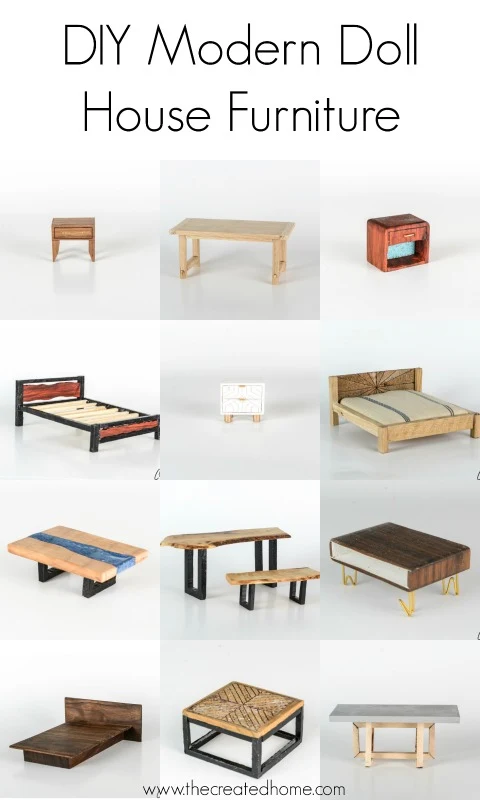
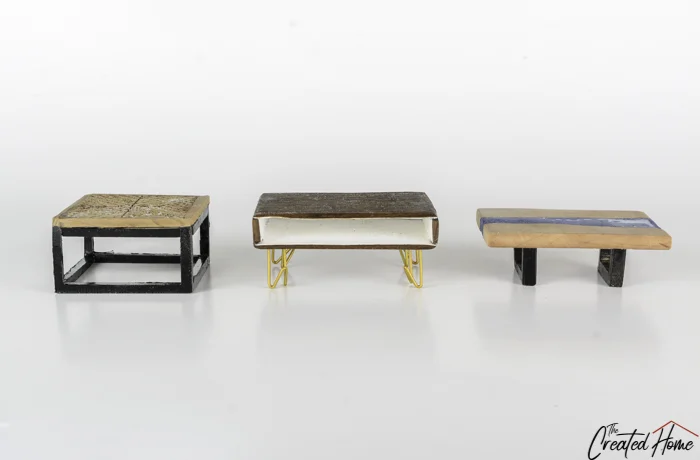
So when a group of amazingly talented bloggers that I get to work with held a scrap wood challenge it hit me that I could at least take a step that direction by making a few furniture pieces. The result is three dining tables, three coffee tables, three nightstands, and three beds. And a whole lot of temptation to make more, because it’s surprisingly fun to make these.
Links to the other great scrap wood projects are at the end. Be sure to check them out, because there are some really killer ideas.
I’ve got a diagram with the measurements for each of these pieces, and a few tips and tricks for making them. I really cannot tell you if they are a 12:1 ratio…size…whatever. There’s a whole world of miniatures out there and I honestly know next to nothing about it. I just wanted a fun way to let my kiddos play with making the doll house what they want it to be…without breaking the bank.
Also, it was super fun to play with major design trends by recreating them all in miniature. I was able to make all of these in just a few days. To be fair, the detail work is not exactly painstaking, but I didn’t want to have to seek therapy when they break one.
There are a few tools that made these doll house pieces possible…or at least much easier. I’ll tell you what I used, and provide affiliate links where they are helpful (As always, you can check out my affiliate disclosure here.)
Tools and Materials: In General (specifics will be covered for each piece)
Scrap Wood of any type
planer (or use 1/4″ stock wood)
scroll saw or band saw
stationary belt sander (or turn a regular belt sander upside down)
small measuring device (a 12″ rule is best)
spray paint (or acrylics)
chop saw or handsaw
CA Glue
Double Sided Tape
Utility or Exacto Knife
Again, I linked to what I used specifically, but you should feel free to use what works best for you. I will say that a scroll saw would serve you better than a band saw, but I went for the latter for one compelling reason. I don’t have a scroll saw.
Constructing the Doll House Furniture: Plans and Tips
A diagram of every one of these pieces is at the bottom of the individual sections.
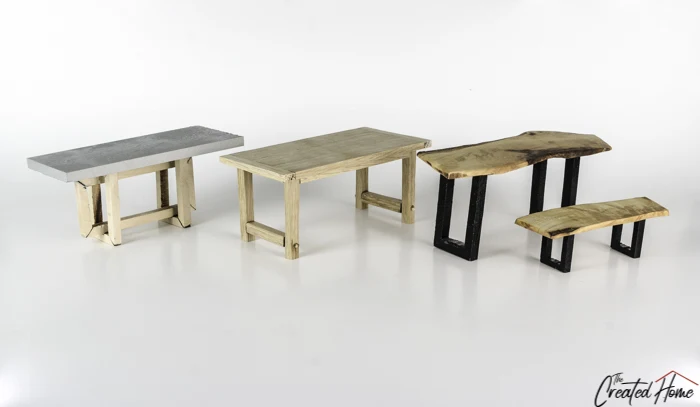
The Dining Tables
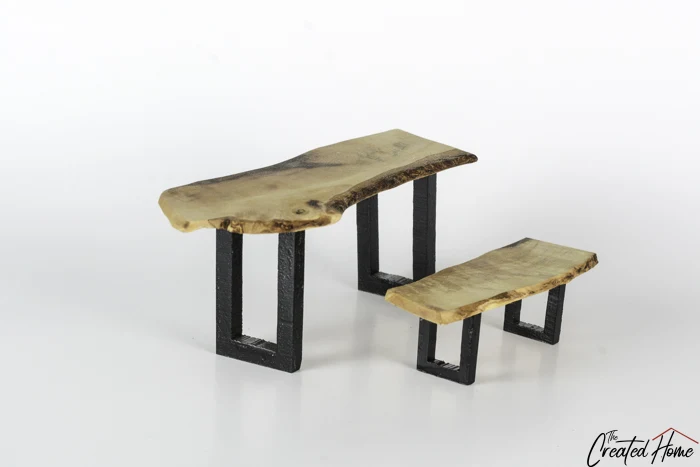
The Live Edge Dining Table
No spokeshave necessary for this one. Just a little creative wood pile picking and a planer. I planed down a slice of maple , then cut out two of the sides. Using a stationary belt sander I rounded the other two sides just a touch – and that was it. A little Walrus Oil on it and the top was finished.
Easiest. Live edge table. Ever.
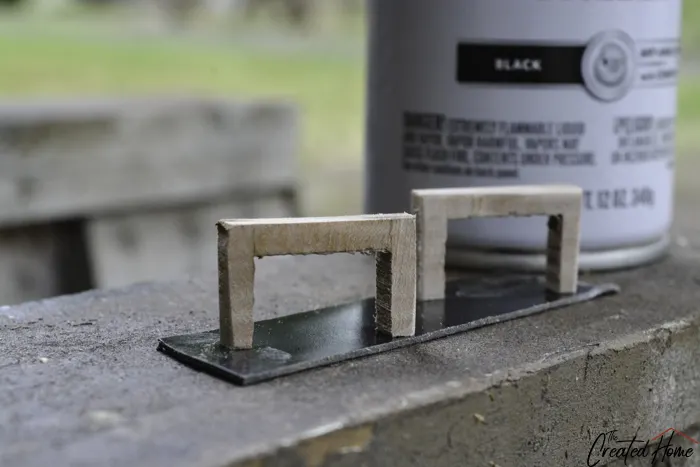
I sketched out the legs on a piece of maple and cut them out on the band saw. These are not the legs for this table, the same process applies.
Tip: Use double sided tape to stick the legs top down while spraying. (As in the end that will be glued to the table top.)
I used CA glue to set all of my joints. Unfortunately I was out of the clear stuff, so I used black for all of it. Clear would be better. CA glue dries super fast, so you don’t have to wait long to finish a glue up and move to the next step. I used it for every one of the doll house pieces
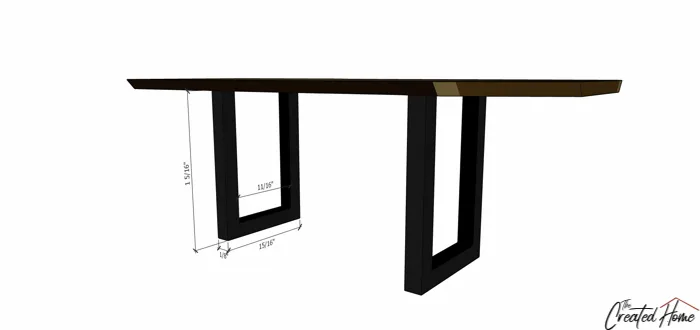
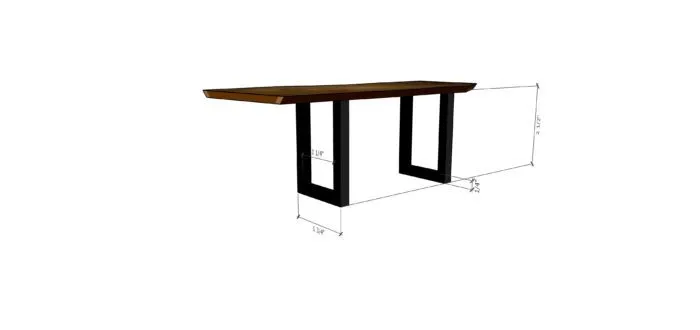
.That’s it for piece number 1. Here’s a breakdown of the dimensions I used.
The Farmhouse Table
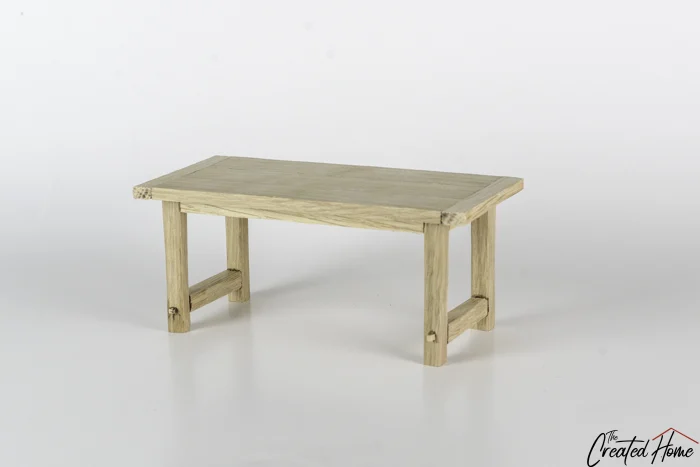
Ah, the quintessential farmhouse dining table. A rite of passage for every aspiring woodworker. And while those through mortises are anything but the real thing, they are that little touch of over-the-top awesome that makes this a super fun little build.
Maybe even more fun than a full size farmhouse table. But I’ll you decide.
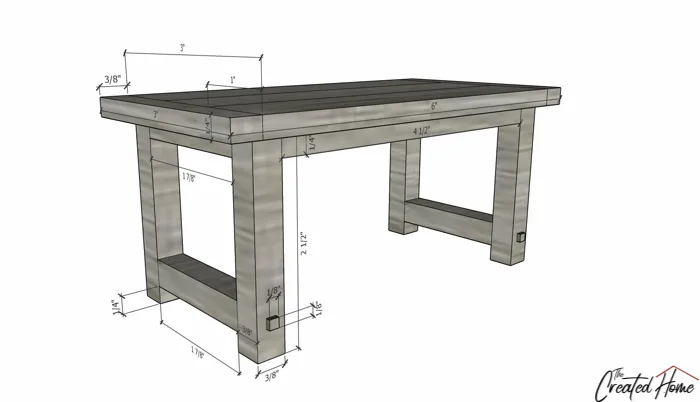
The top of the table is formed from three pieces of 1″ wide 1/4″ thick wood. (I used white oak because in my dreams I could afford to build a real table out of white oak.) They are glued together with CA glue, and the 3/8″ wide breadboard ends are also glued on. The base is formed of 3/8″ square pieces
Those wee little roughly 1/16″ square “tenons” are cut using an exacto or utility knife. I used the sander to get the end of a piece of wood down to the thickness I wanted on one end (the other I held off of the sander), then cut the rest with a knife.
Here are the diagrams for that table:
Concrete Topped Dining Table
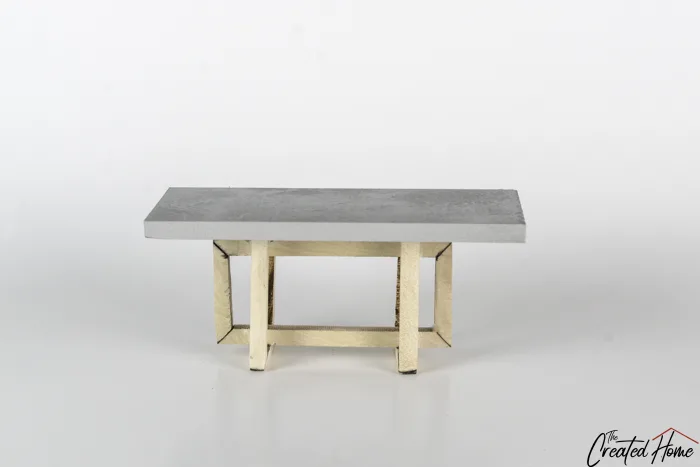
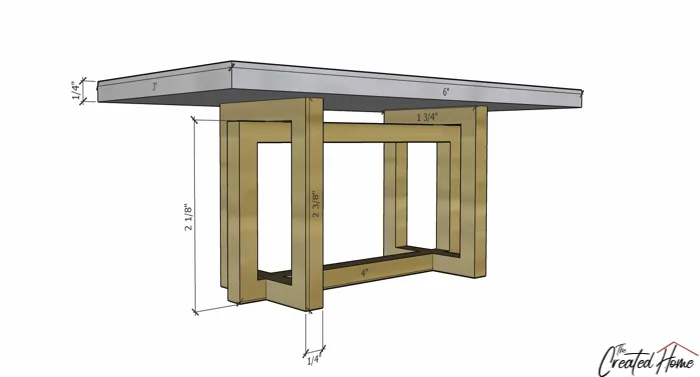
I recently partnered with Jen Woodhouse to create a series of pieces we called the Concrete and Wood Geometric Collection. The Dining Table (which sits out under our pergola) looks just like this. There’s no half lap joinery involved in this little guy, but I did attempt a simple 45 degree method…with varying results. Okay, it’s far from perfect. But it’s still my daughter’s favorite, so I’m chalking it up to a win.
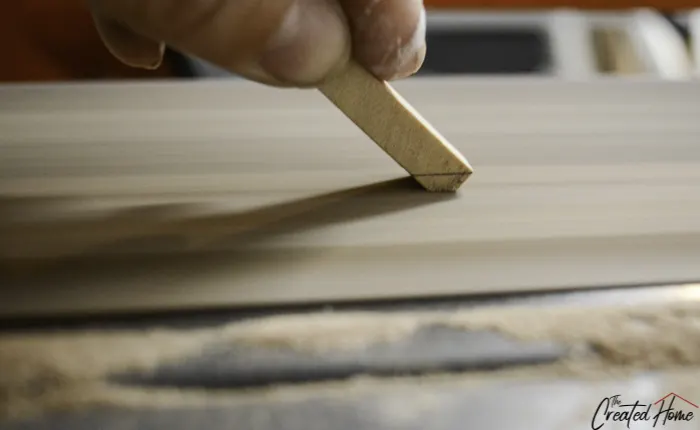
The top is simply a piece of wood painted with concrete spray paint. As I mentioned, I tried a super simple (lazy) method to create the base 45s. I drew a line and then sanded up to it. It wasn’t the greatest. But it was easy.
Here are the measurements for this fun table:
The Coffee Tables
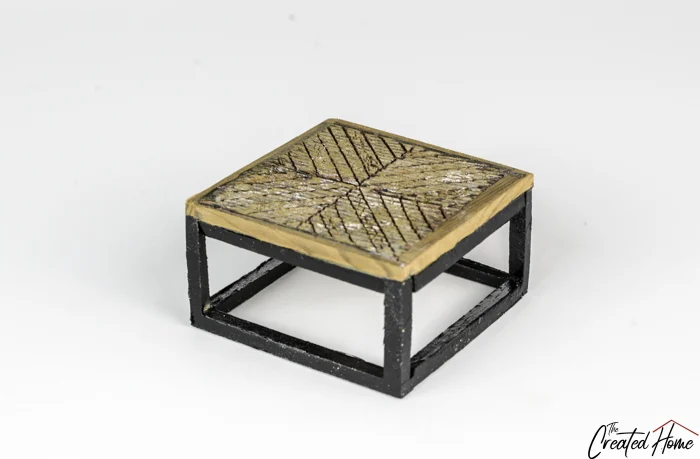
The Mosaic Topped Coffee Table
A good mosaic topped table will never go out of style (I think), but for a while there it felt like these things were all I was seeing. But they are pretty, right?!
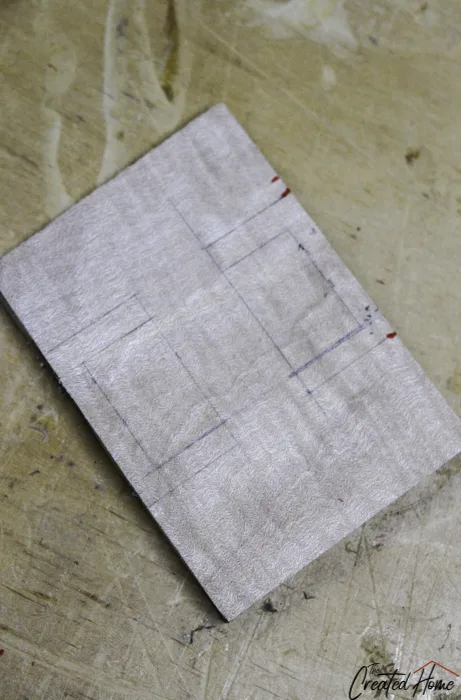
If there was one thing I was certain of on this one, it’s that I didn’t want to piece together teeny tiny little parts of a mosaic. So instead I cut out one solid reclaimed wood piece, drew the mosaic with a pen, then traced my lines with an exacto knife. Then, to give it some extra depth and dimension I used a wood burning tool to darken the lines.
I went back with the knife and added some lines or pattern to some of the little sections, just to further the illusion that they are separate pieces. The piece I chose for this already had a lot of texture, so all I had to do was add a little more to some “pieces” and smudge out others. Then I dry brushed on a little bit of white paint. I’ll share some photos of how that process looked in the next section where I used it on the mosaic bed frame.
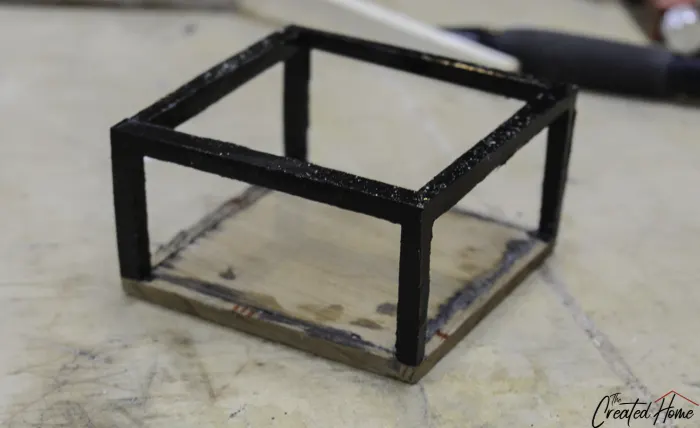
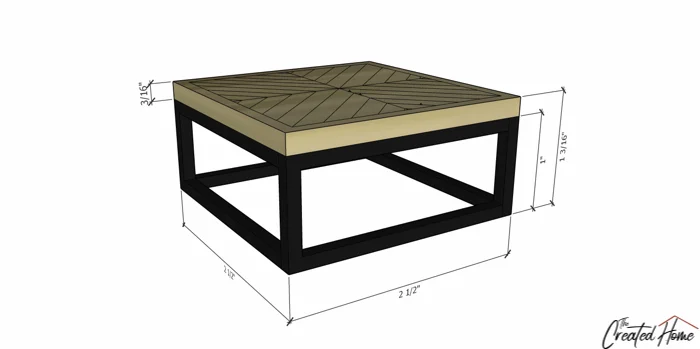
The base is made from 3/16″ square pieces glued together with CA glue.
Here’s the diagram for the mosaic topped coffee table:
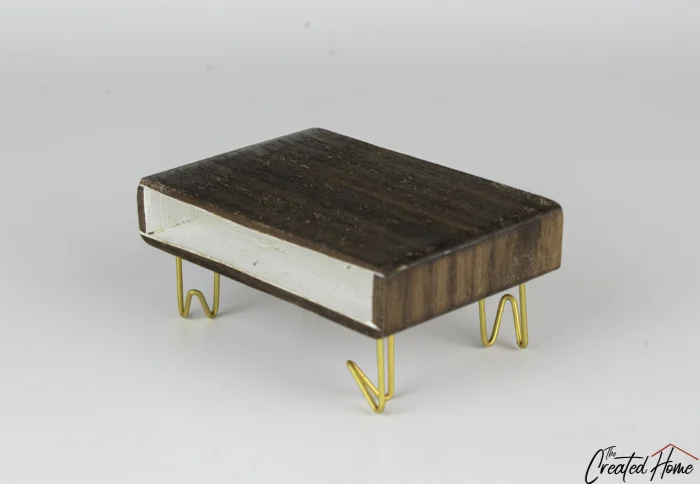
The Mid Century Modern Coffee Table
Otherwise known as “the one my mother in law doesn’t like because she grew up with it.” Hey, I get it. I grew up in the 80s and I swear you will never catch me sporting neon or big bangs, or carpeting everything. The music though, that’s a different story.
Now’s the chance to use those ridiculously small walnut scraps you have been holding on to because walnut is so freaking expensive and you just couldn’t live with yourself if you threw any away.
The trickiest part of this little build is getting the pieces to the correct thickness first. You’ll definitely want to start by planing a larger piece. I didn’t and it was a real struggle.
Glue the sections together, then after it’s try you can use the sander to give the sides a little round if you like.
The legs are formed from gold colored clips I found at my local Joann store. Basically I took the clip, folded it in half, and cut off the excess. I drilled tiny little shallow holes for the tops of the legs so they would have somewhere to hold on while the glue dried.
Oh, and word to the wise: Paint the inside parts of this before assembling.
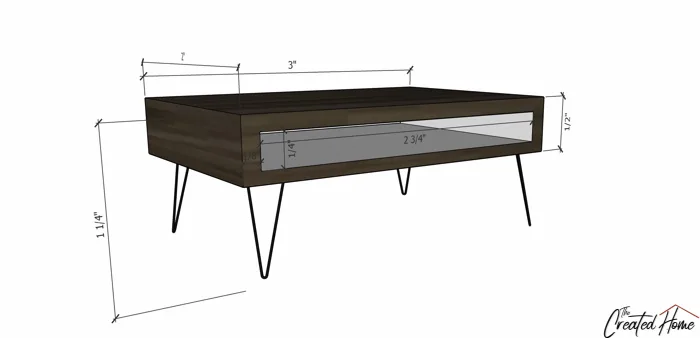
Here’s the measurements for the mid century coffee table:
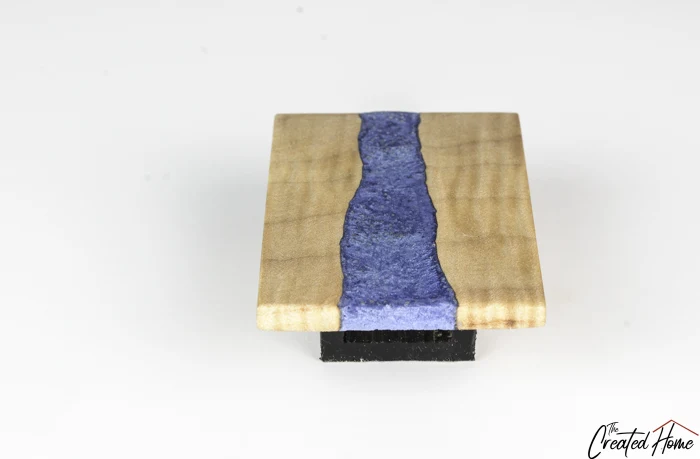
The Epoxy River Coffee Table
I’m not going to lie, this one was maybe the most fun of all.
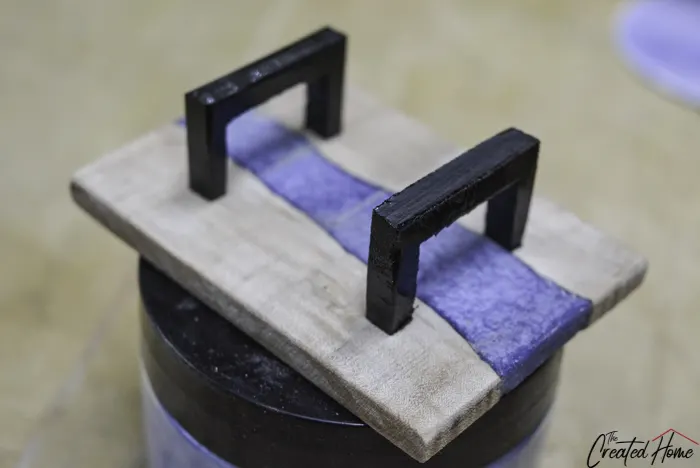
If you have ever wanted to do an epoxy pour but haven’t because it’s too expensive, or you are afraid you will screw it up, or you are afraid it’s becoming a bit played out but gosh darn it that blue is just so intensely pretty!…here’s your chance.
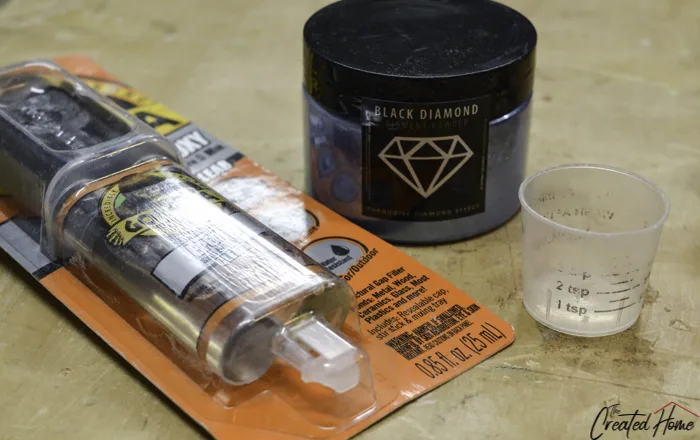
For this one I ordered about 200x’s the pigment I needed (so I’ll be looking for an excuse to use that, yeah). I also used some cheap two part epoxy I found in a drawer. Not the best for this, honestly, but it worked. I mixed the epoxy and pigment in a medicine cup that we obvs are not using ever again.
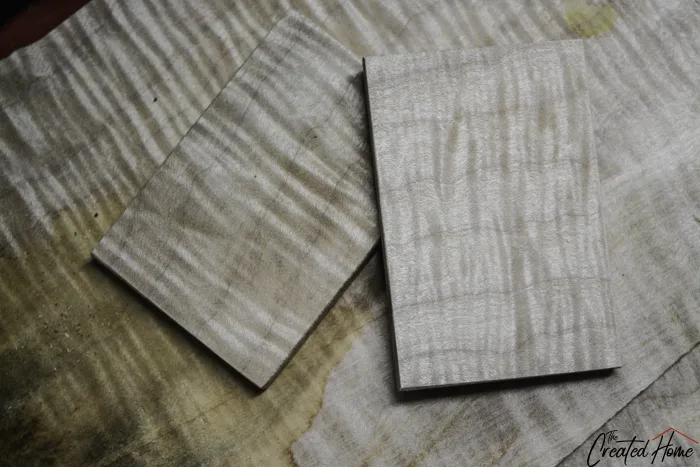
I used the most heavenly curly maple for the table top.
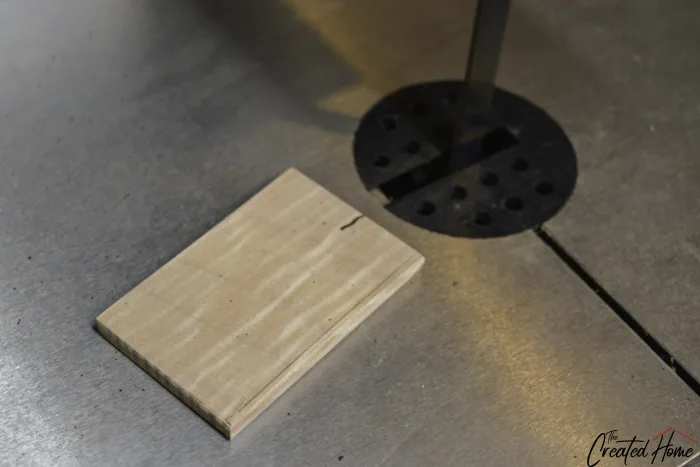
Now look – I tried no less than four methods to split the top, and they were all fails but one. If you have a scroll saw, whatever, you are fine. But if all you have is a big ole’ band saw, use that. It turns out fine.
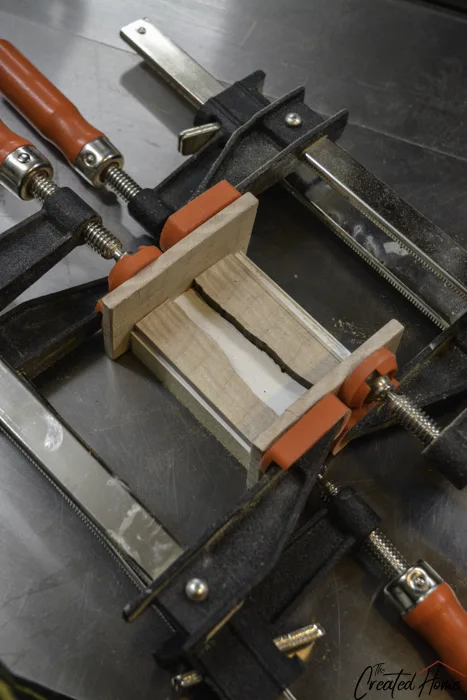
Create a mold using scraps of melamine, like so:
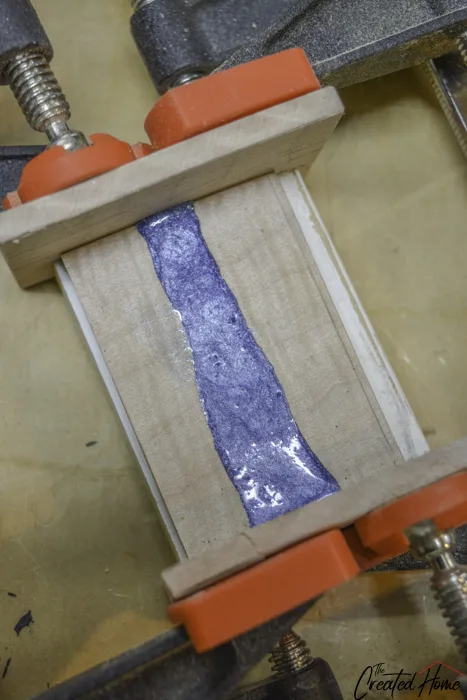
Then mix up a little bit of epoxy and littler big of pigment and fill up the gap.
Has anyone done this miniature furniture epoxy pour thing before?! Please tell me know and I’ll go into business just doing this. It was that fun.
I created legs for this the same way the first dining table legs were made. Cut them out, spray them, then glue.
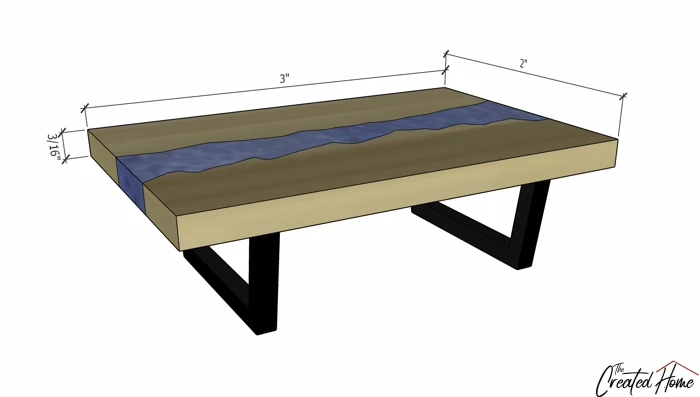
Here’s the diagram for the epoxy river coffee table:
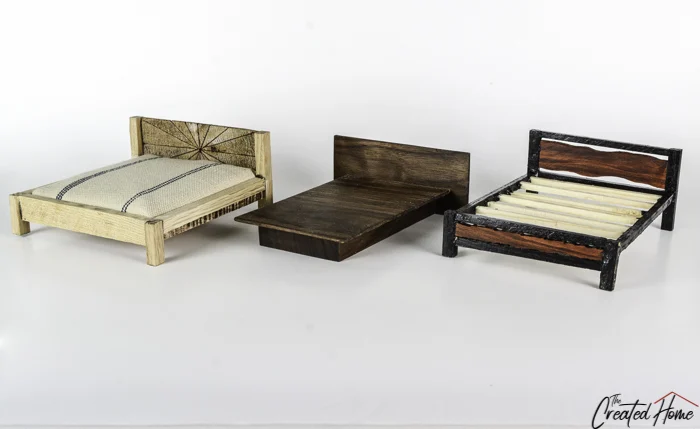
The Beds
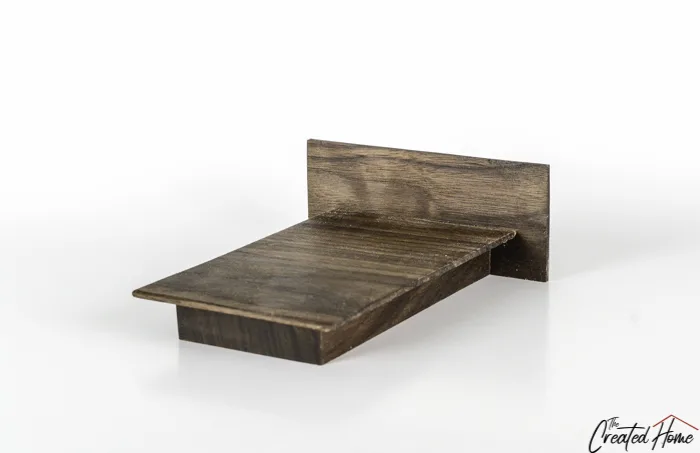
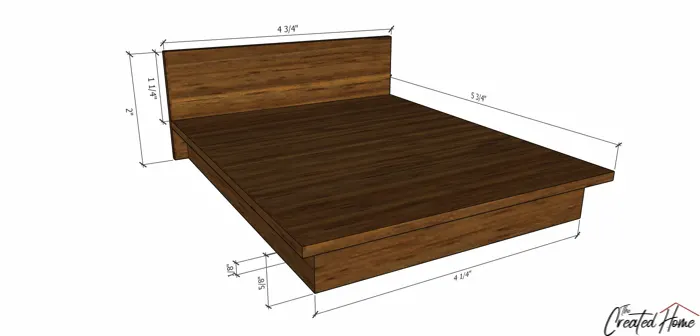
The Platform Bed
This bed is simplicity itself. Three pieces of wood glued together. Bingo. Bango. Bongo.
Here’s the sizes:
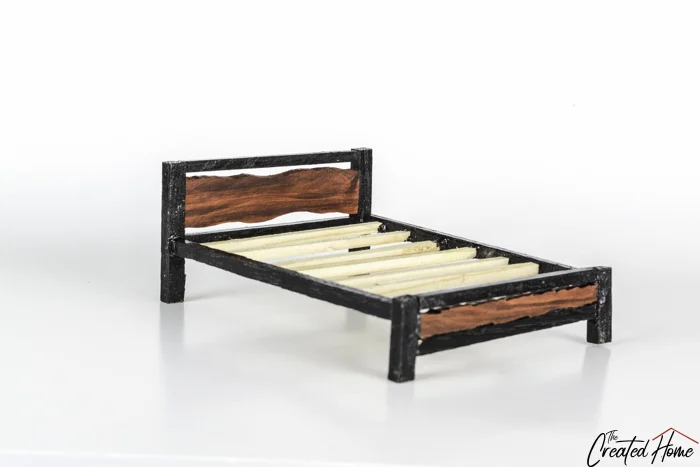
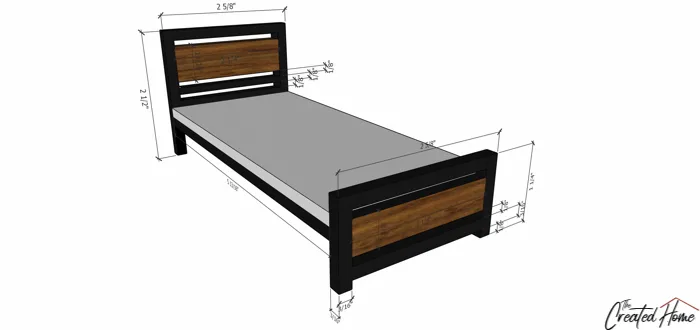
The Live Edge Bed
The live edge “slabs” in the headboard and footboard of this bed are straight pieces I cut randomly using the bandsaw. The slats were more problematic, and to be honest, I wouldn’t do them again. You’ll see that my finish piece is wider than the diagram indicates. I ran out of materials for the platform bed, and it ended up smaller, so I randomly made this one larger. You make it whatever size you want.
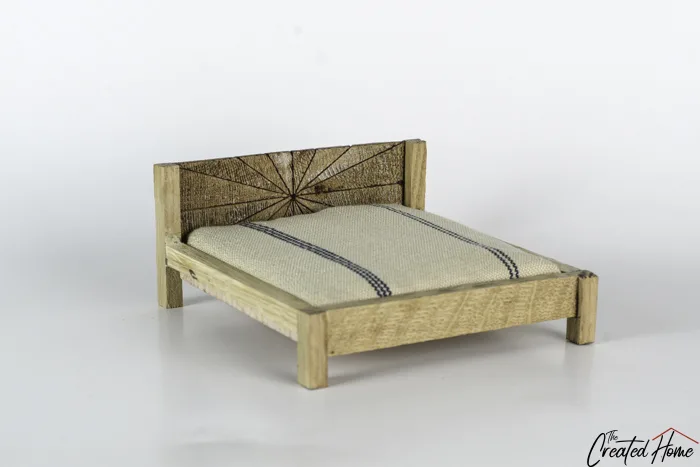
The Mosiac Headboard Bed
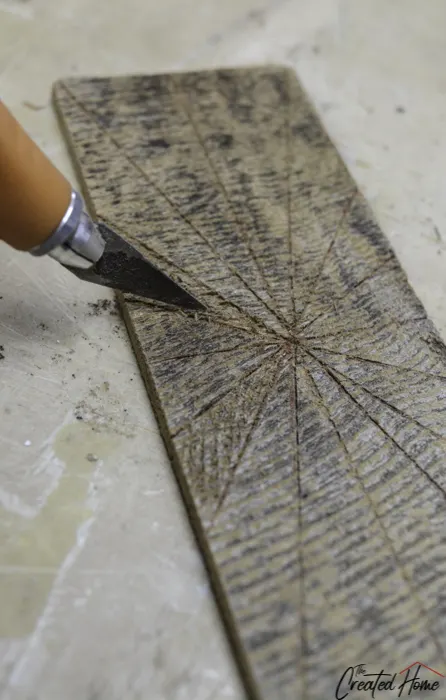
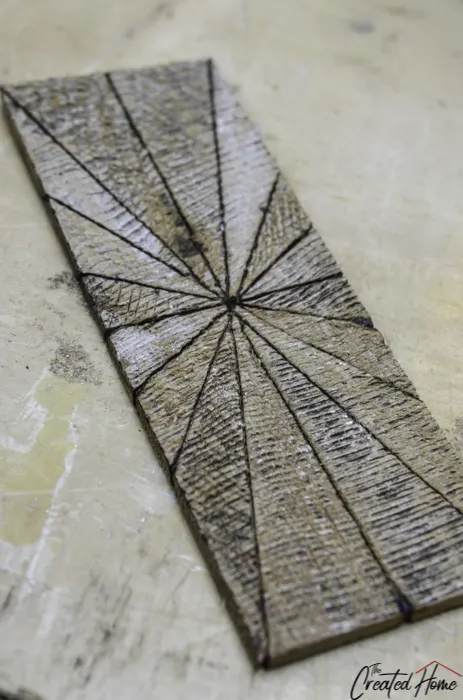
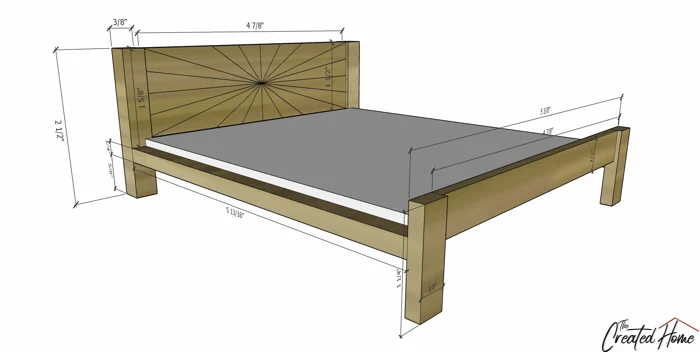
Initially, I had a different plan for the third bed, but I was kind of bored by it, so I ended up making this one on the fly. Like the mosaic coffee table top, the headboard is made using a texture piece of reclaimed wood. I drew the lines first, then traced them with an exacto knife before burning them with a wood burning tool.
Use the knife to change of the texture for some of the sections and dry brush others with a touch of white paint. Be creative!
I put stockier legs on this bed and kept the rest of the frame super simple.
The Headboards
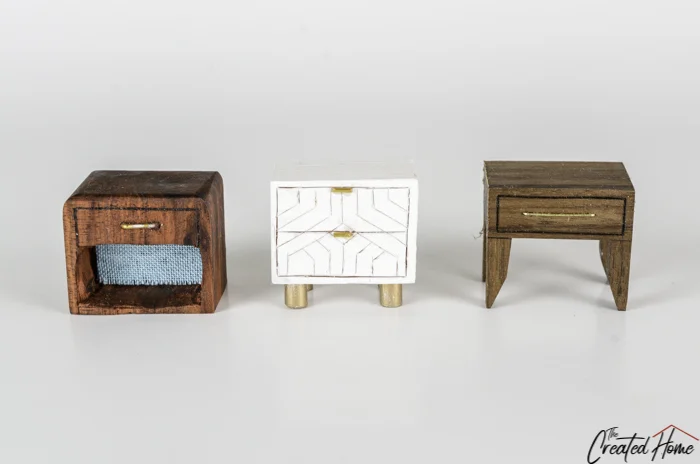
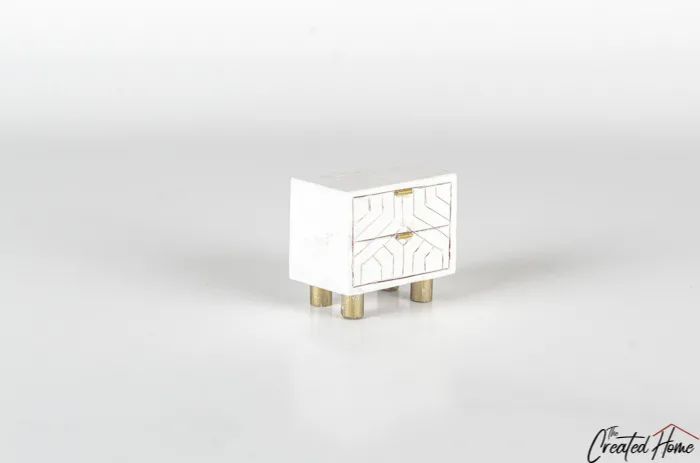
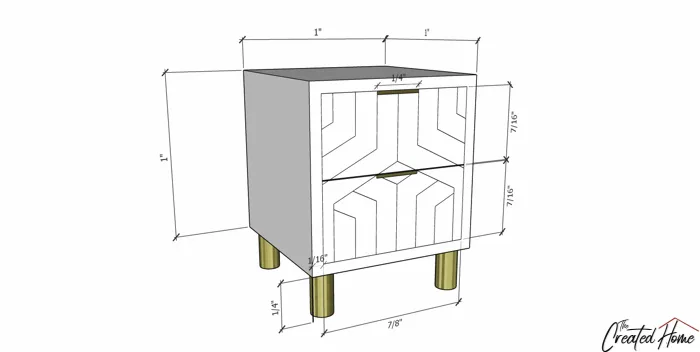
The Glam Nightstand
Let’s just point out right from the start that none of these drawers open. Ain’t no one got time for that.
The lines were sketched on with a pen, then scored with an exacto knife. The drawer handles are cut from the leftover bits of paper clips from the mid century coffee table above.
The legs are 1/4″ dowels spray painted gold. They are both grooved and glued into the bottom.
Okay, it would have been cooler if the drawers opened. Sigh. Maybe next time.
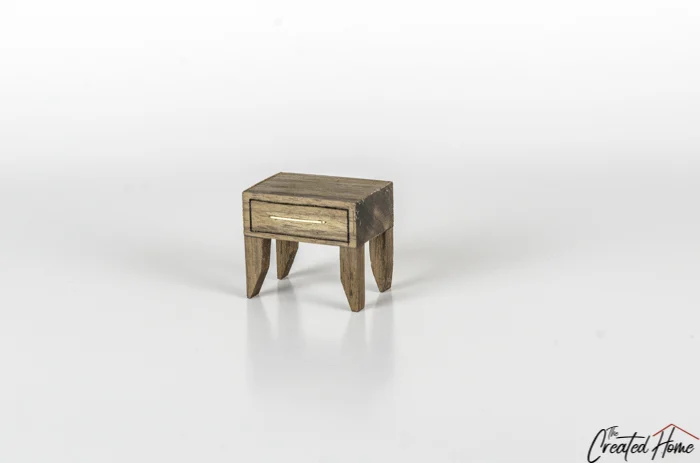
The Walnut Nightstand
I wasn’t sure what to call this one. Is it Mid Century? A bit. It’s all in those sleek, tapered legs, right?!
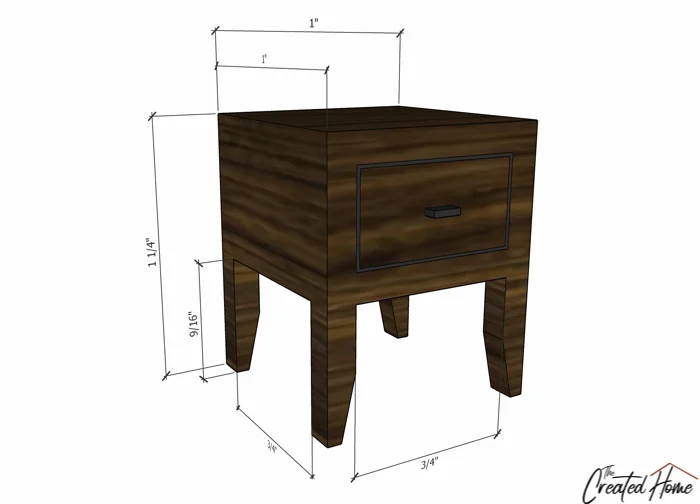
This is another one I made on the fly, and I love how simple it is. The “drawer” was created with an exacto knife and wood burner. The gold piece is from the jewelry making section of Joann’s. I have no idea what it actually is, but I’ll try to find one and link it here. I created a thicker groove for that, put a tiny amount of glue on it, then shoved it in. With needle nose pliers.
The legs were straight, and then I randomly decided to taper them on the sander. Personally, I love how they look.
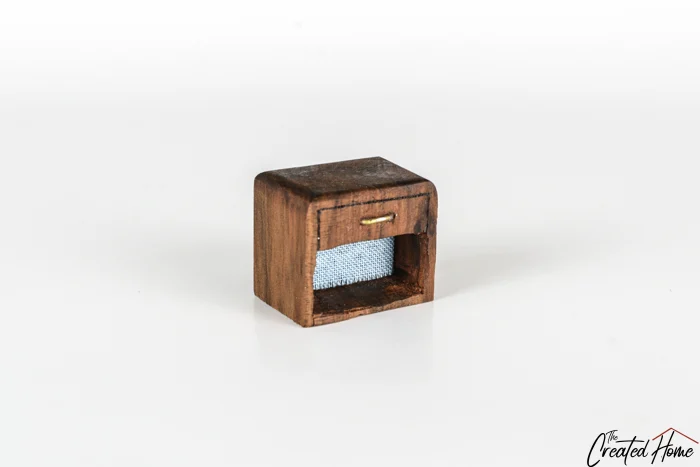
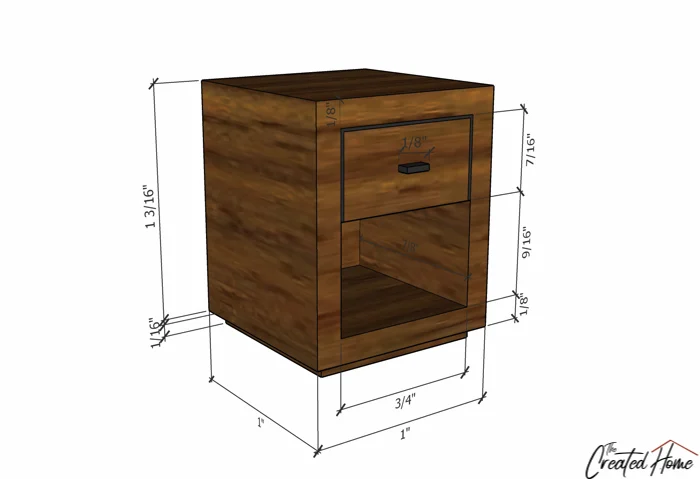
The Other Nightstand
Look, it’s late. I have no more names for you. My idea with this one was to drill out that bottom section from a solid piece, then clean it up with the Dremel. But my husband took it for a job and still hasn’t returned it, so I had to get creative. I ended up cracking it in my impatience, so the moral is…
The foundation of a good marriage is to own at least two of every tool.
…or maybe it’s to slow down and be more patient.
It’s probably one of those two.
Anyway, I drilled out the middle with the drill press. You don’t necessarily have to have one to get the same results, but you will have to come up with a way to make sure you don’t drill through the back. I added a little fabric “wallpaper” sorta thing to cover the marks left by the drill tips.
The hardware for this is another piece of the paper clips I used for the Mid Century Modern Coffee Table.
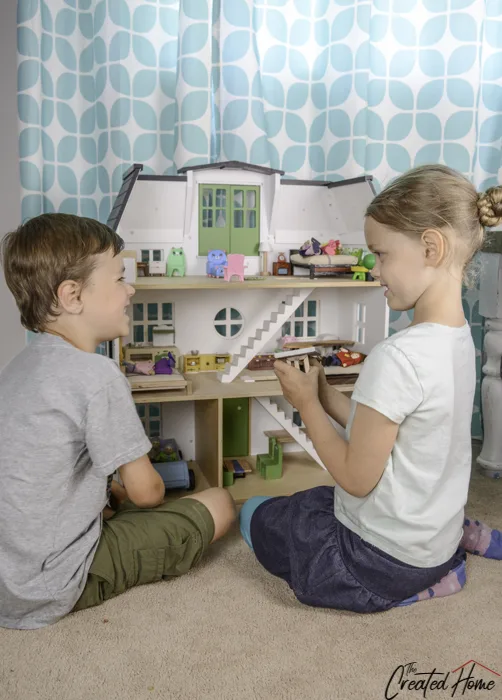
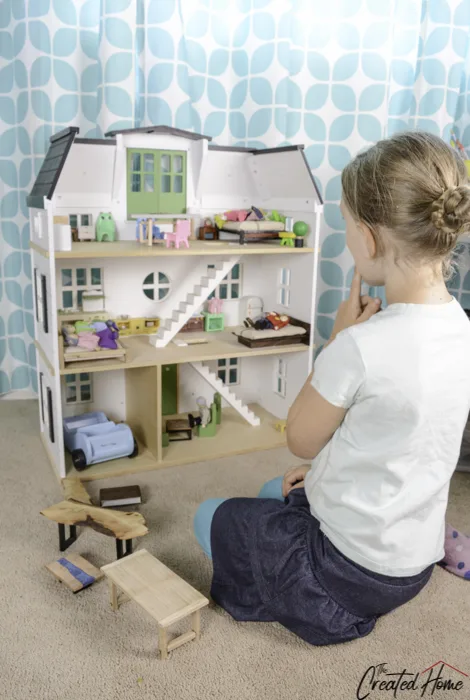
There you have it, twelve new furniture pieces that your kiddos can go to town decorating their own homes with!
I mean, mine think it just means every piece I made has to fit in, but eventually that will chance…I think. The doll house in the photos is from Magnolia and was at Target. I’m strongly considering adding a separate garage with a woodbench, but we’ll see when that floats to the top of the list.
As I mentioned, this post is part of a scrap wood challenge. Here are links to the other great projects put together by building ladies. Check them all out and give them a follow!

Week 5: Research & Project Development – Jasmine Amelia Murray Photography
Tuesday 27th of October 2020
[…] Created Home (2019) DIY Modern Doll House Furniture. [Online] Available from: https://thecreatedhome.com/diy-modern-doll-house-furniture/ [Accessed […]
Modern Dollhouse Furniture – Free Woodworking Plan.com
Wednesday 29th of July 2020
[…] fun!! Build your own modern dollhouse furniture by following the free woodworking plans at the link. A great way to use up your scrap wood and make […]
Make A Home Furniture – DogPedia.Online
Friday 4th of October 2019
[…] View Image More Like This […]
Scrap Wood Geometric Panda Wall Art - Hazel + Gold Designs
Thursday 3rd of October 2019
[…] Wood Wall InstallationThe Inspired Workshop - DIY Scrap Wood Outdoor PlanterThe Created Home - DIY Modern Dollhouse FurnitureMy Love 2 Create - DIY Tiered Serving TraysUgly Duckling House - Scrap Wood Wall ArtJoyful […]
Floranet
Wednesday 31st of July 2019
Great Job Buddy!!