
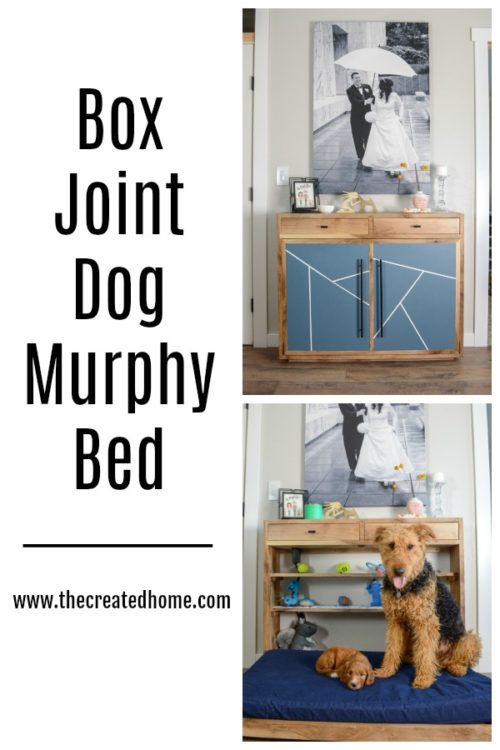
Once upon a time I had this brilliant idea to build a dog murphy bed.
Genius! Brilliance! Surely this was something the world had NEVER SEEN!
Nope, turns out it’s been done before. So much for that. But most of the plans are for little dogs.
WHAT ABOUT THE BIG DOGS, HUH?! WHAT ABOUT THEM?!
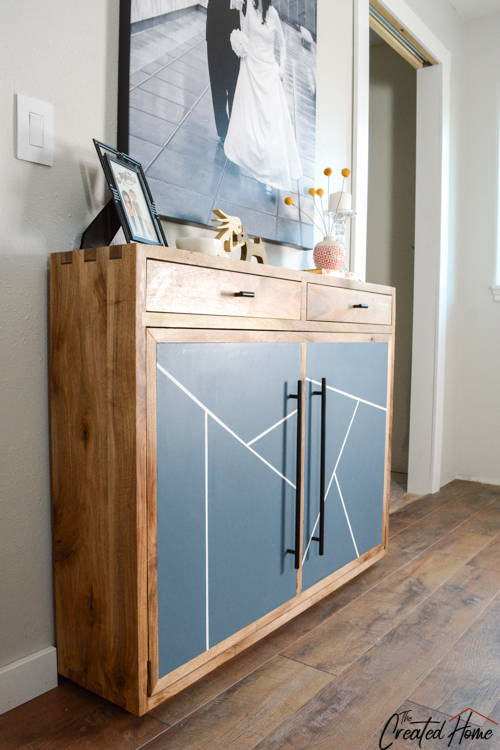
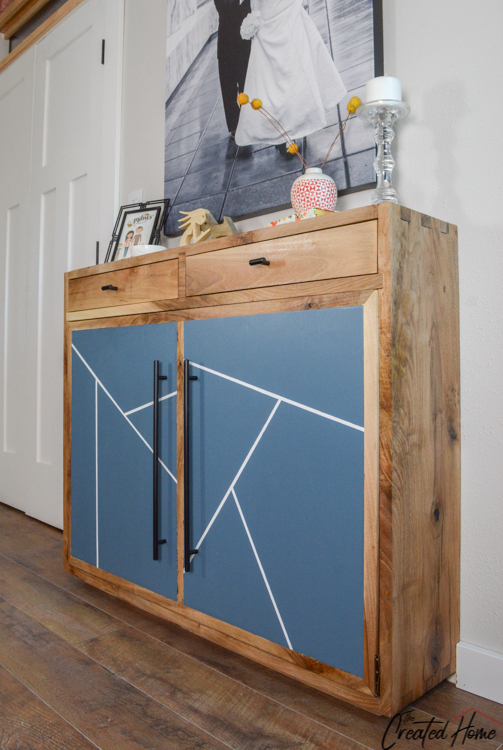
Allow me to present to you the combination drop zone cabinet and dog murphy bed in one. The cab features a pop up port with plugs and usb connections. The drawers are functional as well. The “doors,” however, are faux and conceal a drop down tray that pivots on some inexpensive hinges available at Rockler. (We will come back to that later.)
I’ve partnered with Rockler to bring you this dog murphy bed cabinet, and I will be making the plans available shortly. I found myself using so many of Rockler’s innovative tools in building this that it just made sense to work together, and of course I’ve got links to everything I used. As always, I’m very selective about who I partner with, and while all opinions are my own I’ll tell you right now that if I wouldn’t use it myself, I won’t recommend it.
IN WHICH WE TAKE A SLIGHT DETOUR…
This cabinet comes at a tender moment for our family. You see, along with introducing this dog bed plan I would also like to introduce the newest member of our family.
I was devastated when we lost our sweet goldendoodle, Maddie in February. But a home without a dog just felt empty after her loss, so we rescued our airedale terrier, Ruby, about a month later. She puts the terror in terrier, but we love her sweet little mischief making heart. She had a rough start to life, but she’s settled in well and keeps us all on our toes. That said, I miss having a doodle in my life, so about the time we rescued Ruby we got on a wait list for another goldendoodle. This sweet little pup will officially be ours at the end of next week.
BACK TO THE DOG MURPHY BED
But pictures of adorable puppies are not why you came here. (Though, seriously, who doesn’t mind photos of puppies?!?!) You came for plans. Again, those will be available soon. As I built this dog murphy bed cabinet I ran into a few small issues that I want to reassess before making the plans available. For example, the hinges I thought would work did not fit the inset tray. Thanks to a very patient man at Rockler I was able to come up with a solution that worked, but it required a good deal of chiseling out of both the tray and the main cabinet frame, and I want to further explore options in hopes that I can offer something a little less labor intensive.
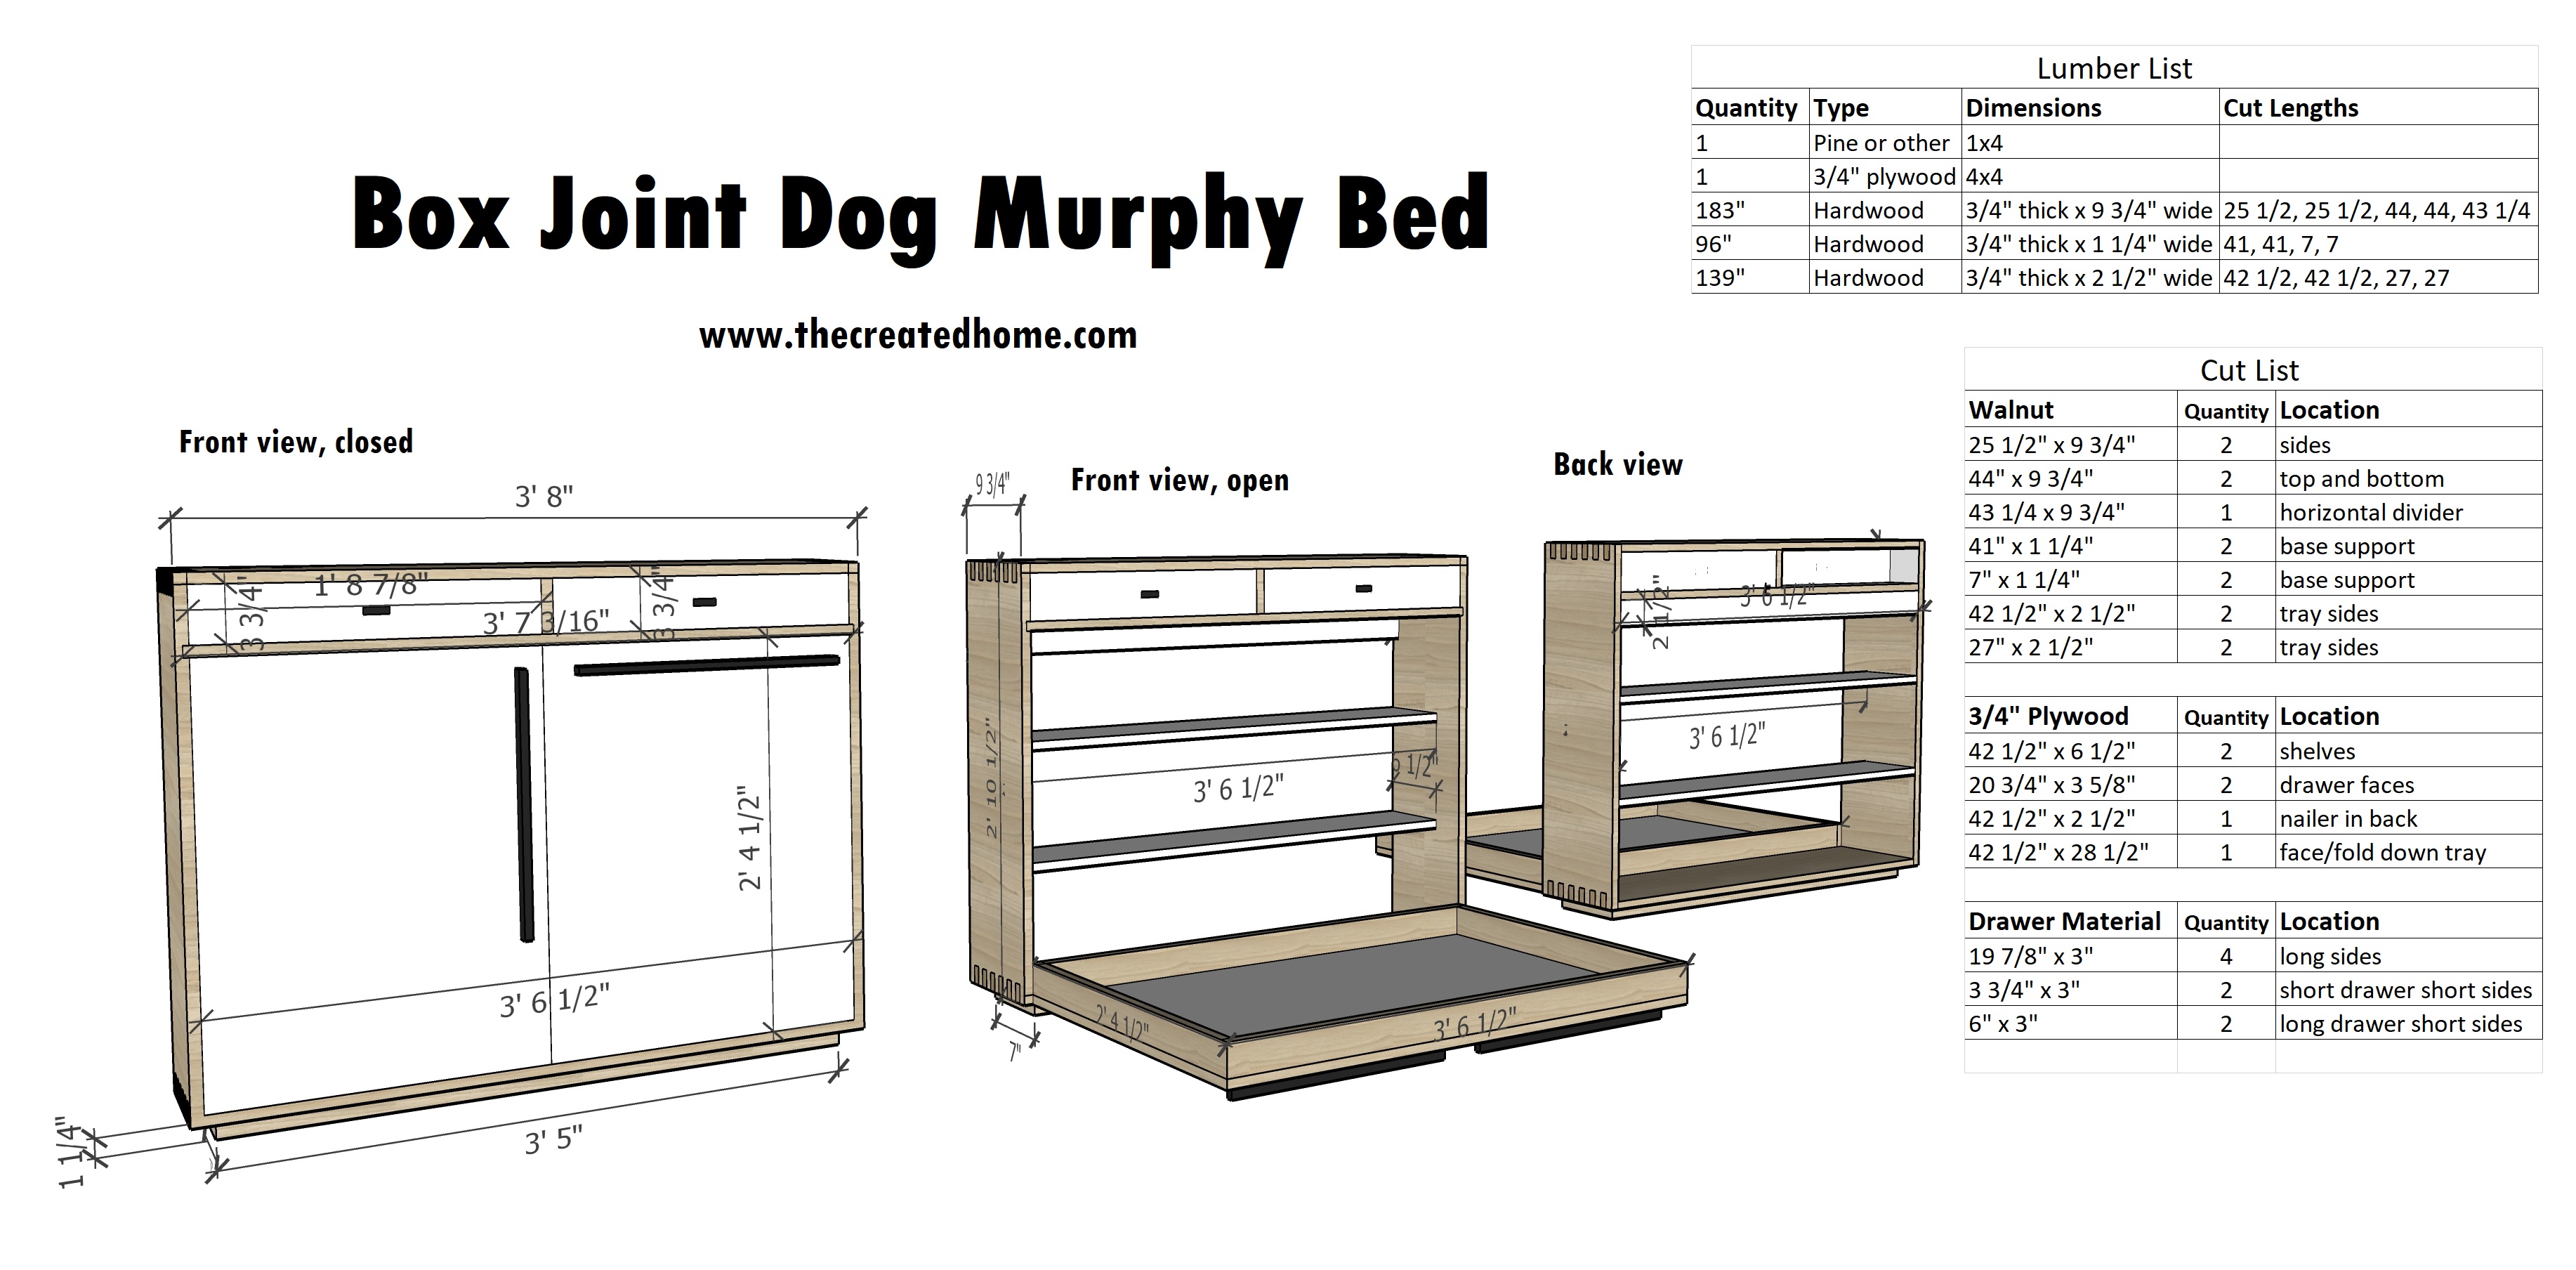
The following is an overview of the build, as well as a materials list.
Materials
Wood
1 – 3/4″ plywood 4×4 sheet (if available)
200.25″ Hardwood of choice 3/4″ thick x 9 3/4″ wide
96″ Hardwood of choice 3/4″ thick x 1 1/4″ wide
139″ Hardwood of choice 3/4″ thick x 2 1/2″ wide
9 3/4″ Hardwood of choice 3/4″ thick x 4 1/2″ wide
Other materials
wood glue
tape measure
long door pulls
drawer pulls
chisels
clamps
dog bed
3 in 1 bar gauge
knife hinge
drawer slides (5″ and 8″)
CUT LIST
| Cut List | |||
| Walnut | Quantity | Location | |
| 34 1/2″ x 9 3/4″ | 2 | sides | |
| 44″ x 9 3/4″ | 2 | top and bottom | |
| 43 1/4 x 9 3/4″ | 1 | horizontal divider | |
| 41″ x 1 1/4″ | 2 | base support | |
| 7″ x 1 1/4″ | 2 | base support | |
| 42 1/2″ x 2 1/2″ | 2 | tray sides | |
| 27″ x 2 1/2″ | 2 | tray sides | |
| 9 3/4″ x 4 1/2″ | 1 | vertical divider | |
| 3/4″ Plywood | Quantity | Location | |
| 42 1/2″ x 6 1/2″ | 2 | shelves | |
| 20 3/4″ x 3 5/8″ | 2 | drawer faces | |
| 42 1/2″ x 2 1/2″ | 1 | nailer in back | |
| 42 1/2″ x 28 1/2″ | 1 | face/fold down tray | |
| Drawer Material | Quantity | Location | |
| 19 7/8″ x 3″ | 4 | long sides | |
| 3 3/4″ x 3″ | 2 | short drawer short sides | |
| 6″ x 3″ | 2 | long drawer short sides | |
Tutorial:
Reference the following diagram to see how the different pieces fit together. It may be helpful to print this for use in your shop.
This build can be made far more simple using butt joints or even miters. I challenged myself to use box joints, and frankly they need A LOT of work .But I like to push myself and this one had a real learning curve. So pocket hole it up, or hand cut your fancy pants dovetails. It’s up to you.
Glue up the panels
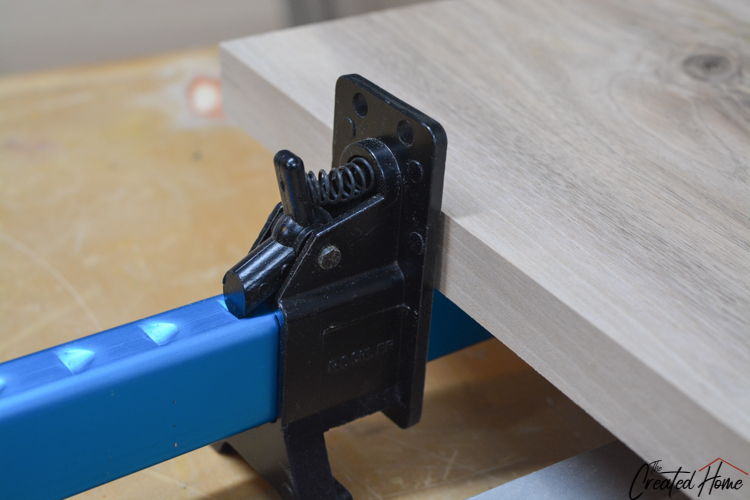
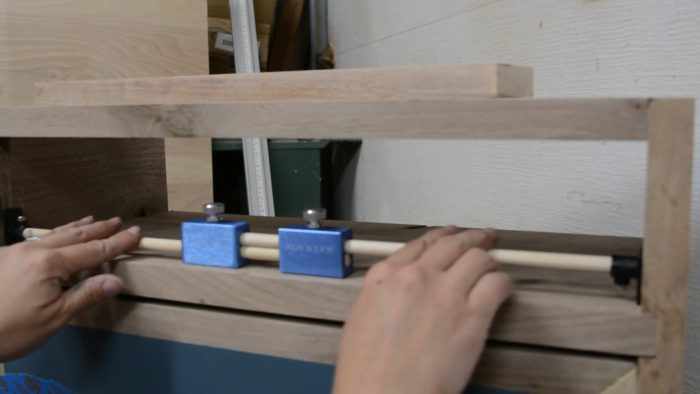
I had a couple of pieces wide enough, but most of the main carcass sections had to be glued up. I didn’t bother with any mechanical fasteners here. Just some Titebond and a few clamps.
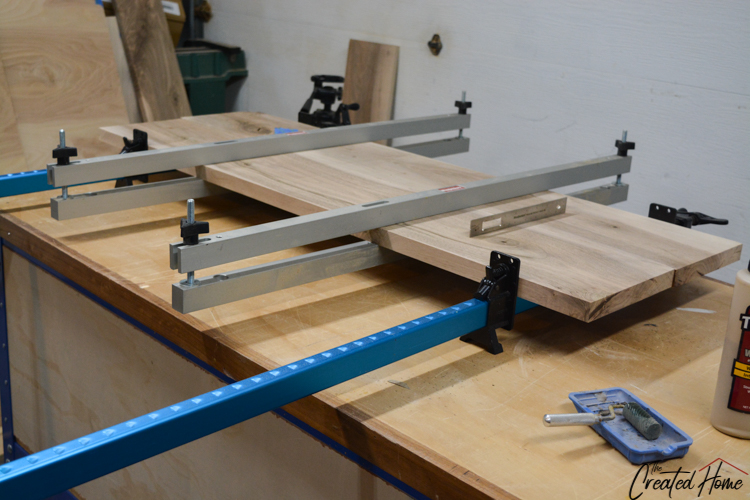
These aluminum clamps by Rockler are some of my favorite. You know how sometimes it’s tricky to get those bar clamps to tighten? These lock into spot using the grooves you can see here, then tighten up the rest of the way with a turn screw/handle. And they are light! So you won’t have to have your foot amputated if you accidentally drop one or something.
The carcass is really just a simple box. I chose to elevate it a bit because it looks classy. The handles on the faux doors/drop down tray match the elevation of the base of the cabinet, so when it is open it will be level and the face will not lay directly on the floor.

The piece separating the main part of cab from the drawers is dadoed in, though clearly there are a number of options. The shelves are made from plywood with a walnut veneer that I ripped from an extra piece. I decided to go with plywood because they were going to be covered in wallpaper.
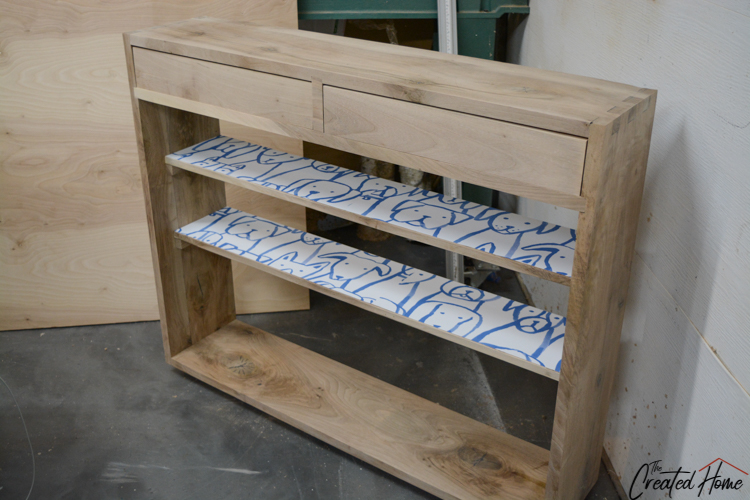
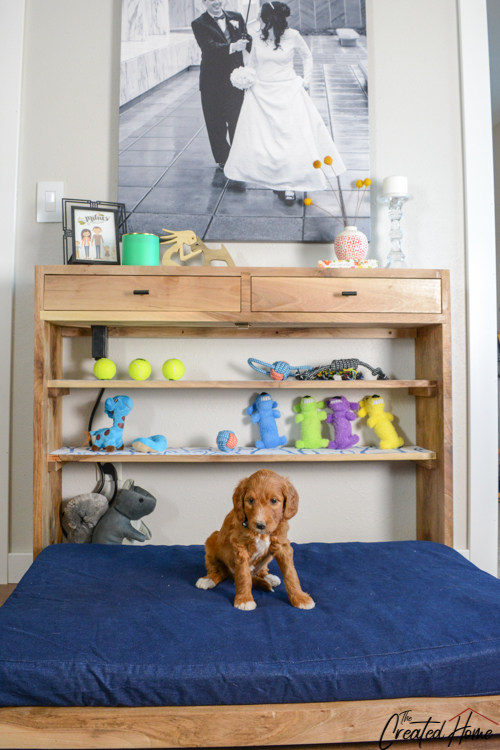
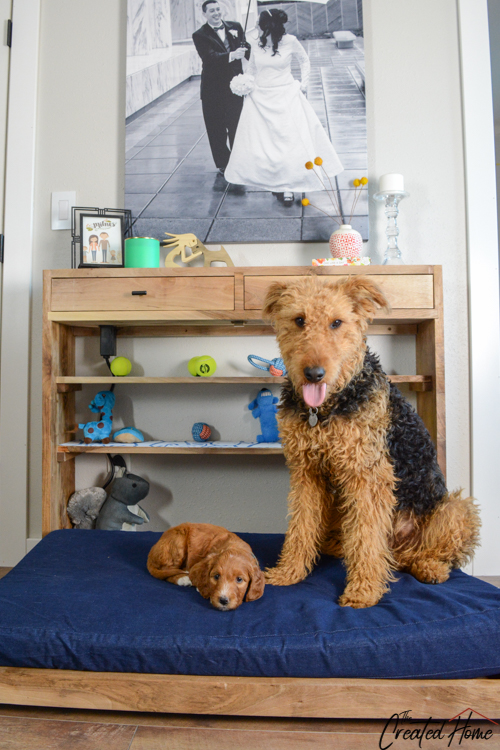
The shelves provide storage for toys or whatnot. Note also the nailer board connected the main frame of the piece. Since this cabinet is only 9 3/4″ deep and the tray is a bit on the heavy side, it is a good idea to secure it to the wall.

The Tray
The tray is formed from 3/4″ plywood and wrapped in hardwood to match the carcass. The dog pad you see in the photos is linked here, and the tray is made to fit this bed specifically. I painted the face of the tray, then later went back and added lines for visual interest.
The Drop Down Tray Mechanism
This is where things got a bit muddled. I had planned to use a pivoting hinge from Rockler, but realized after constructing the tray that I had failed to perceive how the tray would sit in the cabinet. That is, there was not point to pivot from as the tray folds out past that point.
Lid support hinges do not work here because the “lid” does not overlay the “cabinet” but instead sits inset. After much deliberation with an employee at Rocker I went with knife hinges.
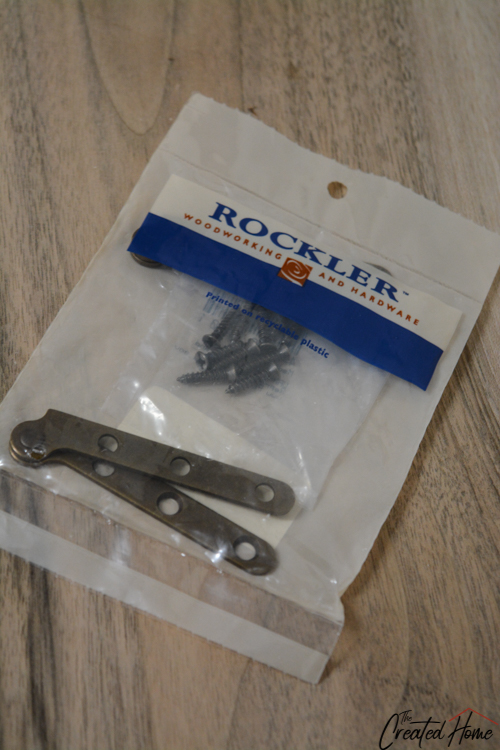
The hinge allows the tray to pivot all the way down, but has to be set into the wood a bit to give the tray clearance to open and shut. So I ended up chiseling those areas out at the 11th hour because I couldn’t come up with a better plan.
They show, but all in all, not badly.

Hopefully I’ll wrap my head around something better before publishing the plans. Hit me up if you have an idea!
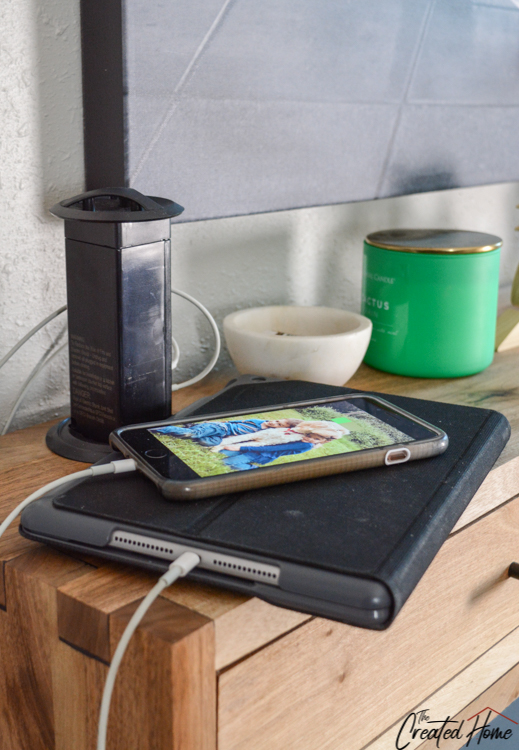
The Drawers and Pop Up Power Strip
Note that the left drawer is only 5″, while the left utilizes the full 8 3/4″ depth of the cabinet. I have this set this way because I used a pop up power strip available at Rockler. As you can see, the port will need extension room through the pieces of wood, necessitating forstner bit or other material removal method.

After all, what good is a drop zone if you can’t charge your devices?!
One last thing I have to mention – one of my new favorite inexpensive tools. Drawers can be a bear to make, but in my experience, struggles with drawers are nearly always the result of the space being out of square.
I used this 3 in 1 bar gauge from Rockler to ensure that the boxes were square. The biggest thing you’ll want to check for is that the side to side measurement at the front of the drawer area matches that of the bac.
Finally, I used the hardware linked above to elevate the tray when it is lowered. I think that about covers everything. The plans will have more details. But for now I have provided links to everything I used. A big thank you to Rockler for sponsoring. I am a huge fan of their tool solutions, and as you can hopefully see, they really came up to bat for this build.
Multipurpose furniture is some of my favorite to create because it is both fun to build and is just such an effective use of space. And you are in luck, because this month a few of my friend’s in the blogging world are bringing you their multipurpose furniture ideas, and I’ve got links to them all here. Check them out and follow these awesome DIY ladies for more great projects.
Addicted 2 DIY
Anika’s DIY Life
Her Tool Belt
Ugly Duckling House
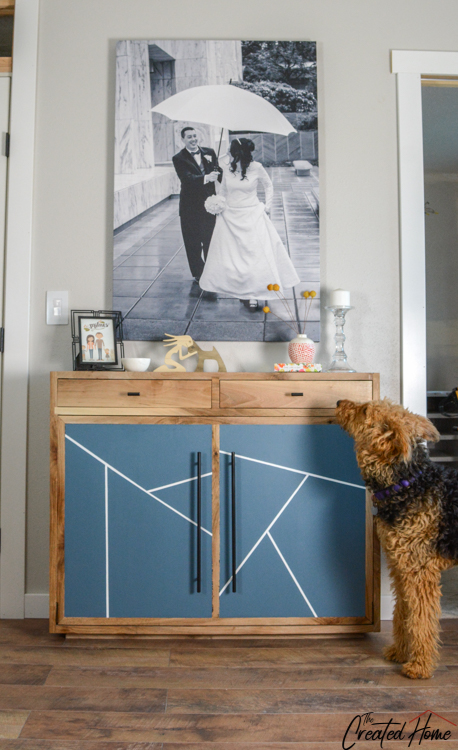
PS. That incredible canvas was printed up by the good people at Canvas HQ. Isn’t it stunning?!
Dog Murphy Bed – Free Woodworking Plan.com
Sunday 7th of February 2021
[…] right? Build this drop zone cabinet and dog murphy bed in one. The drawer is functional but the doors are faux and conceal a drop down […]
DIY End Table with Charging Station - Anika's DIY Life
Tuesday 22nd of October 2019
[…] Dog Murphy Bed – The Created Home […]