
Before we get started I feel the need to clearly state that I am no expert.
What I can offer is my humble experience creating three projects:
1. A small countertop using a basic bag of inexpensive concrete
2. Specialty concrete mix for creating furniture
3. A full kitchen worth of countertops using Concrete Countertop Solutions mix and templates
Each of these sections will be followed by a breakdown of costs and a rough estimate of cost per square foot, as well as a supply list.

The goal of this post is to give you an idea of the scope of work if you decide to tackle your own concrete table tops or countertops. I’ll share some tips and tricks I learned, some mistakes to avoid, and my own mostly unfettered viewpoint about the pros and cons of using specialty mixes versus basic concrete.
The first thing to know before we dive into these projects is that cement and concrete are not actually the same. I remember attending a workshop once where I learned not only that little gem, but that apparently people in the industry are a bit touchy about it. Look, all I can tell you is that there is cement in concrete.
This is a safe place. I won’t judge you if you use the terms interchangeably.
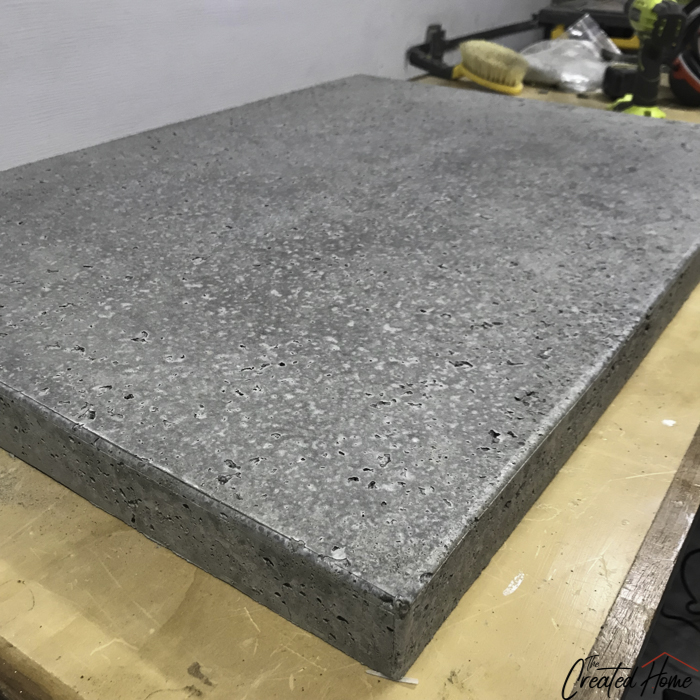
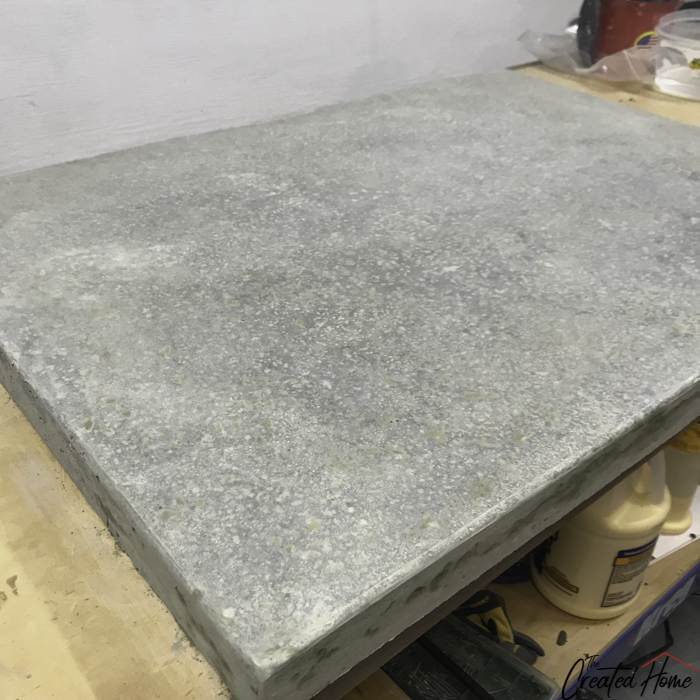
The next thing to know is that concrete contains aggregates. Basically rocks and sand and stuff. When you pick up an inexpensive bag of your nationally recognized brand concrete mix from your local home improvement box store, it likely has a coarser aggregate. Sanding it down will reveal the aggregate. That’s not to say you can’t turn out a great looking product. The top of my shoe cabinet is made with basic concrete mix, and here’s how that looks:

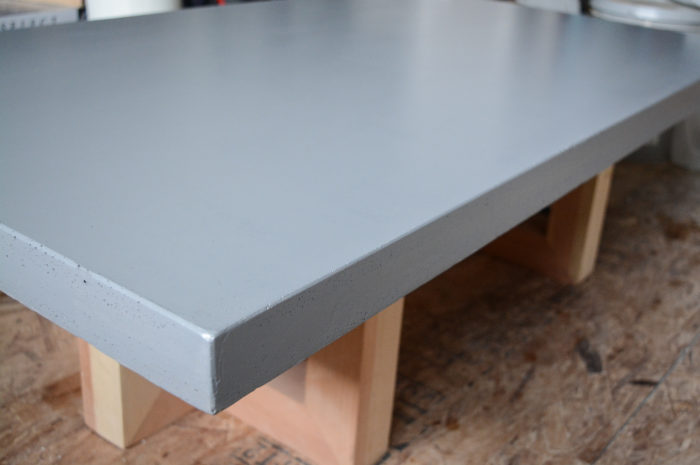
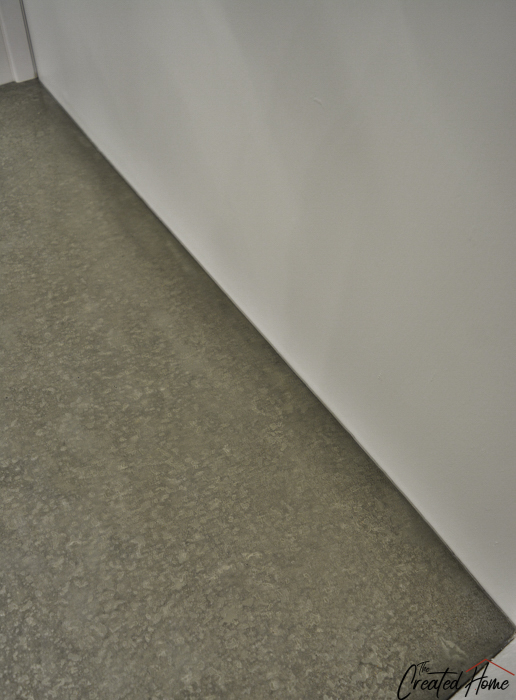
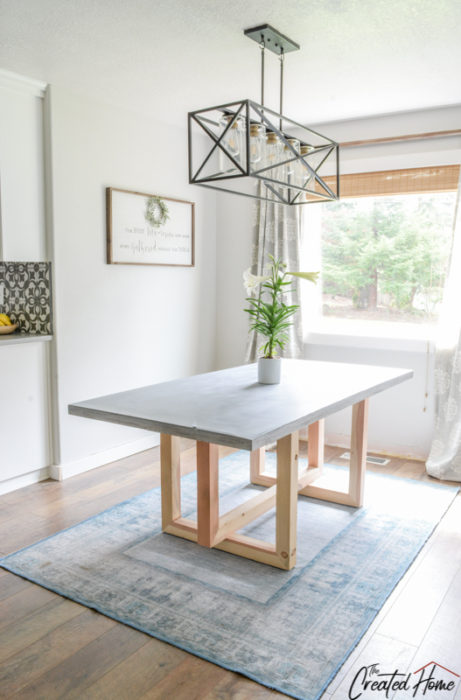
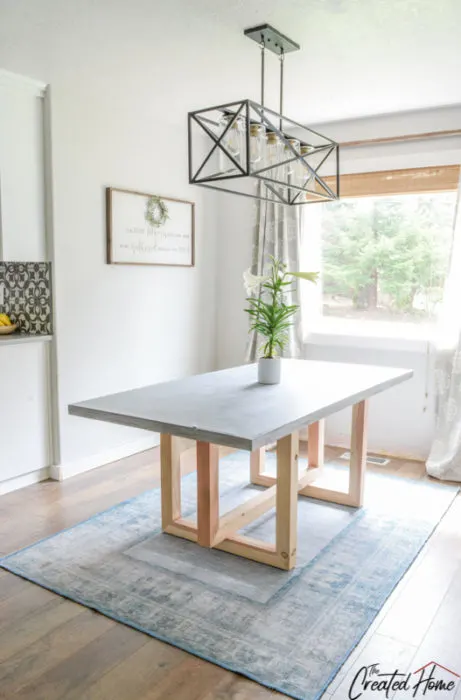
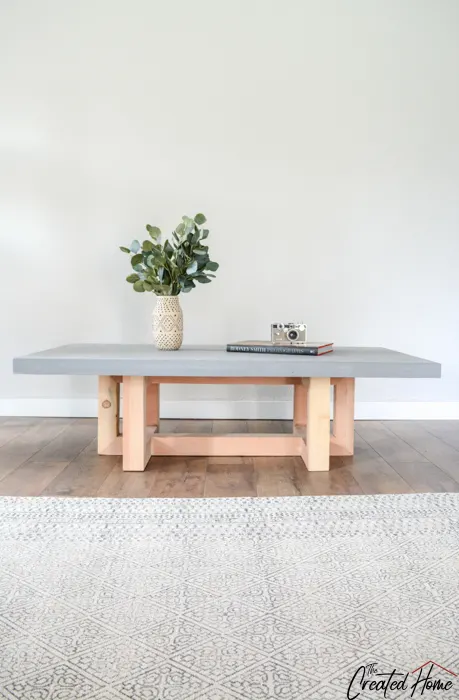
A countertop-specific concrete mix will contain finer aggregate. These countertops were created using Concrete Countertop Solutions Concrete mix, and you can see how smooth they are.
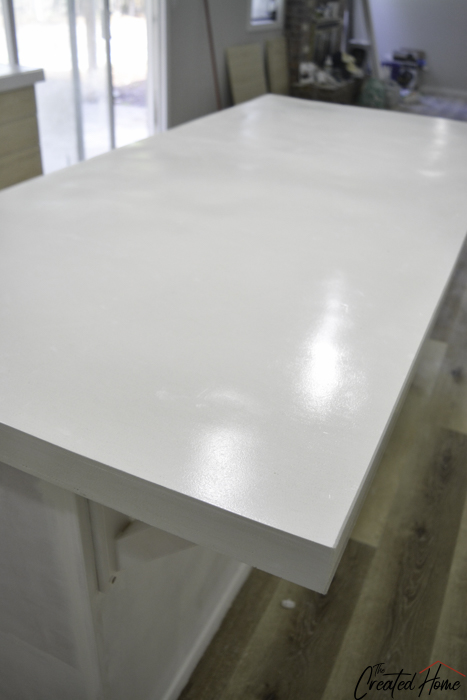
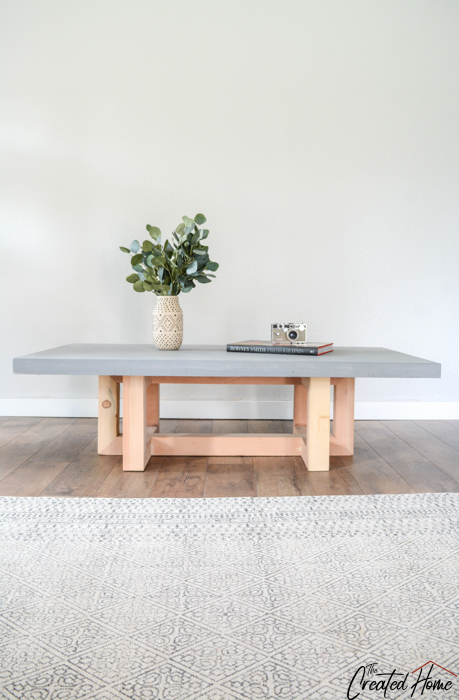
I also used some of the Concrete Countertop Solution mix to create this concrete and wood geometric collection. I’ll touch on that process here as well, so you can decide whether you want to use a specialty concrete mix in creating your own furniture.
I will also share some of the products I’ve found success with. Though I do use some affiliate links rest assured I only ever recommend products I have used and found success with myself. (You can find a disclosure statement here.)

Working with DIY Concrete Counter and Table Tops
1. A small countertop using a basic bag of inexpensive concrete
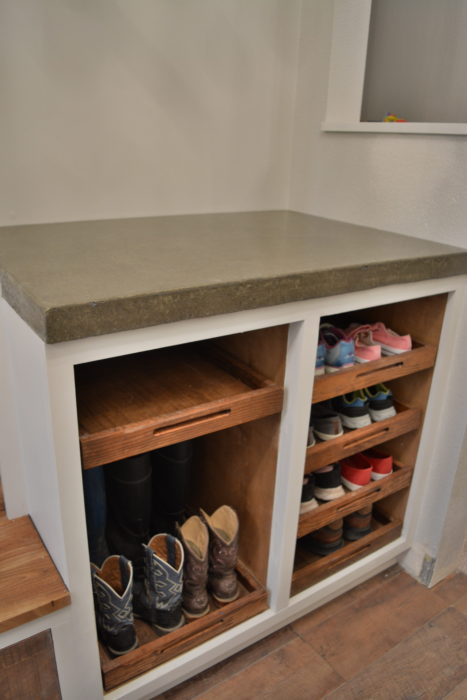

This shoe storage area is pretty well the heart of the massive mudroom makeover my husband and I did last year. It’s basically a cabinet with pull out trays. Because the renovation of that hallway was so extensive, involving everything from two structural support beams, new plumbing, electrical work, drywall, moving the main heat stack and a bunch more, we needed to find ways to cut some costs. A concrete countertop was financially smart, and it allowed us to conform the countertop to the slightly out of square wall. (I’ll go into how to do that.)
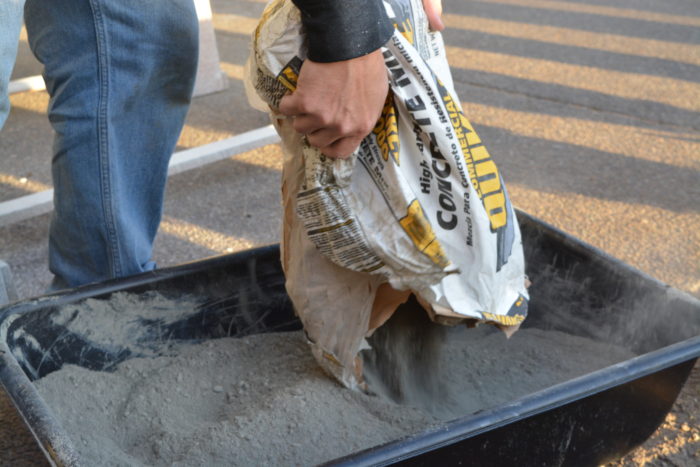
My intention was to buy a countertop specific mix from one of our local home improvement stores, but surprisingly none were in stock. I will say that if I did this again I would go that route so that the mix would be a bit more fine. But honestly, this worked just fine. The bags of concrete we used for this were maybe $5. I believe this took just under two bags.
To make this countertop I created a template and a mold. The other method is to pour in place, which we will cover in the next section. Here we’re going to cover how to create a mold – the same process used in creating concrete topped furniture.
How to create a concrete mold
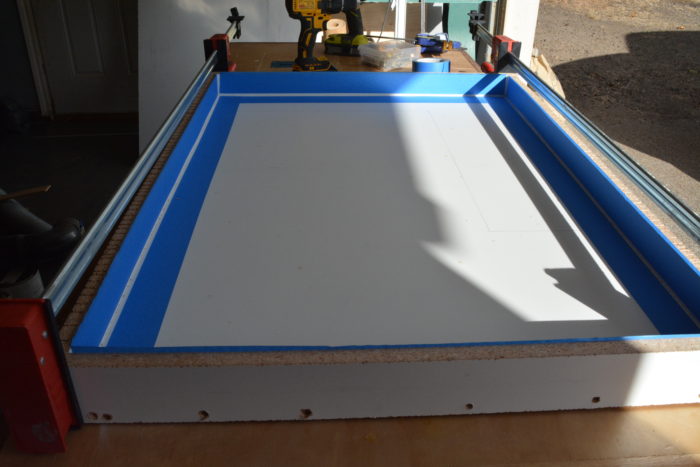
A concrete mold is formed using inexpensive melamine board. Things don’t stick to that white coating, making it ideal for this. To create the template I used thin wood strips and made a pattern of the top of the cabinet, taping the pieces together. The pieces I used were really too thin, which made it a bit of a pain. As I mentioned, the back wall was a bit out of square. If it were not I could have just measured a basic square and skipped the templating process.
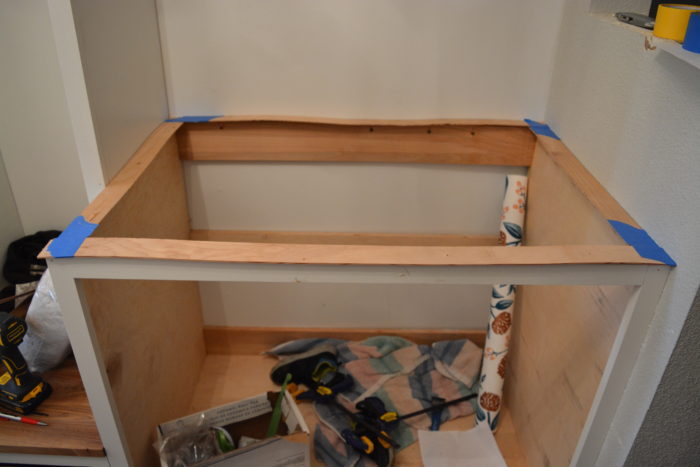
Next, you will cut a piece of melamine to the exact proportions of the countertop or tabletop you are building. To create the sides you will cut melamine strips to the thickness you want for the countertop PLUS another 3/4″ so that you can attach the pieces to the sides of the main piece. Simply screw the side pieces to the base. Someone will ask why I had clamps on this. Honestly…I don’t quite remember.

See those cuts all along the length of one side? That’s the back wall for this piece. It matches the profile of my out of square wall. Likely you will have no need to do this, but if you do all I did was to cut the board about half way through over and over so that the board bent the way I wanted it. I probably cut too much, but overkill is kind of my thing.
Keep in mind that when you are making a mold the top of the piece you are making will be side down. That’s the side you want to look like a million bucks. And if you are matching a wall profile like this, you’ll need to take that flip over into account.
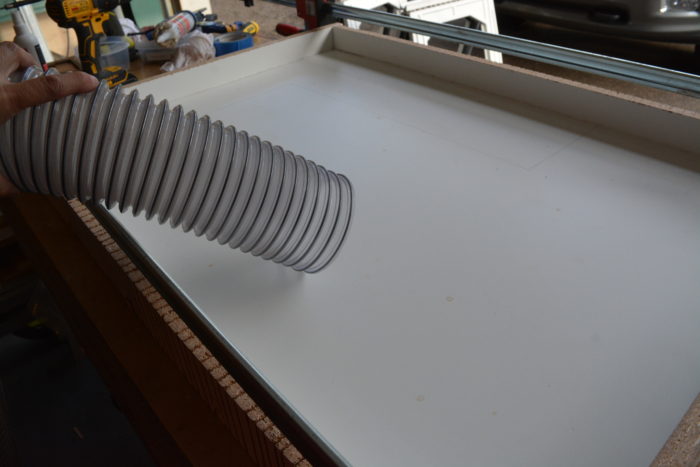
Because the finished top of the piece is face down in this process you’ll want to take extra care that no debris gets on the piece. I vacuum and wipe it out a couple times.
Your final step in preparing the mold is to silicone the edges. Silicone both seals the edge, and creates a soft profile along the edges of your piece. You can use blue tape here to make sure your silicone lines are super clean. I know a lot of people use black silicone so it can be seen better, but I couldn’t find any at the time. An inexpensive caulking tool helps create a super clean line. I bought this set and used one of the rounded edges.
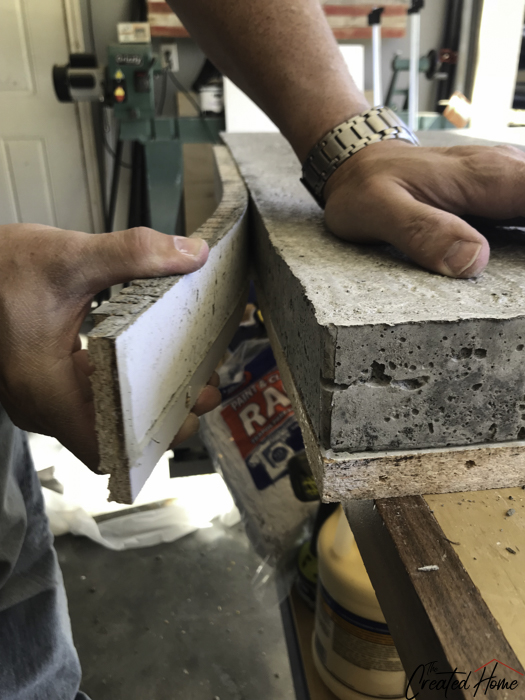
Here’s a look at how that edge profile turns out on another piece because this first one I didn’t use that tool and the second go I did. You can see how nice it turns out.
That’s all it takes to create the actual mold.
Mixing the Concrete
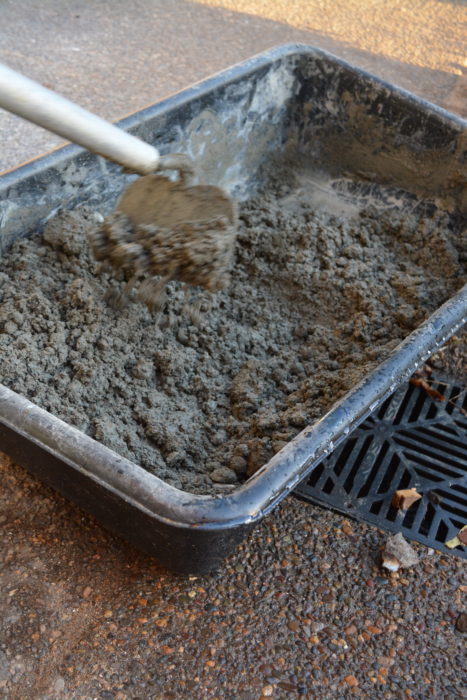
Basic concrete mix can be made with a mixing tub and a hoe or similiar apparatus.
Add water slowly, a little at a time, mixing and chopping up the clumps to form a thick batter. It should be pourable, not have any dry mix showing, and thick enough to pack in firmly.
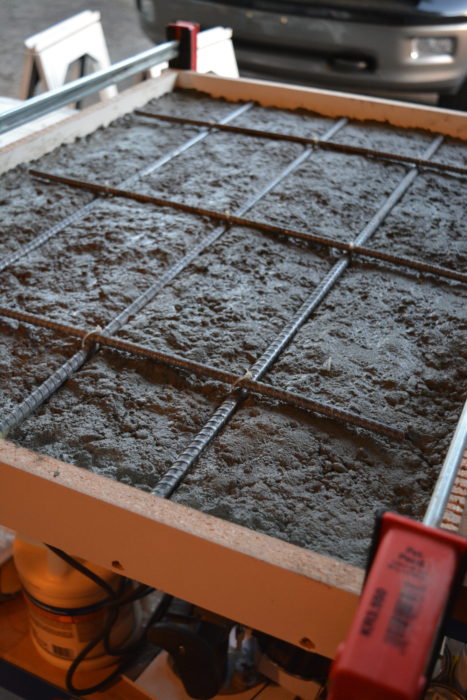
Pour the concrete into the mold and pack it in, paying close attention to the sides so the edges will not have any gaps. I cannot find any photos of this part of the process, but I have some video for the other two sections below, so you can see what that looks like. After you have the bottom of the mold well filled you will need to put some rebar mesh down to increase the strength of the finished piece. If you can’t find any locally (because, lucky you, it happens to be out of stock when you go to get it), you can use rebar pieces and strap them together with zip ties.
I use this float and trowel set to spread and pack down the mixture.
Use a long stick that spans the length of the mold to scree the top – that is, scrap it all level. Again, there’s video of that process below.
Tap the sides of the mold with a mallet. A lot. This brings air bubbles up to the surface and helps eliminate gaps in the mix as it cures. Your goal is not to dry out the concrete – in fact it is a really good idea to put some thick plastic sheeting over the mix to help retain moisture. It will, however, cure over the next couple of days.
After a couple of days you can unscrew the sides from the mold and pull them off. This is kind of the best part.
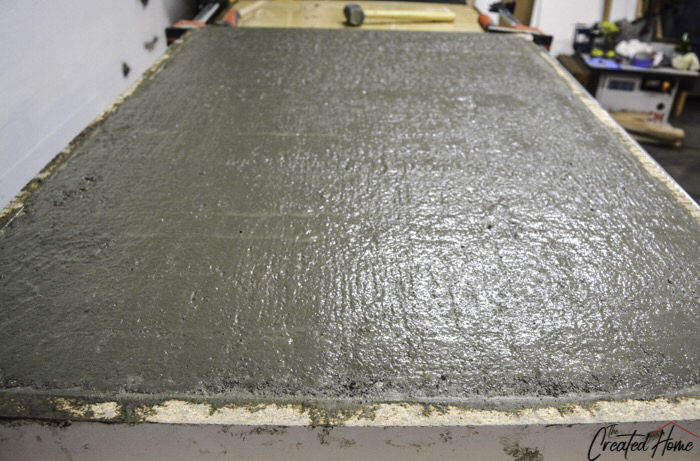
Carefully flip the concrete piece – with help! Here’s what this one looked like fresh from the mold:
You can either leave it with the holes, or mix up what is called a slurry and fill them in. Honestly, I don’t remember what I used, but it’s like this. The slurry basically allows you to mix up a small bag and then push it into the holes. I wasn’t worried about filling everything, but you can see the difference it made.
The final step was to give it all a good sanding with some diamond pads. I used these wet dry pads that I could attach to my angle grinder. It worked just fine. I started with a rougher grit and worked my way up, keeping a steady supply of water trickling on the surface to keep the heat down. Not going to lie, it was messy, wet business.

We moved the piece in after that and were thrilled to see how well that back edge fit the wall. Like an ever-loving freaking glove. I might have teared up.
The final step was to seal it. I use this stuff because it’s highly recommended. A question I hear a lot is: But how do concrete countertops hold up?! Do they stain?! Burn?
It all comes down to your sealer. If you have a good seal on it it will resist stains. We have had this in for a good year with no issues. That said, it doesn’t get exposed to food. Personally, I wouldn’t set anything hot on concrete countertops, as no sealer is made to resist that kind of heat and you don’t want to mess with the integrity of the sealer.
I won’t go into the process with the sealer as it is detailed well on the bottle. But I do have a video of the process below so you can see how it works.
Break down of materials and cost for this method:
Materials (costs approximate)
Bag of concrete $5 (total $10)
melamine: sheet $30
mixing tub $32
Mixer $0 (I’m assuming you have a hoe or something already)
Rebar mesh: $10
Slurry Mix: $28
Concrete Sealer: $31
Wet/Dry polishing pads: $29
Concrete float and trowel: $50 (There are less expensive, but we had a number of jobs to do and wanted good ones)
Silicone: $5
Total assuming you need to purchase all materials: $225
Price per square foot: $37.5
Again, this is assuming you need to purchase everything. If I were to make it again today I estimate my cost would be $50, for a price per square foot of $8. Also, the small size of this countertop drove the price per square foot up. All of the products listed would be constant for a larger project, with only bags of cement changing the equation by a small amount.
The estimated cost of having this countertop made from solid stone such as granite or quartz was double the amount of purchasing everything brand new.
2. Specialty concrete mix for creating furniture
When I made the Concrete and Wood Geometric Collection with Jen Woodhouse I was curious to see what would happen if I went to the opposite end of the spectrum and used specialty concrete. Now, there was an in between step here – I could have elected to use countertop specific mix that you can order through Home Depot.
But I am nothing if not a tad excessive in my DIYing, so I pulled out the big guns. I had already decided to give Concrete Countertop Solutions a try for a kitchen remodel, and I asked the guys there if they would be interested in my trying their stuff out for furniture. Luckily, they were happy to work with me and sent over some bags and mix.
Here’s where I tell you that no, this post is not sponsored. In full disclosure, Concrete Countertop Solutions did send me some product at a steep discount, and I was really very excited to try out their products and templates. I’ll talk more about those templates in the next section. Actually, I’ll talk more about this particular mix in that section, too.
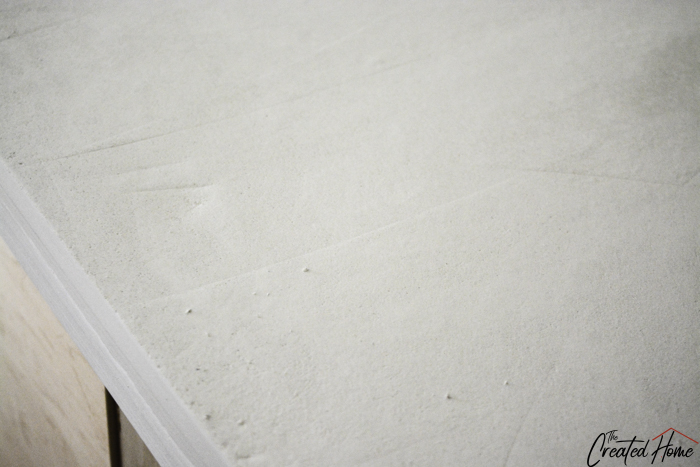
What I can tell you is that, following the same process as in the first section with the basic concrete mix, the table tops turned out much, much, much smoother. Here’s a complete unedited shot of one fresh from the mold:
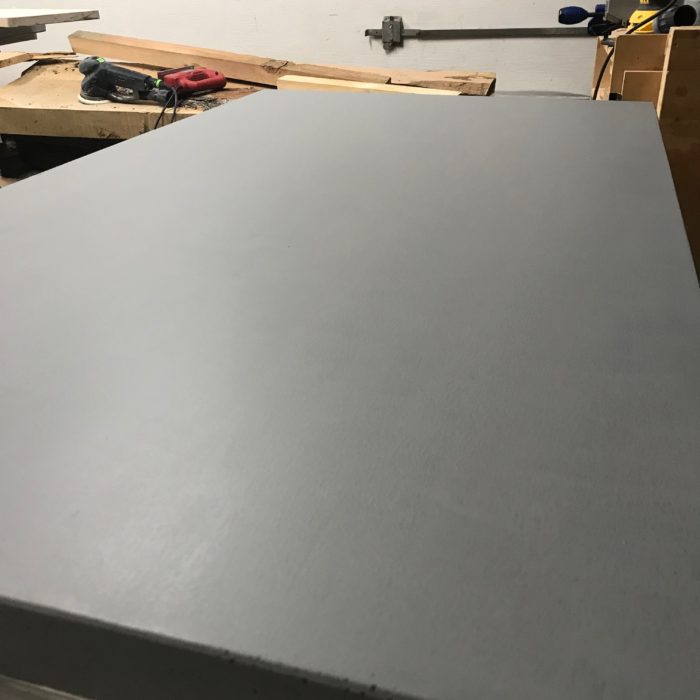
And here’s a look at the edges:

This mix also offers the benefit of not requiring slurry mix or wet/dry sanding pads. I sealed it with the same sealer as in the shoe cabinet top. In fact, the same bottle as there was plenty more.
One difference is that we did not use the mixing tub and a hoe to mix this. Instead we purchased a corded drill from Lowes (this one) and mixed it up in a 5 gallon bucket, following the directions on the concrete bags to a t.
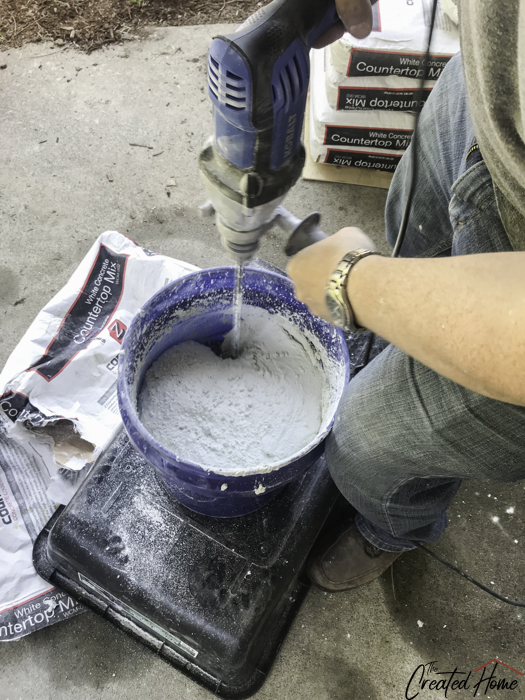
We did make one rather large, crucial error in these tables. I’m kind of embarrassed to admit it, but here goes. The mixture being thinner and more pour-able, we were concerned that rebar mesh would be too heavy. Concrete Countertop Solutions provides a fiberglass mesh for their countertops, but we overthought it and worried that we would not have enough for the kitchen if we used it for the coffee, side, and dining tables. So we tried rebar.
Don’t. Do. It.
Use the mesh. To my utter shame, we had plenty leftover after the kitchen countertops were done anyway, so this really is pretty dumb. We ended up with some shadows in the finished surface of the coffee and side tables. I had to apply concrete stain to completely eliminate them. Learn from our mistakes. Use the fiberglass mesh if you go this route.
Here’s how the tables turned out. You can get plans for all of these on Jen Woodhouse’s site. I’ve got tutorials on my site as well.


Break down of materials and cost for this method:
Materials (costs approximate)
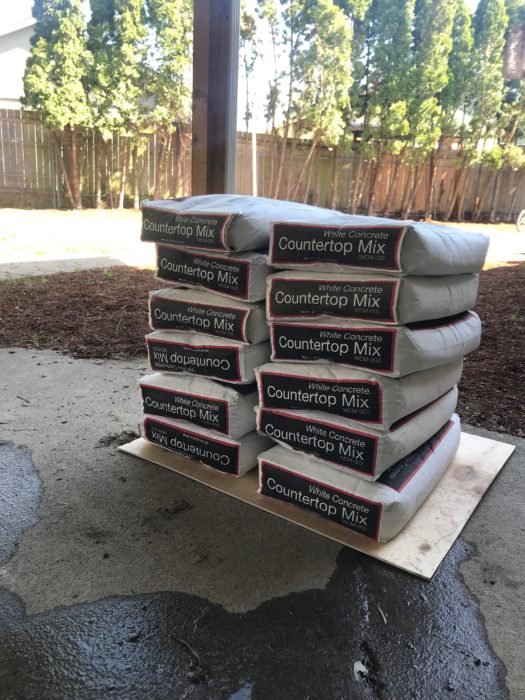
White Countertop Mix: $29
melamine: 1 sheet $30
5 gallon bucket
Corded Mixing Drill $70
Fiber mesh: $50
Z clips: $20
Concrete Sealer: $31
Wet/Dry polishing pads: $29
Concrete float and trowel: $50
Silicone: $5
Total assuming you need to purchase 1 of all materials: $314
For this project, which used 14 bags of cement, that would have been about $700, not including shipping charges.
*I need to mention here that Concrete Countertop Solutions sells something called Z Liqui-Crete, which can be added to regular concrete to transform it into a better mixture. I have not tried this, but it is $16.99 a box and would probably be a more cost effective way to go in terms of shipping alone.
Price per square foot for these four tables: $23
Again, this is assuming you need to purchase everything. If I were to make it again today I estimate my cost would be $550, for a price per square foot of $18.
3. A full kitchen worth of countertops using Concrete Countertop Solutions mix and templates
Last year we renovated our kitchen, a process I shared here, with a follow up post here. The one and only part of the process that we did not DIY was the countertops, and though they look fine really, I’m not happy with them. We paid nearly $4000, and the installers chipped them in one spot, spilled epoxy down my newly refinished cabs in two places, and created a nearly 1/8″ gap where a piece was not cut straight in another area. When I attempted to address the problems the owner swore at me and told me I was being an unreasonable woman.
Nightmare, right?
If I had to do it again, I would have gone with concrete countertops.
So when my husband decided to fully renovated a large investment property, this was our chance. I reached out to Concrete Countertop Solutions because I had seen their system on social media and was really excited about trying it.

Again, this isn’t sponsored. I’ll tell you the good, the bad (hint: it’s me), and the end results. But you didn’t come here for suspense, so I’ll just tell you right off that I really like their products and will use them again. Actually, I already have a project planned. Also, when I was struggling with one part of the process and called their help line I’m fairly certain that they put the owner himself on the phone, and he was incredibly helpful and knowledgeable. So basically I’m going to tell you I love them for all of those reasons
There are some good tutorials on the Concrete Countertop Solutions website, so I’ll mostly cover the process in a quick video without attempting to tack a long tutorial onto this already long post. But I will share our experience.
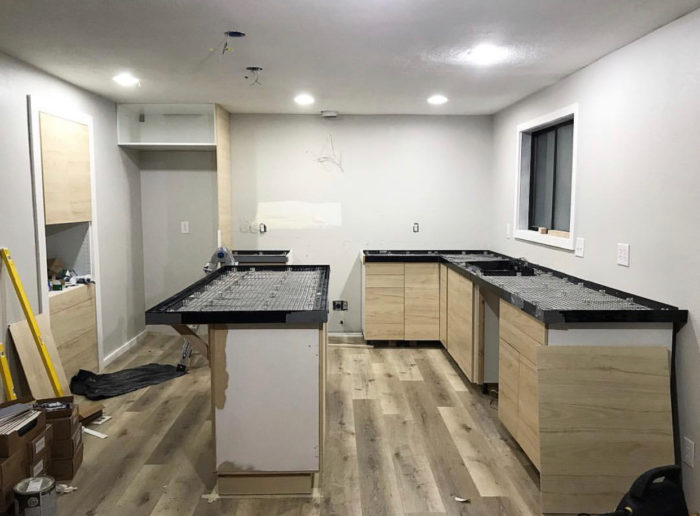
As you saw in the previous section, the mix is smooth and turns out incredible. But the real magic of this system are the edge templates that allow you to create a beautiful, professionally looking edge profile. Rather than pouring the countertops into molds and manhandling all 4 gazillion pounds into the kitchen, these are poured in place.
The edge forms screw right down to the cement backer deck. They are seamed so that they snap off once the concrete is fully cured.
Rather than rebar the system uses lightweight fiber mesh that is supported by clips that are screwed down to the decking. We elected to go with an undermount sink, and used a sink form to pour the concrete around it.
Our big error was not practicing a pour first. That would have saved us some grief. For whatever reason, the ratio of water to mix did not work for us, and to get the right pour and spread consistency we had to add about a cup more. We were really hesitant to do so, and didn’t start doing that until we had already mixed several batches. It could have to do with the weather or something, so I’m not saying you should add more water, but I’ll say we had a lot more success after doing so.
You can see in this close up that due to our difficulties in spreading the mix we ended up with lines that had to be sanded out. I won’t kid you – that was a long, laborious process. But I can honestly say that had we been more on top of getting the mix right, we would have saved a lot of time and effort.
I am feeling much more confident after completing this kitchen, mistakes and all. I would highly recommend it, with a caveat that you should do as the instructions say and practice first, and be sure the consistency is right.
Here’s a look at how it looked immediately after snapping off the forms:

We sealed the countertops with Concrete Countertop Solutions two part epoxy sealer. I love the sheen it gave the countertops.
Break down of materials and cost for this method:
Materials (costs approximate)
White Countertop Mix: $29 (We used I think 18 bags)
Edge Forms: $229
Sink Form: $30
Sink Knockout: $15
Corded Mixing Drill $70
Fiber mesh: $50
Z clips: $20
Epoxy Sealer: $79
Wet/Dry polishing pads: $29
Concrete float and trowel: $50
Bright White Color Packs: $6/Box (We used 18)
Total of all materials: About $1200 (does not include shipping charges)
Price per square foot for this entire kitchen: $24
Savings assuming quartz cost of roughly $80 sq/ft.: $2800
Whew! That was long. I hope it was helpful. Of course, this isn’t a comprehensive guide to the concrete countertop or table top making process, but I hope it was helpful. Most of all, I would say don’t be intimidated! Take the time to practice, and you’ll be making concrete tops like a pro.
Happy building!
Scott D. concrete projects
Monday 11th of January 2021
Definitely the best DIY countertop tutorial I’ve seen, makes me even more keen to have a go! Good job, thank you
Sarah
Wednesday 31st of March 2021
Thank you!
Floranet
Sunday 4th of August 2019
Your writing seems to be totally an inspiring one. Thank You!!
Sarah
Monday 23rd of September 2019
Thank you!