
We believe in spoiled puppies around here. Because, let’s be honest, it is really fun to build for kids and dogs.
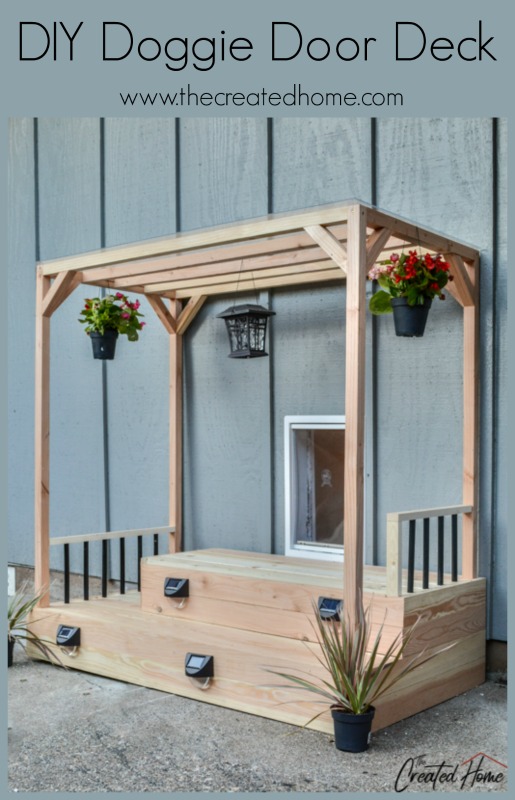
So when we were presented with the problem of a random hole drilled into some siding at an investment property I decided it was the perfect opportunity to create a doggie door deck that was a bit above and beyond.
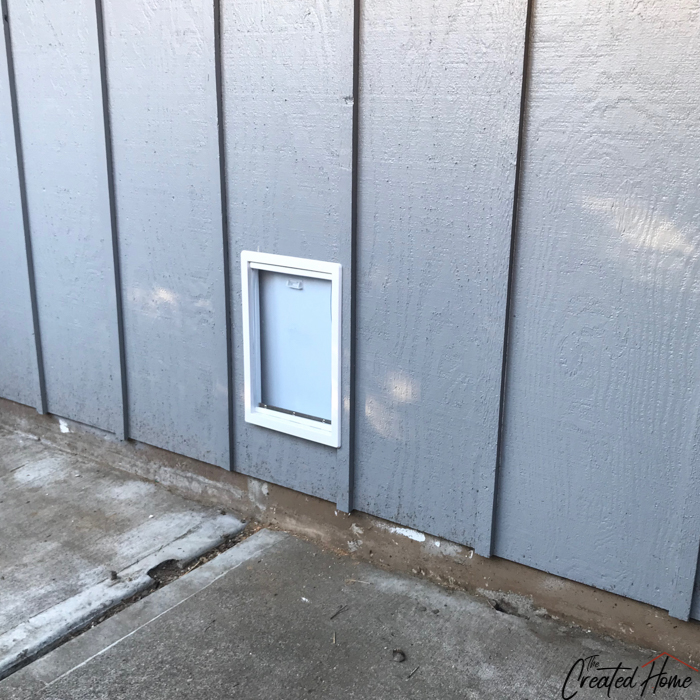
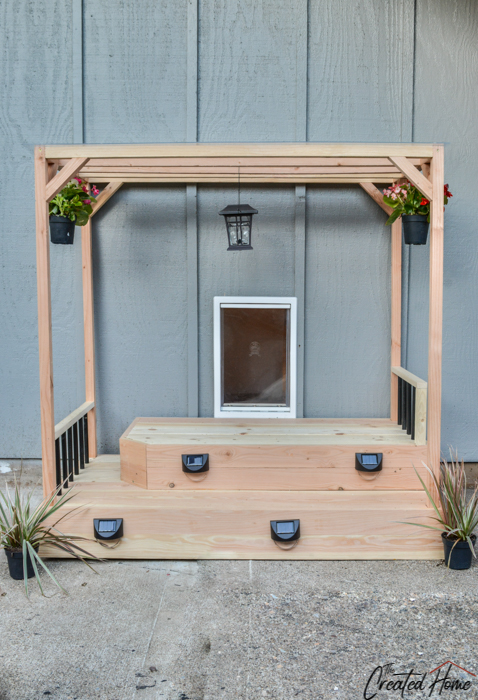
Though it may not be easy to tell in the photo, the dog door is a foot above the sidewalk. It was cut into the middle of a section of board and batten, and that section was locked in by an outdoor staircase. So we evened out the hole and framed it out with an inexpensive door from Home Depot. To be honest, that was probably all the solution that was needed, but I didn’t like that the hole was in the garage, so I decided that rather than minimize the problem, we would embrace it and turn it into a feature.
Hence, the DIY Doggie Door Deck. Or Pooch Porch. Call it what you like, it’s a fun, ever-so-slightly-extravagant build that is perfect for dogs big or small.
The Plans
I built this thing a bit on the fly, then went back and put together plans. Because they are not as polished as I would like I’m putting them up here for free with a bit of explanation for each step. Feel free to ask if you have any questions.
I’ve included links to the materials and tools I used. I do use affiliate links, and you can learn more about what that means here.
Materials
10 – 1x4x10
2 – 2x10x8s
8 – 2x2s
Solar deck lights
Solar accent lighting (for lantern)
2 – 5/8” dowels
Black spray paint
Hanging plants (optional, but awesome)
Wood glue
1 ¼ wood screws
2” wood screws
24 x 48” acrylic sheet
3/16” drill bit
Tools
Miter saw
Table saw
Drill
Brad nailer
Jigsaw or bandsaw
How to Build the Doggie Door Deck
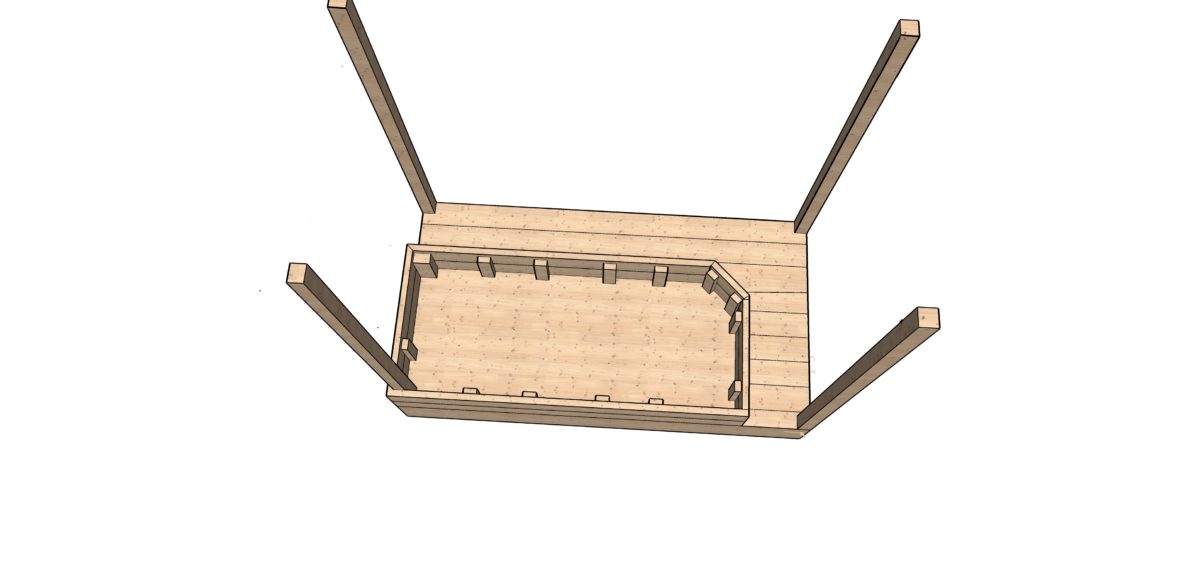
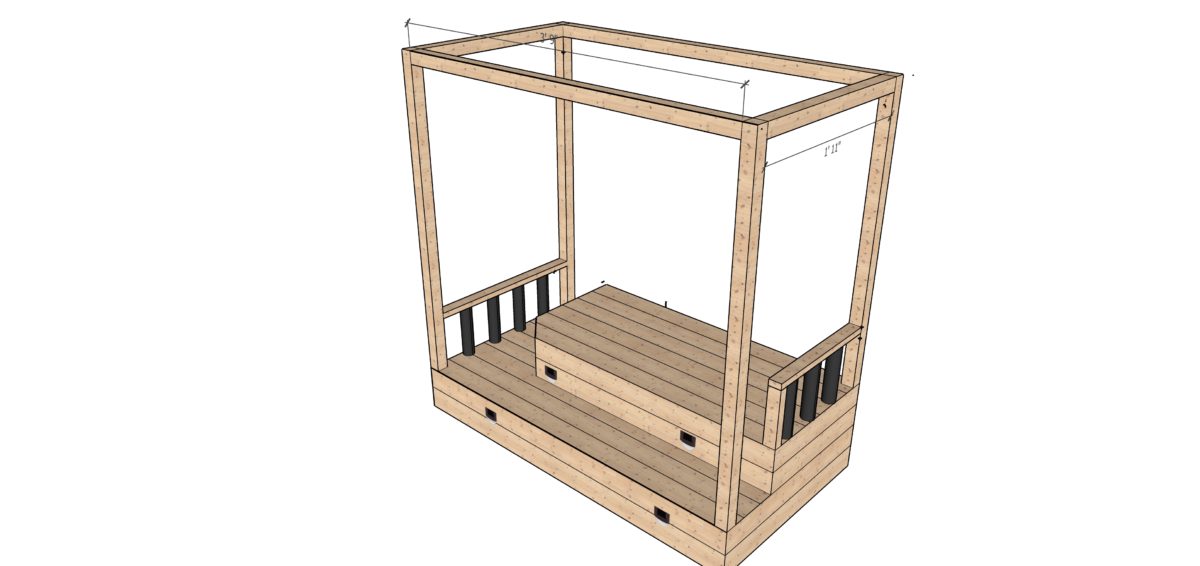
The Deck is built with a base frame made of 2×10 boards. I’ll tell you right off that the height of my steps was dictated entirely by the height of the existing dog door. In other words, there is nothing sacred about it. So when I say I ripped the 2x10s for the bottom step from 5 ½” to 5 ¼” to accommodate the ¾” board and bring them up to 6”, that’s kind of arbitrary. You’ll need to determine the height you are setting out to achieve, and make sure your steps are whatever they need to be. For mine the bottom step is 6’ high and the top step is 5 ¾”. This bright me to the 11 ¾” height of the dog door.
Step 1:
Cut your 2×10 into four 22 ½” long sections and rip them down from 5 ½” to 5 ¼”. Unlike a traditionally framed porch, I inset the top boards into the sides, so the 5 ¼” height will grow by ¾” with the top boards, for a 6” high step.

Step 2:
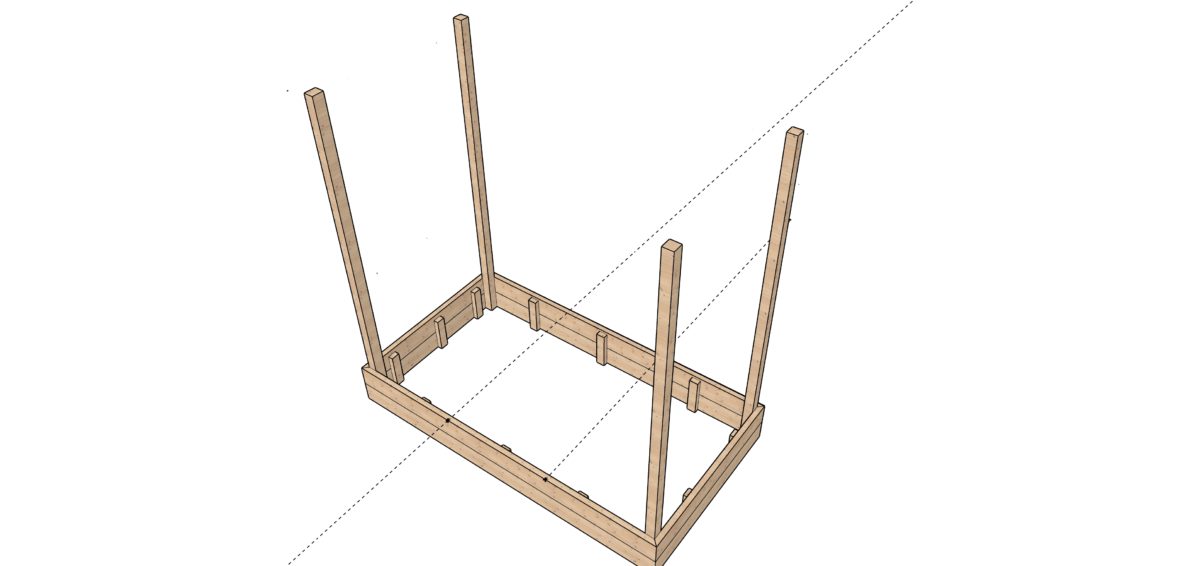
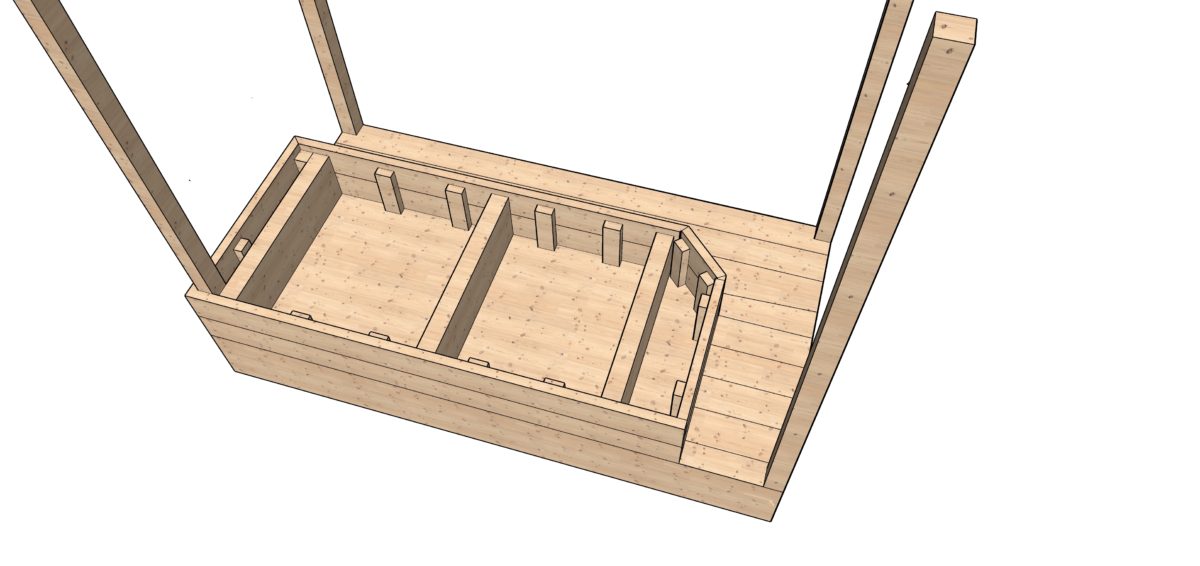
Cut the front and back boards to 48” with mitered corners. You will need four. Cut the four side boards to 18”, again with mitered corners. Each side consists of two boards, joined with a strip of ¼ cut to slightly less than the width of the two boards together, then glued and screwed to hold them in place. You could also pocket hole these together. But, frankly, this was easier and faster. Refer to the diagram if that is confusing.
Step 3:
Cut four 2x2s down to 47 ¾”. This is so arbitrary, really. Just pick a height. Mine stands at three feet above the top step, which was at 11 ¾” Hence the 47 ¾” measurement. I chose to rip the corners off of mine so that they would line up better, particularly with the little 45 degree bracers at the end. I expected the boards would be 1 ½”, but they were already more like 1 3/8”. Nice, lumber titans. Nice. So when I ripped off the rounded corners they ended up at 1 ¼”. It’s just one of those things you have to deal with.

Step 4:
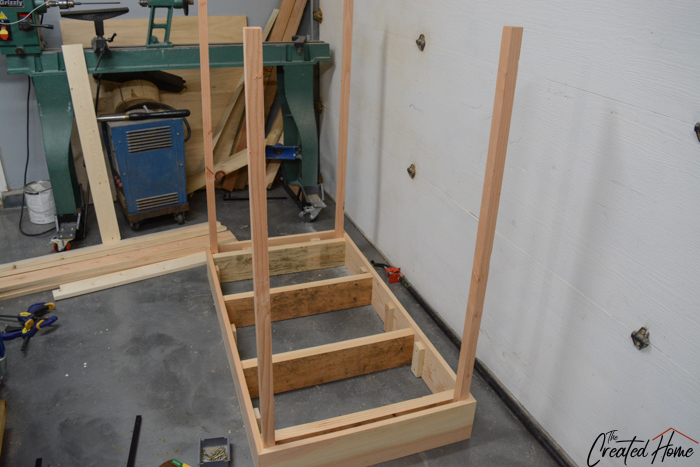
Lay out the base with the 2×10 sections in place. The 1 ¼” posts should be in each corner, with the 2x10s at the sides against them, like so.

Screw the far side 2x4s through the posts into the ¾” side pieces. Attach the front and back deck walls to the middle supports. Basically, you want the entire thing joined up, so those mitered corners meet. I’ll be honest, mine weren’t perfect. And I didn’t sweat it in this case.
It should look like this;
Step 5:
Cut your top boards to 46 ½”, and lay them across the bottom supports. I recall that this worked out perfectly so nothing needed to be ripped. But life is what it is, and you may have to adjust a board.

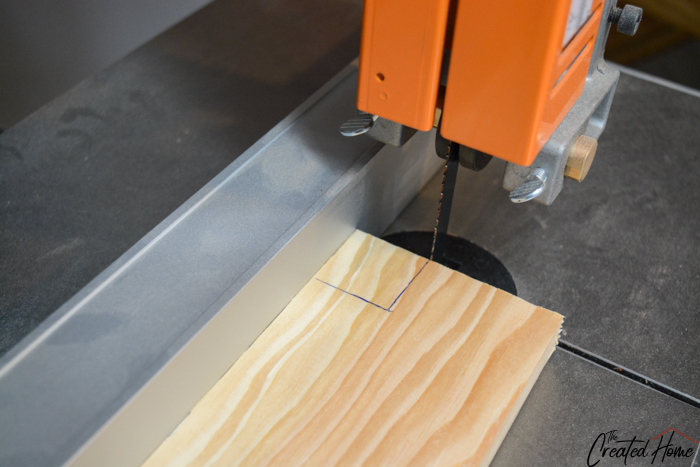
You will need to cut notches in the four corners for the 1 ¼” posts using either a jigsaw or a bandsaw.
Step 6:
Basically repeat steps 1-5 for the top step. Only this one will be 6” shorter, or less deep, and 6” less wide. Mine is also only 5 ¾” high, so I ripped the 2×10 supports to 5 ¼”, but if you don’t have to do that, then don’t.
 I chose to angle one corner of this step. You can skip this if you are more sane than me. If you like the look you’ll want to miter the short and long sides as you did with the bottom step, but leave that little short 6 3/8 section cut at 90 degrees. As you can probably tell, assembling this section proved a little more tricky than intended. I ended up screwing a little nailer piece against the bottom so I could nail through the face of that angled section. I then did the same for the short side.
The trickiest part of the top step is leaving room to get the drill or nailer in there. I recommend checking your spacing when adding the little support strips that hold the top and bottom parts of the step together. If they are too close to an edge it will be hard to get a drill in there. You can also use a right angle attachment like this. I do recommend gluing all joints first. Please note that you will need to assemble this in place – that is on top of the bottom step – as you will need to build around that back right corner post.
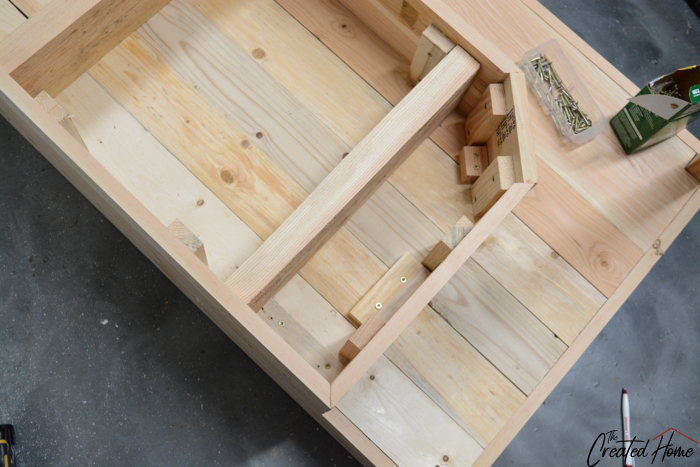
Add the 2×6 support pieces to secure everything down and support the top step.
Note that the far left support in the diagram above sits against the back post. I added a bit of scrap from a post cut off to the front both to support that corner and to add nailing support to the 2×6.

Once the step is fully supported add the top boards, adjusting the width of the last as necessary for optimal fit.

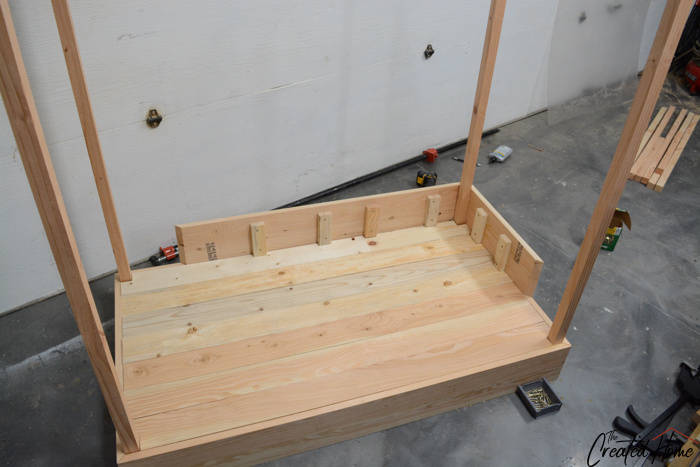
Step 7:
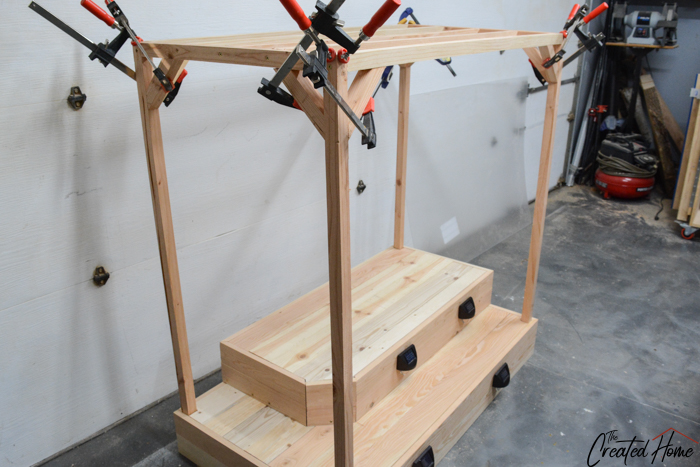
Apologies for the amount of actual work in step 6. That was totally unfair. The good news is, you are nearly finished! Cut (and rip the rounded corners off of) 5 sections of 2×2 to 44”. This assumes that you trimmed your posts to 1 ¼”, so double check the measurement. Glue the ends and use clamps to help you set the front and back top long pieces between the post. Clamp a couple inches down with just enough pressure to hold the board in, then screw it in place. Or get a friend to help. That would probably have been easier, but it was like 2am by this point when I was building it. Screw in place with your 2” (or thereabout) screws.
Hold on to the other three boards you cut for just a second.
Step 8:
Repeat the process using 20” long boards for the side pieces. Once those are secured with glue and screws attach your other three boards long ways as supports for the roof. No, it doesn’t need three. It just looks good, and gives you a middle point to hang the lantern.

Step 9:
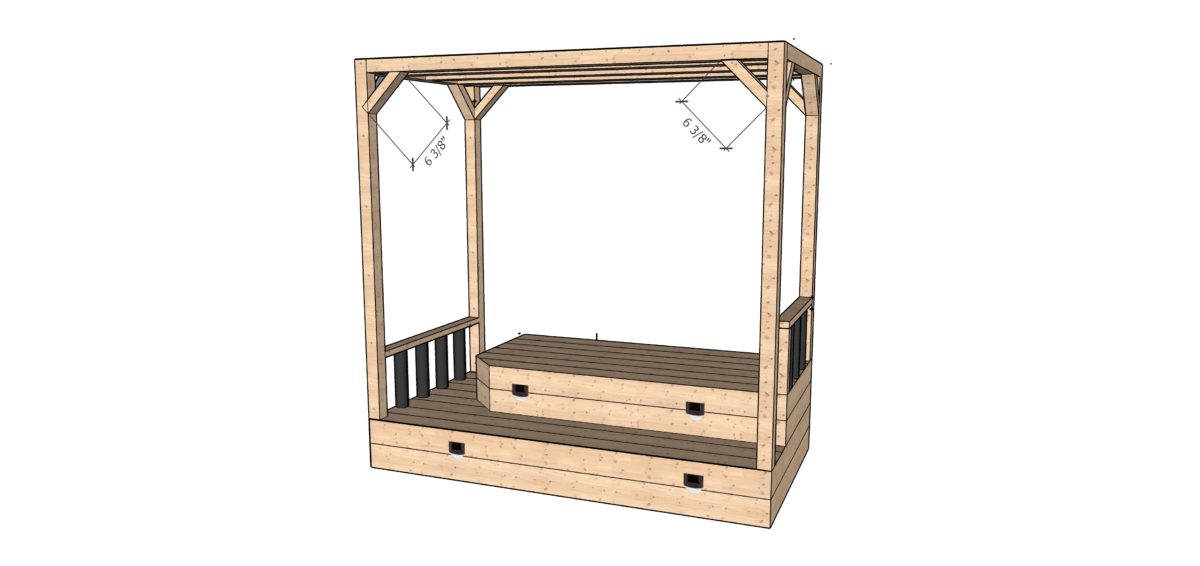
Rip a long section of 2×2 and cut it into 8 pieces to 5 3/8” long, with miters on both sides.

Fit them in the corners with glue. I used Titebond’s really thick glue for this and all other end grain glue ups. It’s a good idea because it doesn’t soak into the grain, and in this case it pretty much held on itself. I used clamps merely to keep them from falling while they dried. Because I didn’t have my brad nailer with me. But you don’t need to do that, you can just nail them right away. Simple, eh?
Step 10:
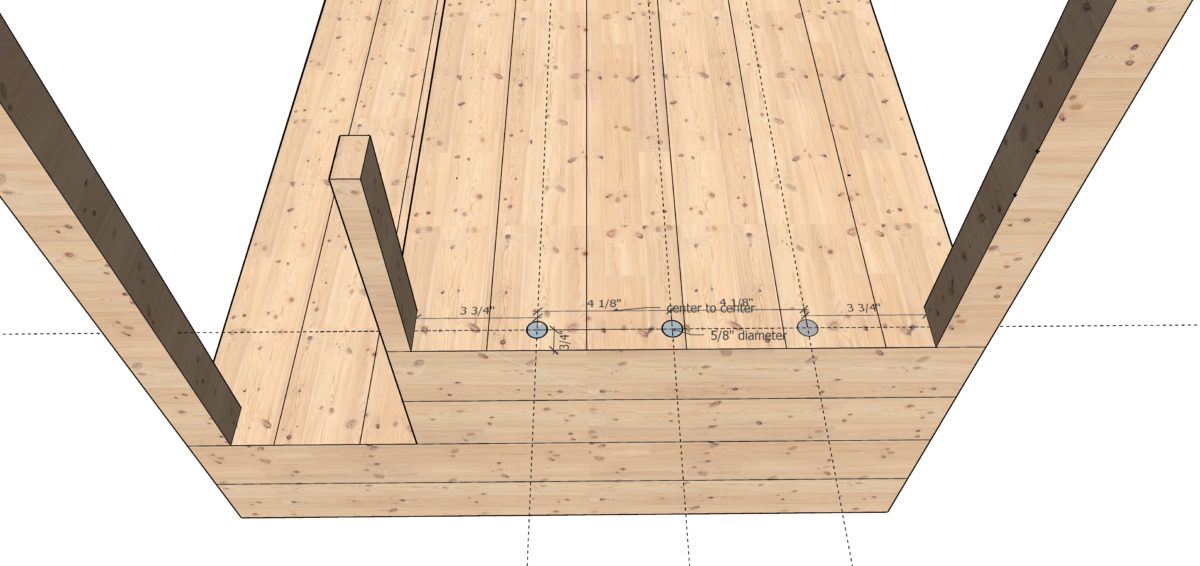
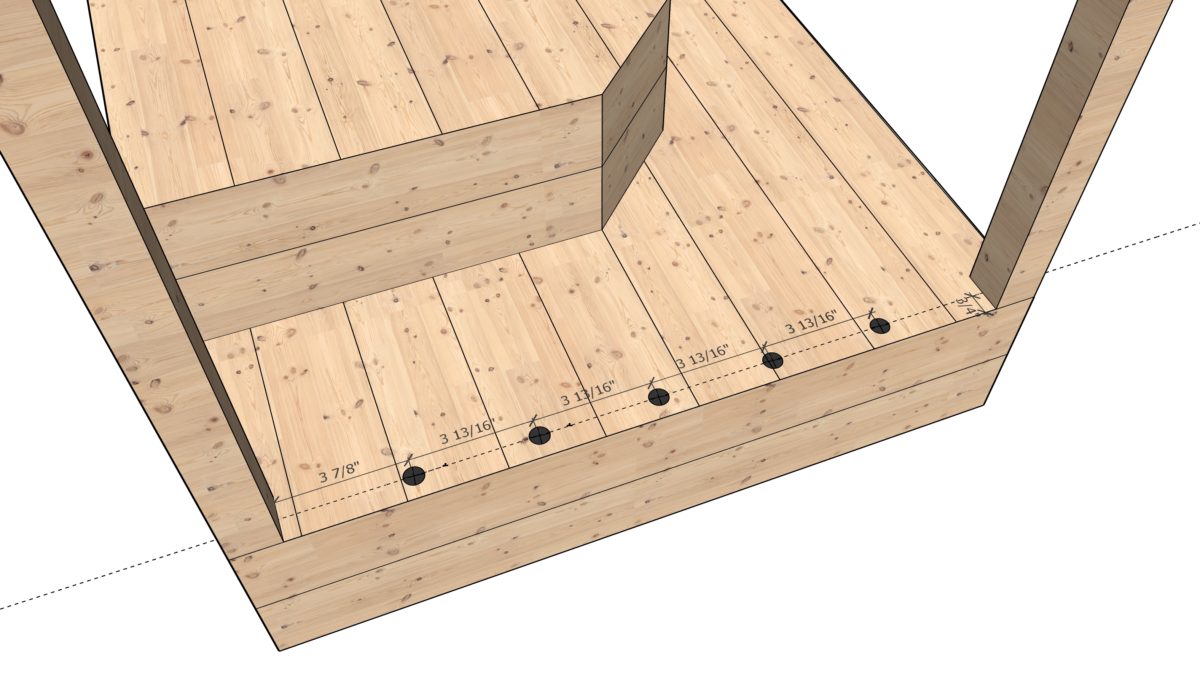
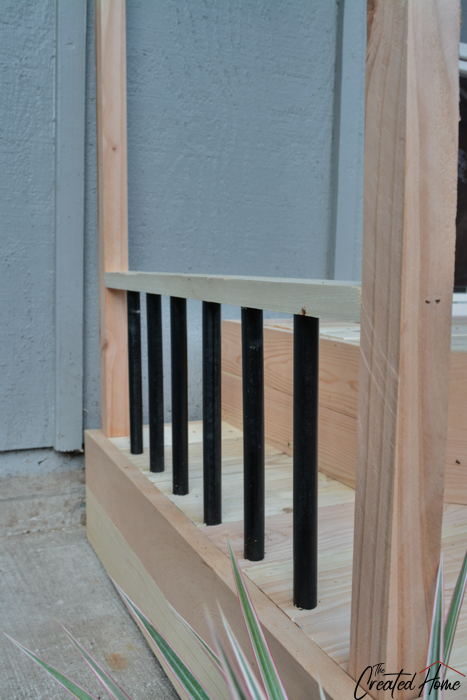
Build the railings. The railings are made from 1 1/4″ x 3/4″ boards and 5/8″ dowels (painted black). I laid out where each rod would be, then drilled holes in the top and bottom sections using a 5/8″ forstner bit. I just eyeballed it, so I few have some wiggle room up and down. Just be sure not to drill out too much or they won’t stay at all!
Here is a diagram of how my railings laid out. Double check yours before drilling.
Right side, top step:
Left side, bottom step:
Finished railing!
Step 11:
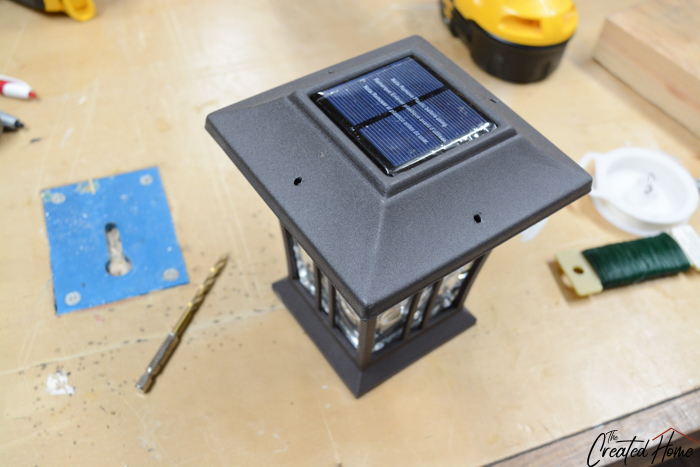
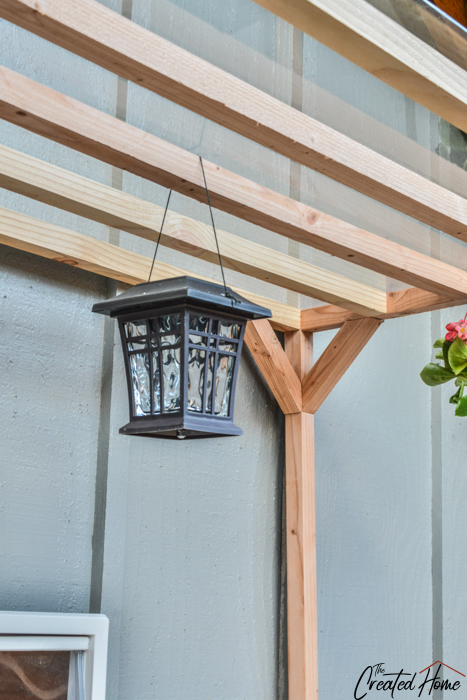
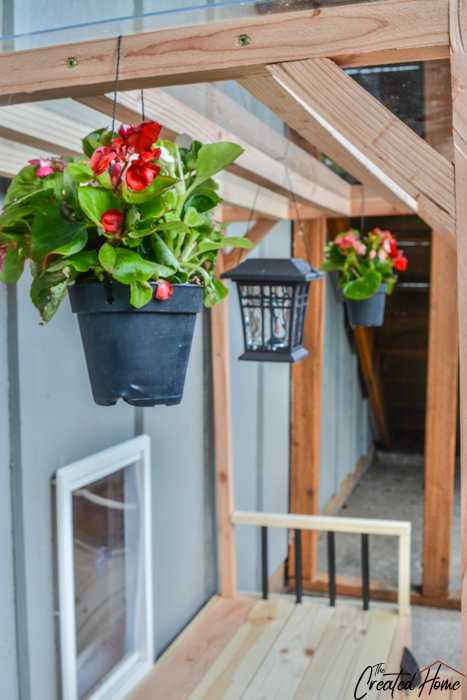
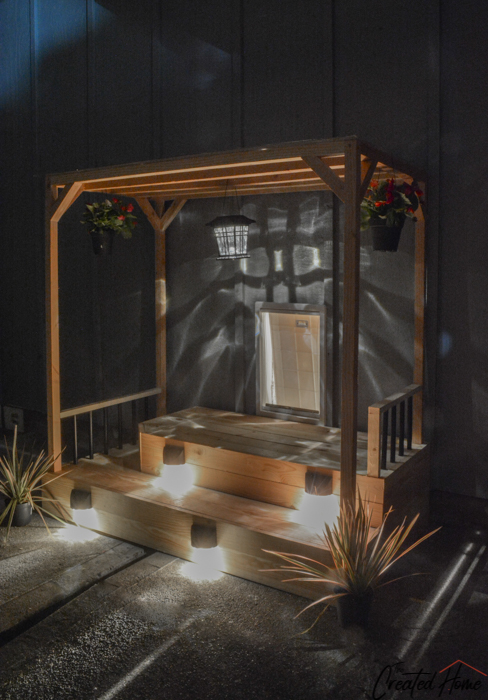
Add deck lights, if desired. I just slapped them on wherever it looked right. The lantern is formed from a $5 pathway light. I snapped off the bottom, drilled holes in the top, and then looped string through and hung it.
The solar light picks up enough energy though the acrylic to light up at night.
Step 12:
I picked up a couple really cheap plants just for the planters, replaced the plant with petunias, then drilled holes in the planter and hung them from the roof structure. You can use a screw hook, or loop them around the 2x2s.
Step 12:
Attach the roof. All I could find in stock at my local Home Depot was a 3’ x 4’ acrylic piece, so I took a chance and cut it on the table saw. Fortunately, it worked like a dream. Because I started with a longer piece I let this overhang by about an inch and a half. If you get the 24×48” piece there won’t be an overhang, but you won’t have to cut it. Drill holds in the acrylic where you will screw it down to the 2×2 structure on top. I think my bit was somewhere around 3/16 ish, but honestly, I don’t remember. You’ll just need to drill first to keep the acrylic from breaking. After that you can screw it down to the structure, being careful not to over-tighten the screws.
Sorry I don’t have a picture of that process.

You can add some step lights if you want to get really fancy. (And who doesn’t?!) These ones at Home Depot were the smallest solar lights I could find. I’m sure there are others, but these worked just fine. How cool does that look in the evening?!
And here’s what it looks like during the day:
That’s it! I’m so sad that I didn’t get the chance to stage this with my dog using it. Unfortunately the house we were working on is an hour from our own home, and I sent her back early with my husband the day I photographed this because she had taken to digging up all of the new landscaping. She’s a bit of an imp.
If you build one of these, shoot me a photo with your dog on it. Because that would be so much better. As always, happy building!
Doggie Door Deck – Free Woodworking Plan.com
Monday 8th of February 2021
[…] you have a dog, you may need a doggy door. If you have a doggie door, you may need to build a doggie door deck. At the link you will find full step-by-step instructions to build your pooch his own […]
20 DIY Dog Door Projects - How To Build A Dog Door
Tuesday 12th of January 2021
[…] Click for more details […]