
Bathroom vanities can cost a LOT Of money. And, honesty, many of them really are not built that well. So when we recently remodeled our master bathroom I designed and built my own vanity. I call it the Cascadia Vanity, and I’ve got plans and a tutorial so you can make your own.
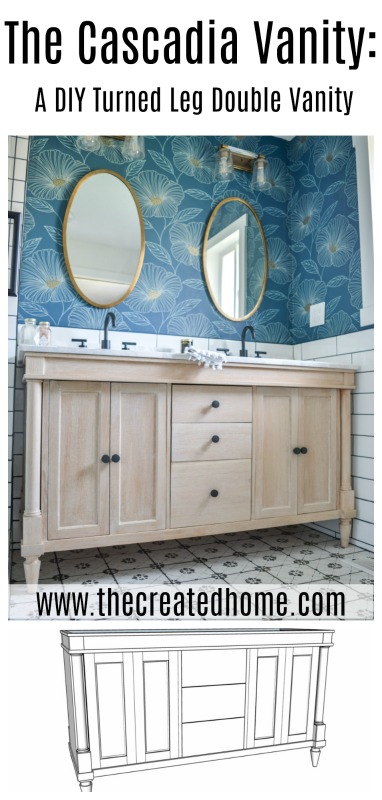
This thing is a beast. It was a personal challenge on many levels, with hand cut dovetail drawers out of wood milled from rough slabs, mortise and tenon joinery, and custom cut trim work. You can pick and choose how you would like to build it – just because I use one form of joinery doesn’t mean you have to.
The downloadable plans are here.
The build video – which happens to be the most detailed tutorial build I have done, is here:
Most of what is below is the video in written form, with a few extra pointers and links to help you in the build process. This will not be a photo heavy post, as the video shows everything discussed in the tutorial.
The list of materials and tools is extensive. I link to the products I use personally (and sometimes to one on my Christmas list). You won’t necessarily need them all, depending on how you choose to build this…but I won’t kid you – it is a long list.
*As an Amazon affiliate I earn from qualifying purchases. This disclosure pertains to all the links in this post. You can learn more about affiliate links here.
(There are some other links in there, too, but mostly I’m too lazy to make them affiliate links.)
Materials
Ruler for marking notches, etc.
Cascadia Vanity Legs
Hardware
10mm brad point drill bit
10mm mortising chisel (mine is part of this set)
Wood glue
Ca glue and accelerator
Dewaxed shellac flakes
Denatured alcohol
Liming wax
Rags
Gloves
Ball bearing full extension drawer slides – 16” (x3)
Door hinges
Tools
Miter saw
Table saw
Featherboard
Pocket hole jig if desired
Drill press
Saw (I use and recommend a dozuki, a dozuki dovetail saw, or a European dovetail saw)
Chisel set (There are a ton of options, but I’ve linked the ones I have for reference)
Router and Router table
Router bit for cutting tenons (3/4” works great)
Router bit – ¼” round over
Shoulder plane
Clamps (variety from small to long pipe clamps)
Band saw
Set up blocks (can also use wood blocks cut to thickness)
Plunge router & guide
Jigsaw
Card scraper
Rockler Bar Gauge
Planer (maybe you will need it, but maybe not)
Small speed square
If you will be cutting dovetails:
dovetail marker
marking gauge
coping saw (if you prefer)
wood mallet
*As with any tutorial it’s up to you to follow best safety practices. Keep any body parts you want to keep well away from spinning blades. Wear ear, eye, and breathing protection. Use push sticks and featherboards. Use common sense, be safe, and as my grandfather would say “never take your eyes off the blade.” (Actually, I never did woodwork with my grandpas – that is my husband’s saying, but it sounded cooler that way.)*
A brief note about those plans:
I choose to build this out of 4/4 quarter sawn white oak lumber. It’s milled to 7/8”. The plans are designed for ¾” lumber, so you’ll need to make adjustments if using any other dimensions.
The Carcass:
The basic frame:
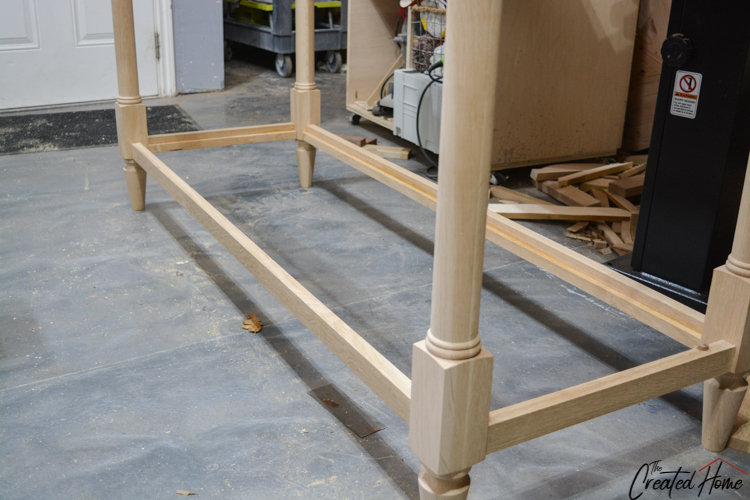
Begin by framing the carcass. I cut the top and bottom stretcher boards for all of the sides to length first, then ripped them to width. The top boards are wider than the bottom, which is detailed in the plans.
The boards are joined to the legs via mortise and tenons. Could you use pocket holes? Sure thing. But for a seamless look, I like using mortises, and it’s really more accessible than you might think.
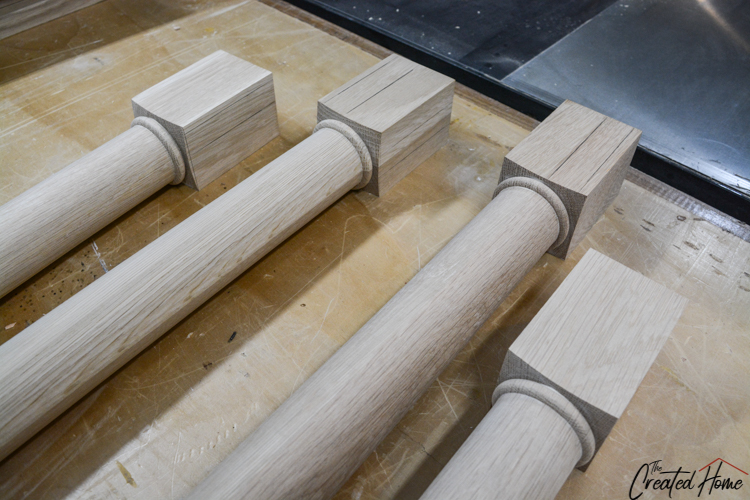
The Legs:
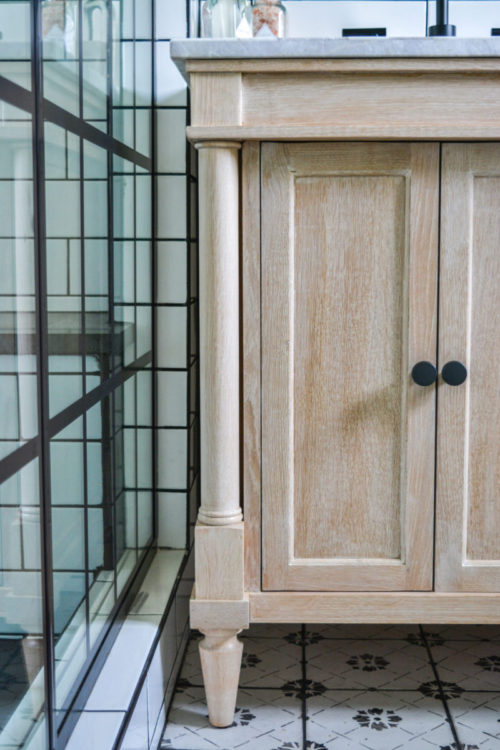
Let’s take a moment to talk about those legs. I designed these legs for Highland Manor Wood Products, and they did an absolutely killer job bringing them to life. The finished product may look like a leg and foot, but it’s actually all one leg. You can find that on their website under “Cascadia Vanity Leg.” And you can use coupon code TCH10 to get free shipping on anything on the Highland Manor website.
The Mortises:
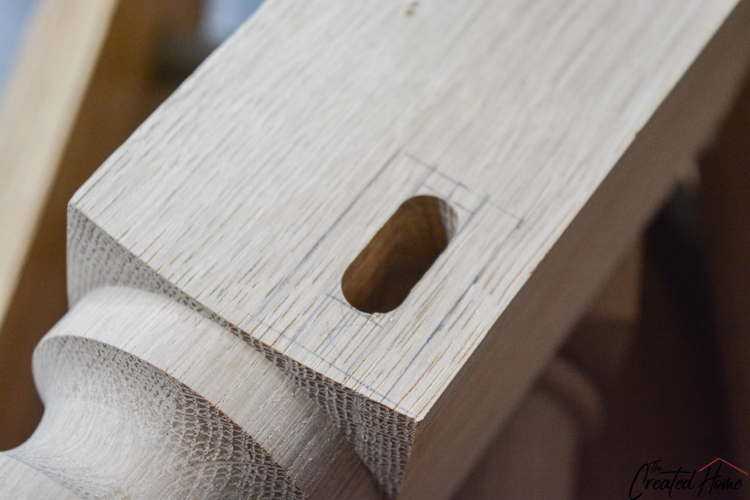
To create the mortises I use a combination of power and hand tools: Drill out the mortises using a drill press. Clamp a piece of wood to the table so that each of the legs would drill out at the same spot. Make a series of holes close together and at the same depth. Then carefully, in multiple passes, run the drill bit along the length of the mortise, clearing some of the material left behind.
I used a mortising chisel to clear the remainder of the material and square the ends. Make sure that your bit and your chisel are precisely the same size, in this case 10 mm.
These are haunched mortise and tenons, meaning they have a short tenon at the end of the regular tenon that lends strength and rigidity to the joint, keeping it from twisting over time. I cut the mortise for haunch using a dozuki saw and chisel.
About Mortise and Tenon Joinery:
Let’s pause for a moment. Here’s what I like about using mortise and tenons: 1. I confess, I feel some pride of craftsmanship and the idea of not needing mechanical fasteners is appealing to me. But, 2, a mortise is actually rather forgiving. The tenon shoulders cover the mortise completely, so that a snug fit is what is needed, not perfect lines. The haunch is located at the top here, but even then any small gaps won’t show, because the vanity will be on top. All that is certainly NOT to say it’s okay to be sloppy or whatever. You want the best fit you can get. But don’t overstress it. I like a forgiving wood joint.
The rest of the haunch clears away simply and cleanly using a chisel.
The Tenons:
To cut the tenons I use a router and table set up. I set the bit height so that the tenon that is left after cutting both shoulders fits snuggly in the mortise. Cut a practice piece or two first, and then don’t mess with the settings.
I like to cut the haunch piece out of the tenon using hand tools as well, being a bit conservative on the first cut and then shaving back for a good fit. One other tip is to angle the shoulder just a bit so that outside edge of the tenon shoulder sits as flush as possible against the face of the opposite joint. It’s a small adjustment that helps clean up the final joint just a bit.
The first fit likely won’t be just right, and in this case too snug is better than too loose. One trick is to pull it back apart and hold the tenon up to the light. The areas where the wood is shiny are where it is fitting too tight and needs to be skimmed back a little. For this I like to use a shoulder plane. I have an inexpensive one that I picked up on Amazon, and it worked great. It’s also a very accessible hand plane if you are new to using planes. The shoulder plane is great for cleaning up tenons because the mouth of the plane goes across the entire sole (or base) of the plane, allowing it to get into that corner exceptionally well.
Lower mortise and tenon joints
That is how I created the mortise and tenon joints for the top boards. The bottom boards were not as wide, and for those I did not do a haunch. After carefully laying out the cut lines I created the mortises on the drill press, like the upper joints. I also cut the tongues the same, on the router table. But in this case I wanted the top and bottom of the tenons to have a shoulder, or an edge that would rest against the face of the leg when the tenon was fitted in the mortise. To mark those out I simply held the tenon up to the mortise and marked where the shoulders should be. I cut the first one on the band saw, just to try it out. But after that I cut all of the others with hand tools, which I found to be more precise and not all that much more time consuming. Besides, I had to go back and adjust the fit after cutting out the tenon anyway, so I don’t think it really saved much time.
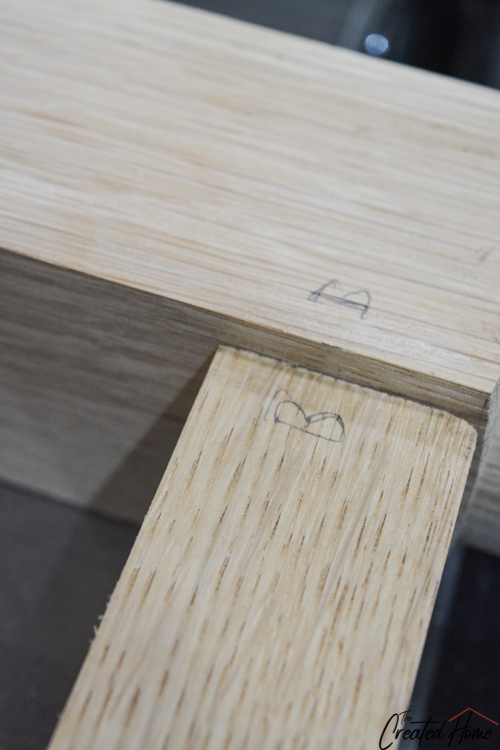
One last tip for cutting the mortise and tenons: Since the tenons are cut to fit specific mortises you’ll want to label which go where. I labeled each mortise and tenon with a letter so that I wouldn’t mess up the actual assembly. Once the mortise and tenons were all dry fit and ready to go the carcass was ready to be put together.
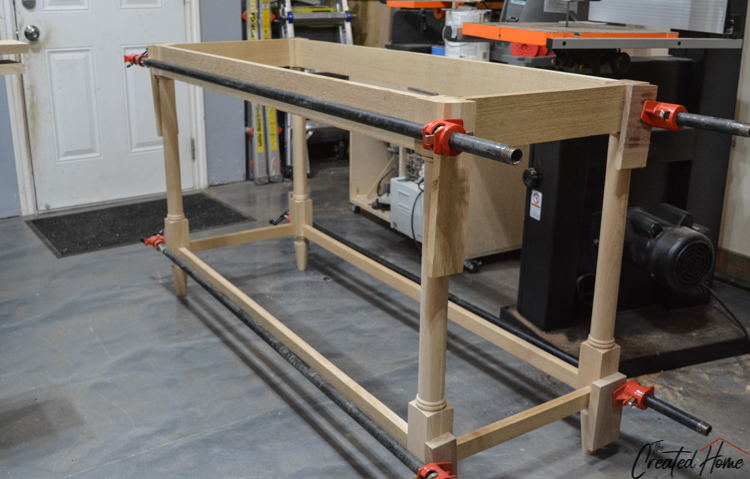
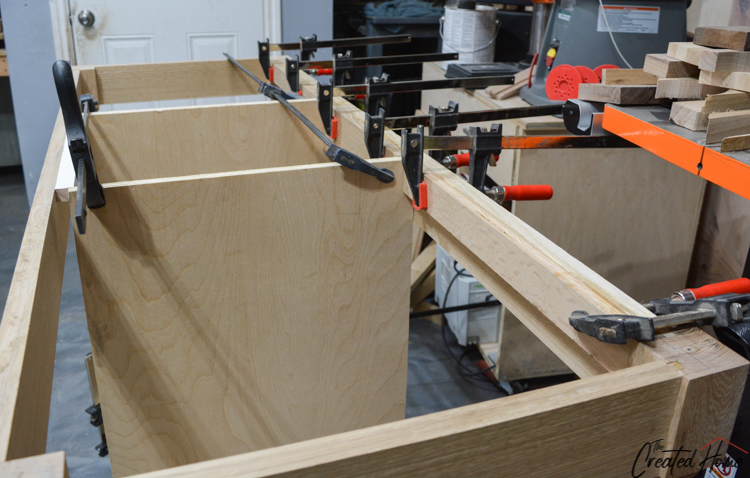
Gluing up the Frame
Have your glue up materials ready and be sure to use a block to spread the pressure from the clamps and protect the vanity wood. I left the side panels in clamps for a day before attaching the middle stretchers with pipe clamps.
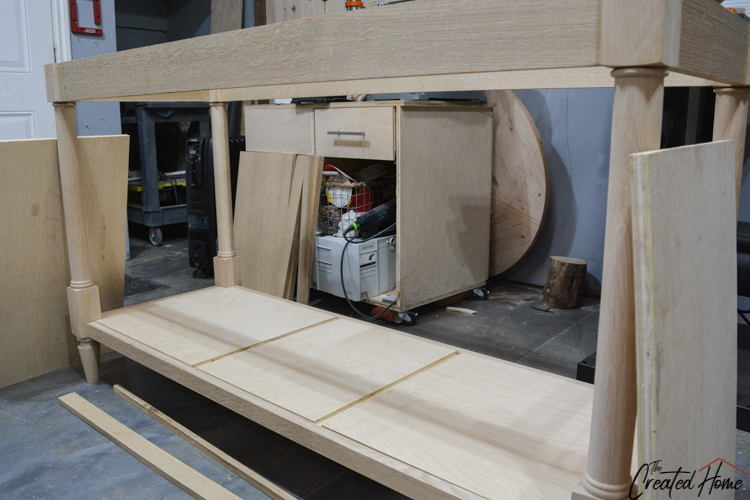
After the carcass is assembled I added supports to the bottom stretcher to hold the base plywood piece in place. There are probably plenty of other ways to go about this, but I found this to be a pretty simple way to go. Set up blocks or a piece of wood cut to the same height as the plywood, are great for ensuring that the shelf left for the plywood base is the right height.
Before installing the bottom board route some dados for the divider pieces. Again, you can use pocket holes. It’s just a matter of the look you want. I also am not a fan of how difficult it is to make sure the board stays precisely in place while drilling out those holes, and find that this works much better and just as quickly. The corners of the base board will have to be notched. I used a jigsaw, and as they will be covered later it’s all good if they are not precisely precise. Fit the bottom board and glue in place.
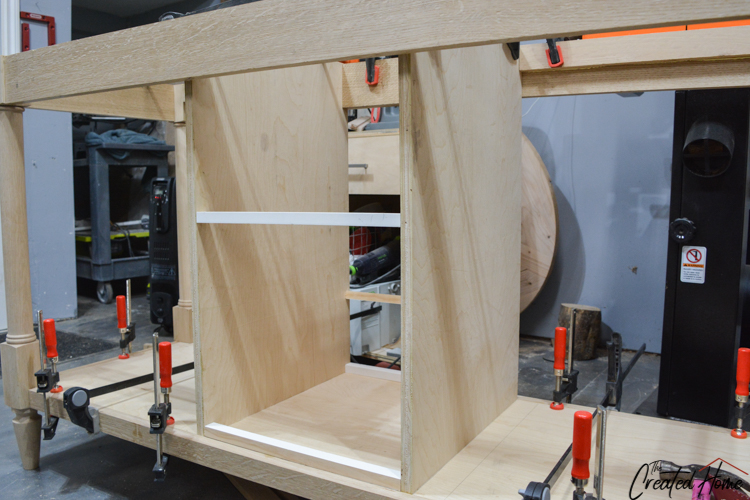
Backer Boards
Next, add backer boards to the top stretcher. The middle divider boards do not go all the way to the front face of the vanity, and that gap is filled with a backer board that also serves as a top ledge over where the drawers and doors open, if that makes sense. You can use one solid piece or use scrap pieces, either will work just fine.
This is also a good time to square up your three sections with some spacers. The ultimate goal is to make sure that the drawer section in the middle is square. It’s darn near impossible to fit drawers in an out of square space, so spend some time on this.
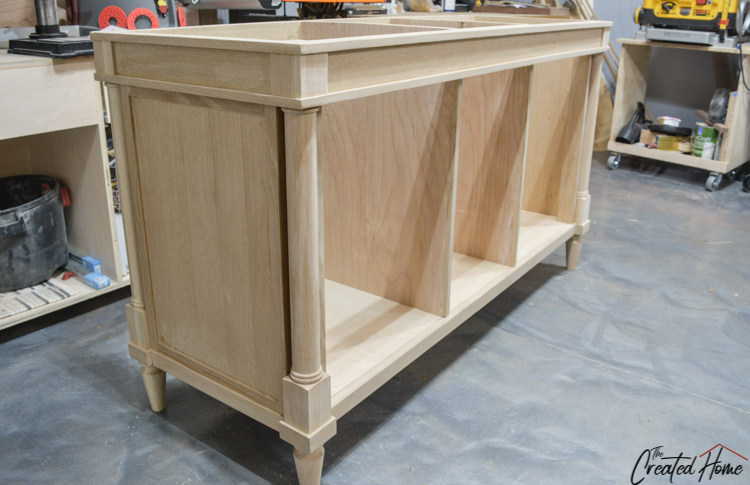
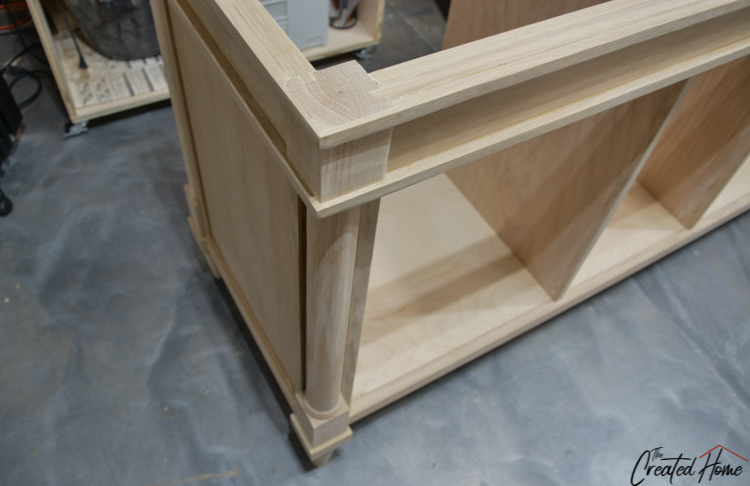
The End Panels
To create a pocket around the back side of the legs I glued two pieces together in an L shape with the overlapping or longer piece being the one that is visible from the front. That’s probably confusing, but stay with me here. That end grain on the side will later be covered with trim.
Clean up the L shape leg brackets. A shoulder plane and card scraper work well for this. The panels themselves I cut from ¾” quartersawn oak plywood. I attached the L brackets to the panels with glue, and after some drying time, glued the panels into the sides.
The sides will later (or right now, whichever you like) be trimmed out with 1″ wide oak at about 3/16″ thick. The trim covers the edge grain that shows when you build the panel, and gives is a more layered look.
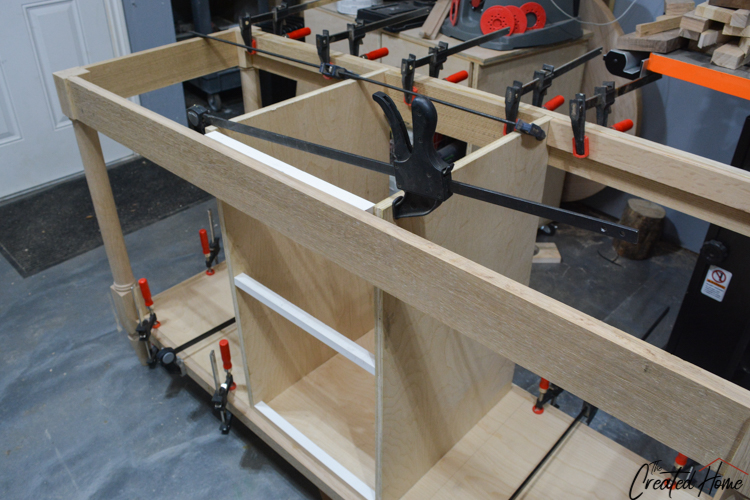
Squaring up the vanity
Hopefully everything is coming out square, but this is the point at which you will want to check that and do any work necessary to make sure the three sections are as square as possible. That is especially true for the middle drawer section, as drawers are exceptionally difficult to fit in out of square spaces. I like to use scrap wood cut to the same lengths when I build a space for drawers, and keep them in place to ensre nothing moves. Then I use a Rockler Bar Gauge to insure that the cab is the same width front to back and top to bottom before moving on to the next part of the build.
You can attach spacer boards at the front of the sections behind that front ledge and in front of the backer board to hold everything in place. Just be sure that they will not interfere with your vanity top.
The Doors
This tutorial will not be enough if you have never built a door. To learn how to measure for inset cabinet doors, check out this video by George Vondriska: https://www.youtube.com/watch?v=8MUqiQd6ncw
The plans should cover the correct sizes, but it is always good to double check after your frame is built in case there is any variation.
Here’s another great tutorial video: https://www.youtube.com/watch?v=IeSXeYamODk
Doors consist of stiles and the rails. The stiles are the vertical pieces, the rails are horizontal. The panel in the middle should be floating, as in set into grooves cut in the stiles and rails, with a tiny bit of space left over so the panel can expand and contract over time. This is obviously less important with plywood, which makes a great insert material, but is still the best way to construct long lasting doors.
My inset panels are out of solid oak so that I did not have to purchase plywood. I’m also not sure that I could have gotten a hold of any quartersawn oak in 1/4″ material. Fortunately, I have a bandsaw that could resaw the pieces down to the right thickness. Whatever material you use for this build, make sure you will have the material for the inset door parts.
Cut the stiles and rails to size according to the plans. Find the mid line and cut grooves along one edge grain of each to fit the inset panel. The depth should be 1/4″, and the width is dictated by your inset material.
Cutting Tongues for the Rails
The rails need to have tongues cut into the ends, which will fit into the grooves you cut in the stiles. Cut these on the router table by setting the bit height. The same 3/4″ bit you used for the tenons is fine. Dial this in on some scrap wood before cutting the actual rails. The tongue should fit snuggly in the rail grooves, but still be able to pull apart on a dry fit. Check the video to see what this looks like.
You can now assemble your cabinet doors with glue and clamps.
The Drawer Faces
The drawer faces will be inset in the panel and should allow for a 3/32″ reveal around all four sides. Double check your space before cutting according to the plans to be sure that your reveal will be correct. If the bottom drawer is too wide to create the face out of one board, as mine was, you will need to glue up two pieces to make a wider face.
Trim Work
Trim work is what gives this vanity a more layered, visual interest. It ups the wow factor. I’ll cover this in six sections.
Divider Faces:
Remember me saying the dividers don’t go all the way to the face? You want those to come to 3/8” shy of the front, which lines them up with the brackets that wrap around two sides of the legs. For that reason, and because the dividers are made of plywood, they need to have strips of wood attached. I ripped some more oak so that the face grain was to the front and glued them on.
Side Panel Trim:
These are 3/16” thick strips, 1” wide. They simply frame that end panel, covering the end grain. Nice and easy.
Top Panel Trim:
These next are 5/8” wide, and you’ll want to think through how you cut them so that the most visually interesting grain shows. With this material, I want the face grain to be what shows, so I cut them such that the 5/8” wide face will be out, and the edge grain will be at the top and bottom. It is easy to get that mixed up, so check that carefully.
That will line the top and bottom of the top panel and will also wrap around the sides. Where they wrap around the legs they will reduce from ½” to ¼”, and for that I chose to cut it out of one solid piece. The alternative is to miter the pieces together.
Here is how to cut the notches for the top face trim:
You’ll want to reference the video on this one as the description itself is likely to just be confusing!
Cut the trim piece too long so you have some wiggle room. The ends of the piece need to be mitered to join to the trim that goes around the side. Cut or leave room for the miter, then hold the piece in place and mark back to where your notch needs to start.
Using my small square, I marked out the section that needed to be removed to notch around the top of the leg. The piece needs to sit flush from the long straight run down the vanity to around the front of the leg, I actually needed to remove slightly under ¼ – 7/32 or 1/32 under a ¼” for mine. Cutting a piece of scrap wood to thickness would work great for this. Set the blade height to precisely the depth of cut you need and test that depth on a piece of scrap wood to double check your work.
To cut the notch I set the total distance of the cut with the fence, clamped the piece to a piece of wood that was attached to my miter gauge, and ran the piece over the blade, moving it slightly over with each cut until all of the material was removed. If you have a box blade this should leave a smooth notch. If you do not you can carefully run the piece across the blade to smooth out the cut. Again, watch the video to see how this works.
Fit the piece on the vanity, and if it needs a bit more removed work your way back carefully until it fits like a glove. I found that it was usually easier to cut the miter at the end after creating the notch. A word about the miter – due to the size of the piece you will likely find that the miter saw is a bit too much power. After some trial and error I found it best to hand cut these using my little 3” square as a guide.
There are a total of 12 notches that need to be created to wrap the top trim. It’s a bit tedious, but not bad once you get into the rhythm of it and it looks like a million bucks.
Bottom Leg Trim:
The base of the cab is wrapped in 1½” wide trim at ¼” wide. It’s redundant to add a piece along the bottom, so this material will warp around the legs only. I cut these small pieces by clamping longer 1 1/2″ wide pieces at the right thickness to my miter saw fence and cutting them. I didn’t go with a hand saw here because the inch and a half width made it a bit too difficult to be consistent. Now, those little pieces will fly into space if you don’t have a way to stop them, so here’s my ghetto solution: Hang a towel from the back of the saw so that the piece hits the towel and lands right there.
Be sure to use clamps, not only to keep the pieces steady, but to keep your hands well away from the blade!
I glued the pieces on with CA glue and accelerator. It cures in like 30 seconds or something and allowed me to skip trying to clamp up those small pieces. Check this out in the video as well.
Bead Moulding for Doors:
This is another area that you will want to reference the video to see in some detail. I decided to add a small piece of bead molding to the inside of the doors to add visual interest. The tricky part is that I wanted it to be out of the same material, so I needed to make it myself. And this is where I’m going to walk you through that process:
To create this I took some scrap pieces leftover from the build. Put a ¼” round over bit on the router, which is set into the table for this application. Run the wood along this bit before cutting it down to size because ultimately, the pieces will be too small to run along the bearing. You should be able to cut a single piece along both sides for this project, then take the piece to the table saw and cut both sides to ¼” dimensions.
Cut a bunch of those out of scrap wood, and then work on the process of fitting them into the door frames. These pieces needed to be mitered together, so I cut each piece close to size, then marked where the miter needed to be.
And, you guessed it, with these little pieces of trim it was back to cutting by hand. Again, the dozuki saw works best for this. When cutting the pieces I found it helpful to brace the trim piece against a scrap piece.
Glue the final pieces in place. CA glue works well here as well.
The Drawer Boxes
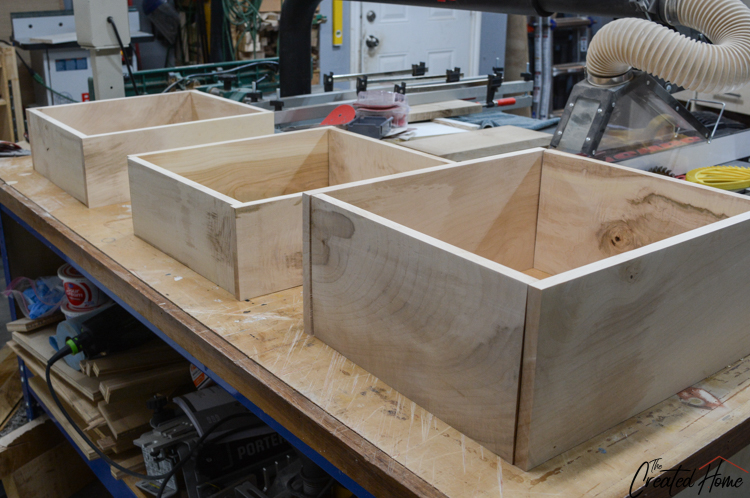
Just to make things a bit more complicated I decided to mill the drawer box material out of rough cut maple slabs from a tree my father took down a couple years ago. There’s a little footage of that in the video so you can see what it took to make that happen, but you definitely shouldn’t feel like you have to go grab a slab of wood or something.
The drawer boxes should be 1” less than the carcass opening in width. This is to accommodate the drawer slides. You can construct them out of what you like, and use a number of different joinery methods. Honestly, pocket holes work great. Because the milling apparently wasn’t enough of a challenge, I decided to handcut dovetails to form the boxes.
Here’s a brief overview of how to hand cut dovetails. Feel free to skip over this part if you would like to go a different route:
The video shows this at a really high rate of speed, which isn’t helpful if you are new to dovetails. So here are a couple of dovetail videos that are very good:
Anne of All Trades:
Matt Estlea:
Paul Sellers:
Really, I’m not sure this is necessary if you watch those videos, but if you happen to want to know my process, here’s how I do it (as shown in my video):
Set a marking gauge to just barely shy of the width of the board and score all around the board. Lay out the dovetails. You can use a dovetail marker for this or lay it out mathematically. Dovetails consist of two parts: Tails and pins. The tails are the dovetail shaped parts, and the pins are the part that fits between them. Cut the tails first, then mark the pins based on the tails and fit them accordingly. I use my dovetail dozuki saw to cut the tails and pins.
To clear out the space between them I use a chisel, first making a gouge well away from the scribe line, and taking a little material at a time. Many people prefer to use a coping saw. Personally, I just prefer this way. The material normally chips away pretty easily, unless you use crazy curly maple that you milled from rough slabs like I did. (Ahem, don’t.)
Once the tails are cut I hold them to the board that I’ll cut the pins from and transfer the tail outlines to that board. The pins are cut to fit the tails. Cut to the inside of the lines. And clear the material much as with the tails.
Once I’ve cleaned up the pins I dry fit the two drawer pieces together. As with the mortises we were fitting at the beginning of the build, shiny spots in the wood will help you see where the wood is rubbing and where you will need to do a little more chisel work.
Assembling the drawer boxes:
When all of the box sides are cut I mark a line for the shelf bottom groove on every side, then cut the groove to fit a piece of ¼ ply using the table saw. My fit certainly wasn’t perfect, but it is strong.
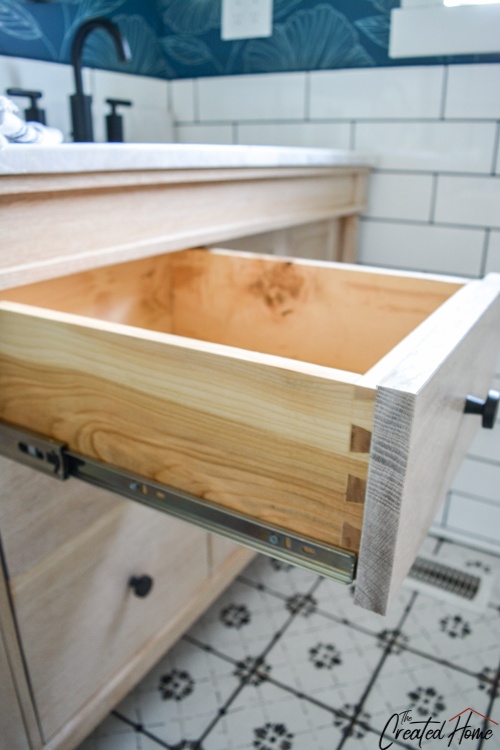
How gorgeous is that curly maple inside the vanity?! Those drawers are strong, they are attractive, and they are kind of my pride and joy at present.
Finishing the Vanity:
I’m really excited about this finishing method. I learned about the shellac part from Gary Rogowski at the Northwest Woodworking Studio, and it has quickly become my go-to finishing method. The liming wax part, while certainly not my invention, was something I arrived at after trying a few different ideas. I happened to have some of this on hand and when I tried it the heavens opened and angelic choirs sang and somewhere in the world people put down their weapons and there was peace.
Okay, maybe not. But it looks good, and I’ll take that.
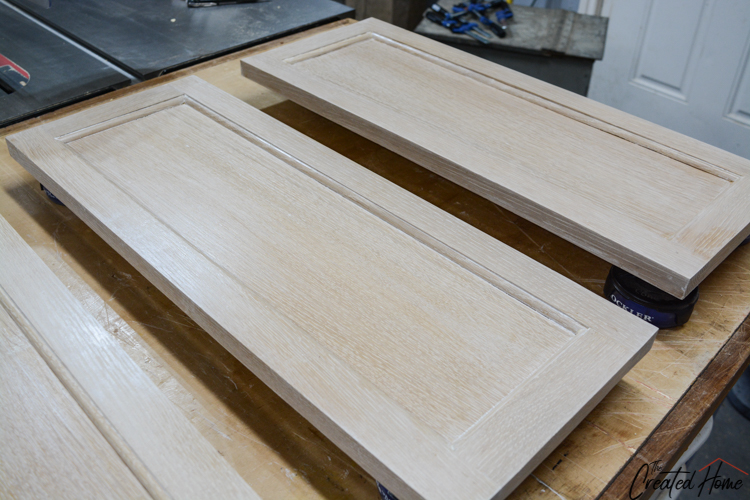
Using a rag (and gloves) I rubbed the liming wax into all of the surfaces. Trim, cab, inside, outside, up, down, doors, drawers. But not the drawer boxes. So, almost every surface. The door on the right has wax, the one of the left does not.
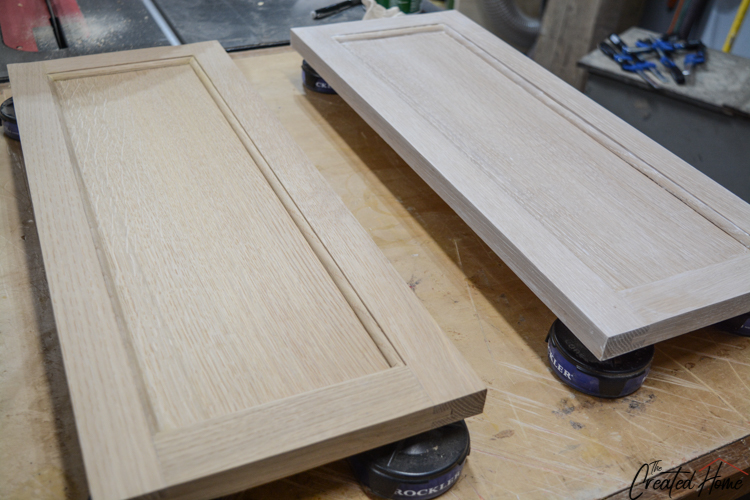
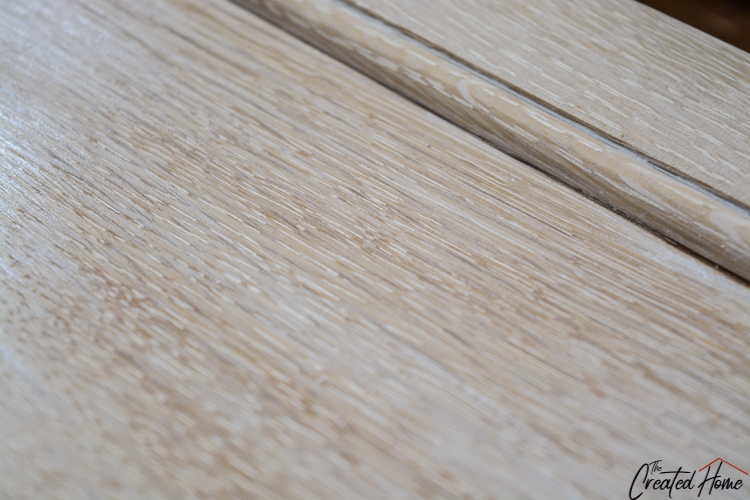
You can see how the liming wax really works into the grain and gives it a sort of whitewashed look that also protects the wood.
The Shellac:
Immediately after I applied shellac to every last surface (drawer boxes included this time). As I say in the video, this is not the shellac you pick up at your local home improvement store. These are dewaxed shellac flakes. I buy the flakes and the denatured alcohol they are mixed with from Shellac.net. Mix according the the directions. After letting the mixture sit for a day or so I strain out any little bug parts and it’s ready to go. The shellac can be built up in layers and dries incredibly fast. About 30 seconds, give or take. That meant I could apply the finish, then go back where I started and do it all again right away. My hope is that the wax and Shellac combo will protect the vanity well in a wet environment, and that they will also forestall natural aging of the white oak. Time will tell.
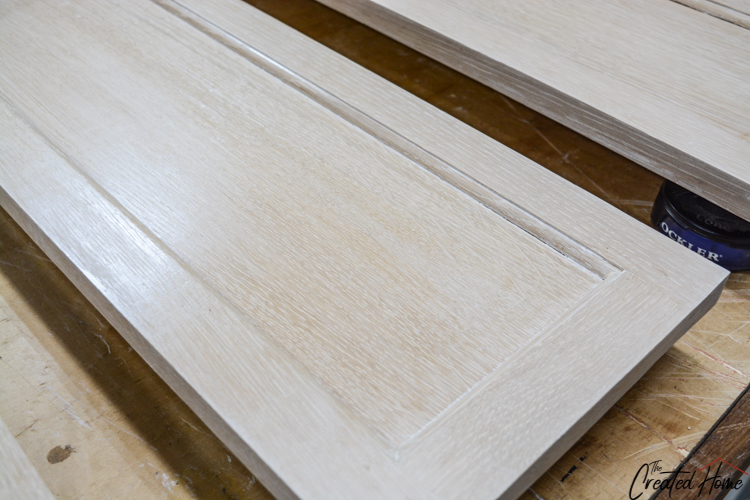
Here’s another look at the doors pictured above with shellac over the liming wax:
I applied a few layers of Shellac, giving it a light sanding with some 400 grit paper after the first coat.
Done!
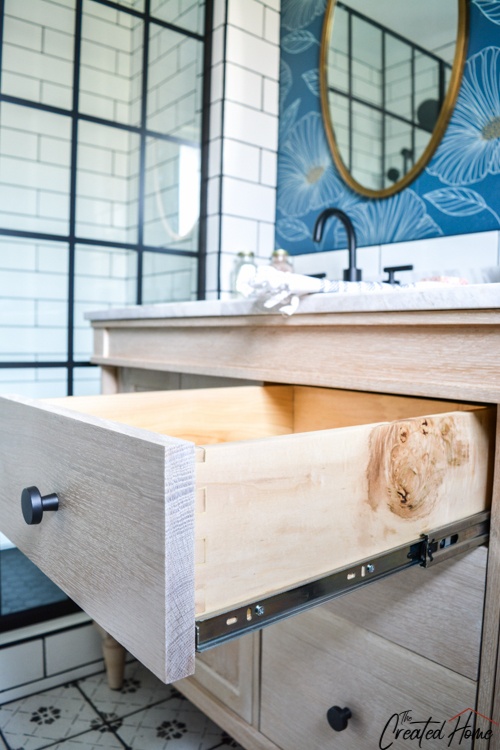
After applying the finish we moved it into the bathroom and I attached the doors and drawers. I will say that we ended up going with a different top than expected, and as a result had to cut down the middle dividers. You will want to check yours, and if you do end up needing to cut out a bit of those middle plywood dividers it will be just fine.
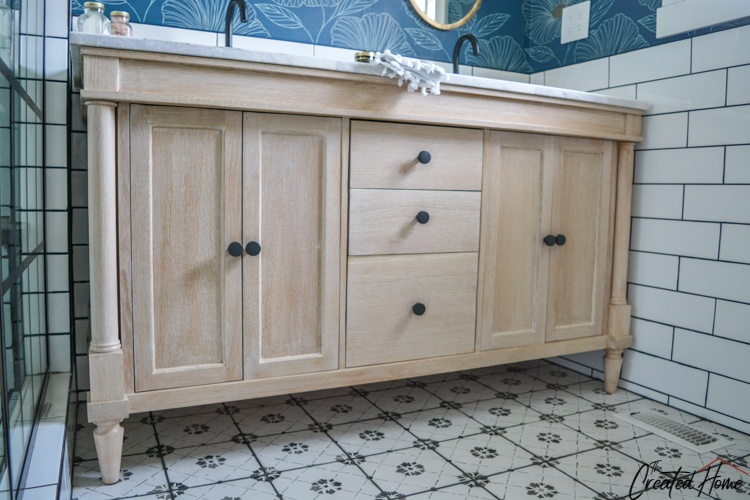
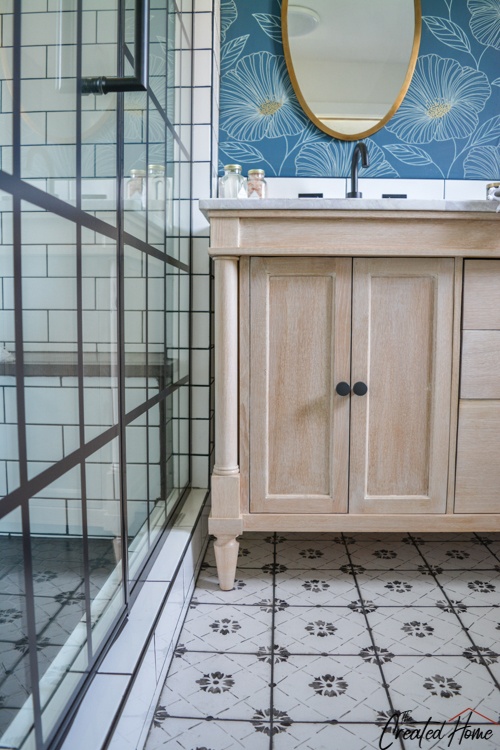
Can I tell you how much I love this vanity?!
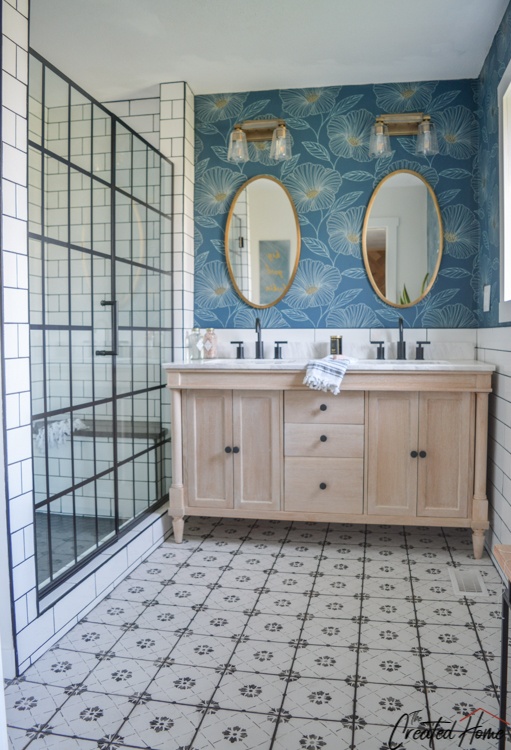
I love the natural wood mixed in with all of the metals and blacks and whites in our new bathroom. And I love thinking of how much money I saved building this myself, because believe me, a comparable vanity would cost wayyy too much for our budget. I love those legs and am thrilled that they are now available at Highland Manor Wood Products so others can enjoy them too. Don’t forget that you can use TCH10 to get 10% off any product at Highland. Of course, I not-so-secretly hope you will get the legs because I’m partial to them, but you can use them on whatever you like there.
That was A LOT of detail. Be sure to download the plans or you will be trying to build without measurements. And, of course, if you build it, share a photo. Good luck, and happy building!
A DIY Master Bedroom - The Created Home
Wednesday 16th of September 2020
[…] Culminating in the addition of the biggest DIY, the en suite bathroom. (I’ve got plans and a tutorial for that vanity here.) […]