
One of my favorite games as a child was dress up, an activity that morphed into a fairly intense oft-repeated game of Rapunzel played on a ledge over the stairway of an old farmhouse. My own daughter is a mix of warrior and princess, which makes dressing up even more exciting really. When her dresses and accessories (both superhero and royalty alike) started to overflow the playroom shelves it was time to build her a wardrobe.
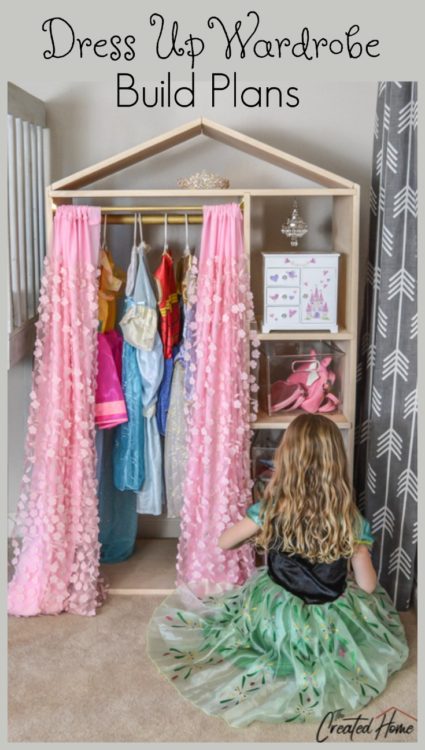
I knew two things when I set out to build this – 1. It had to be house shaped. Because. 2. It needed to be easy to assemble and disassemble without tools. After all, the playroom is upstairs.
This dress up wardrobe is really quite a simple design. You’ll need a few basic tools, a couple sheets of plywood…and the rest is all optional. The plans are available HERE, but I’ll show you how it goes with a quick video and tutorial, as well as links to the accessories I added.
Tools
*This post does contain affiliate links. Check out my disclosure page if you want to learn more.
Table saw or circular saw
Tape measure
Dremel (optional)
Iron (optional)
Router or pocket hole jig
23/32″ router bit
Materials
1 – 4×8’ ¾” plywood
Magnets (optional)
Edge banding (optional)
Closet rod
Closet rod holder
Accessories
Curtain material
Mini chandelier
Jewelry box
Clear storage boxes
Cut List and Diagram
Details in plans
Here’s a two minute overview of the build process.
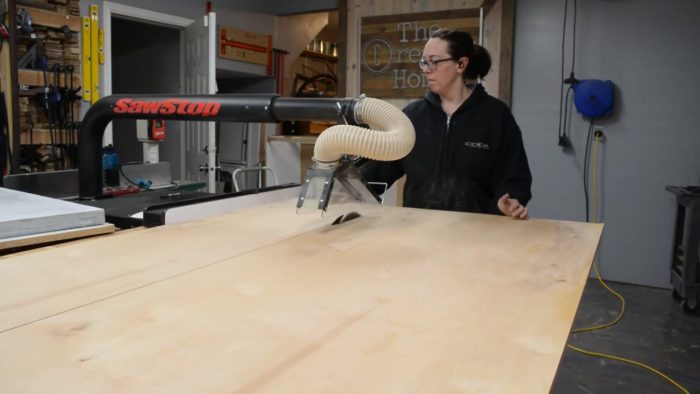
If you want to build this fun little wardrobe I’ll give you a few pointers here. First, I recommend both a table saw and a circular saw if you have them. Even with a cabinet saw I needed the circular saw to make some of the cross cuts.
Creating the Wardrobe Grooves
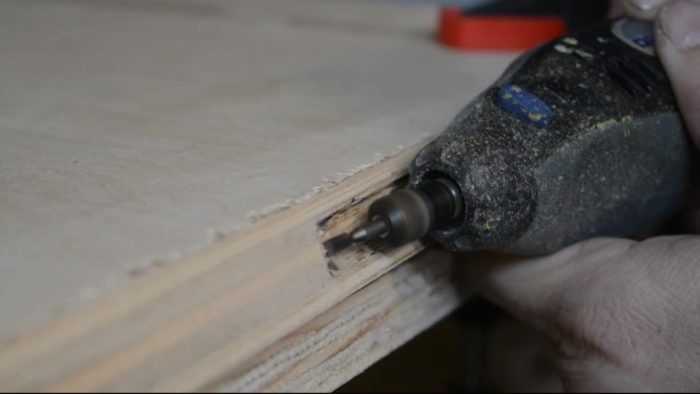
This wardrobe can be constructed using a dados, which gives it the ability to be assembled and dissembled, or simplified with pocket holes. To create the grooves I used a router and an edge guide. Where grooves had to line up, either top to bottom, as in the base and top, or side to side, as in where the shelves notch in, I clamped the two opposite pieces together and ran the groove straight across.
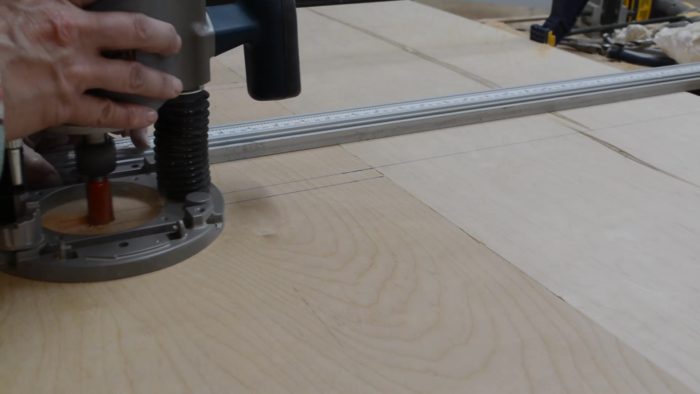
A 23/32″ bit (also called a plywood bit) is made to fit 3/4″ plywood, which – you guessed it – isn’t a true 3/4″. It’s worth picking one of these bad boys up if you are planning to run grooves, because it’s the only way you are going to get a good, snug fit.

Joining the roof sections with inlayed magnets
Once you have run all of the grooves, the wardrobe really just snugs together simply by hand. The roof sections are cut at 22.5 degrees, and they will lean together thanks to the taller side pieces. That said, I wanted something that fit a bit more securely. After all, it’s meant to be played with. So I inlayed magnets into the top edges of the roof. Now, before you run for the hills, check this out. It’s actually not as bad as it sounds.
I traced the magnet in the spot where I wanted it, then used a Dremel and cutting bit to basically hog out that area. It doesn’t have to be terribly precise even, though it never hurts to try, right?

I then switched to a grinding bit – or whatever it is called, and cleaned up the edges.
A little CA glue snugged the magnet up good and tight. I put the glue on the plywood, and sprayed the back of the magnet with accelerator, so that when I pushed the two together the bond was pretty well instantaneous.
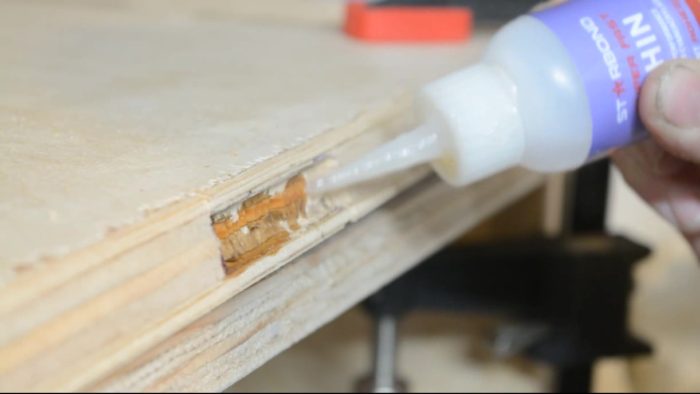
That last point is important to remember when using bare hands, FYI. Don’t stick your fingers to it. I’m not sure I have fingerprints on that finger anymore.

Do that on both sides of the roof…
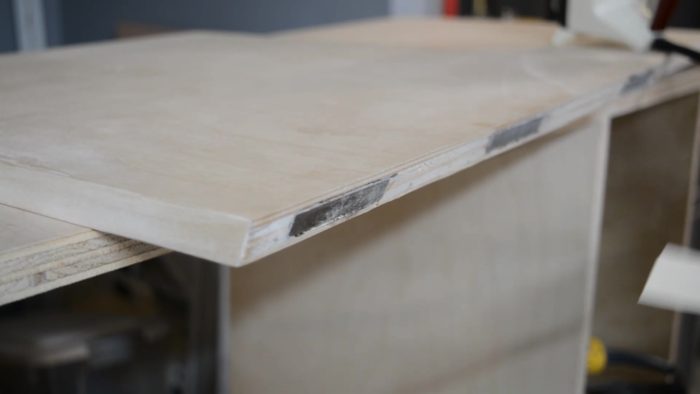
…then iron on edge banding for a nice, finished look.

The result is a nice, clean look that holds together very well.
Finishing the Wardrobe
The wardrobe can be left as is, with plywood sides showing, or you can finish it all with edge banding. I’m not going to lie, it’s a bear of a job. But it does produce a nice finished look if you prefer it.
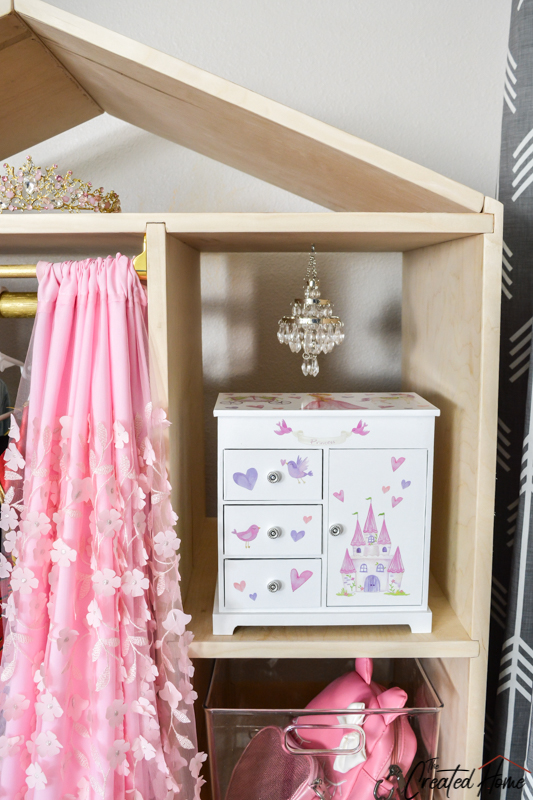
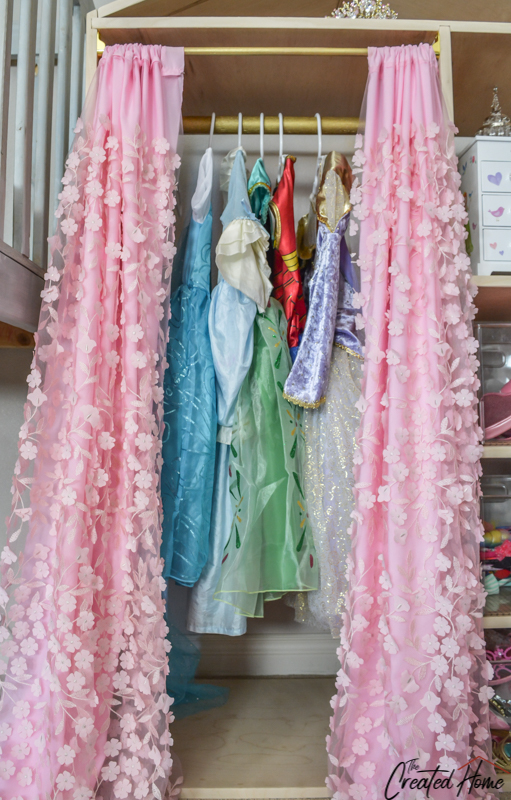
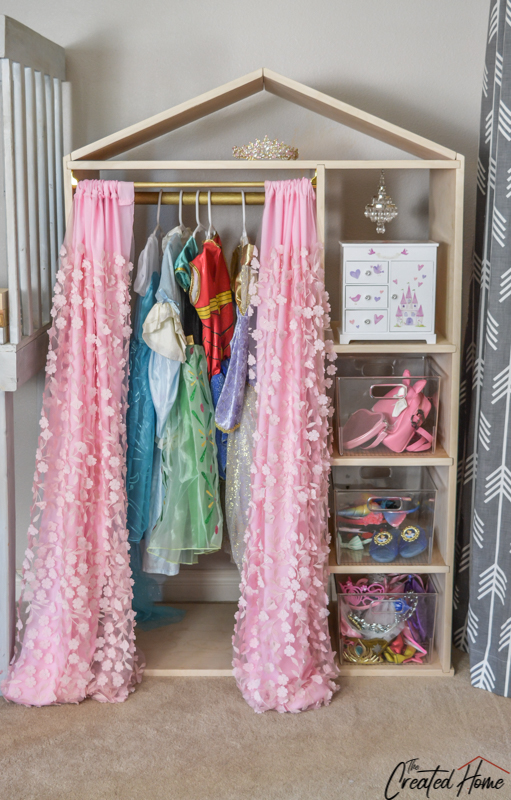
I dressed up the wardrobe with a gold spray painted curtain rod, a second, smaller rod and holders for curtains (my daughter chose the material), and clear bins for dress up items, a mini chandelier ornament, and a jewelry box. Pretty well everything came from Amazon except the material, which came from JoAnn.
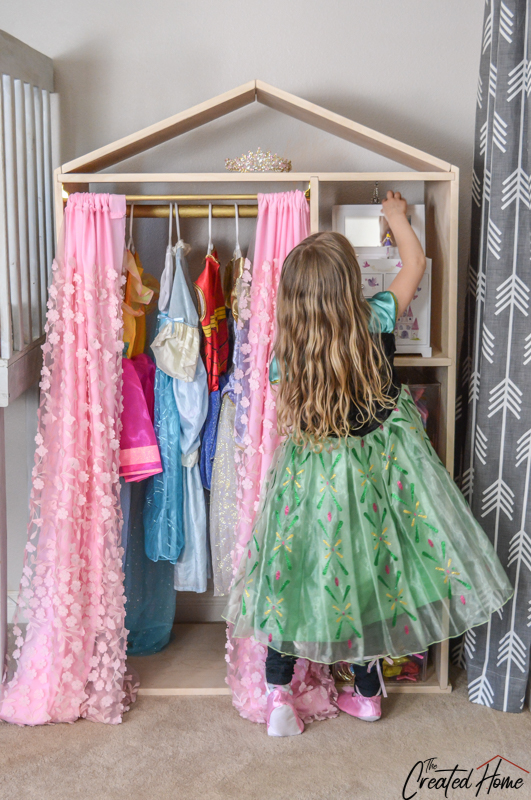
This was a super fun project, and the best part of it all is watching my daughter play. In truth, she’s as apt to dress as Wonder Woman or in her brother’s Captain American costume as she is to don princess gear, but I really woudn’t have it any other way. So however your little one likes to dress, rest assured you can customize this to them easily.
I built this project not only for my daughter (okay, first and foremost for her), but also as part of a monthly build with other bloggers, this one on the theme of child games. Perhaps it is a stretch to categorize this as a game, but I’m rolling with it.
But here’s a list of bloggers who didn’t stretch the point and are bringing you some killer DIY game ideas you can build. Check them out, give them a follow, and be inspired!
Addicted 2 DIY – Backyard Chip Shot Gold Game
Remodelando la Casa – Chinese Checkers Game Nesting Tables
Anika’s DIY Life – DIY Ring Toss Game
The Inspired Workshop – DIY ring Toss Game
The Awesome Oragne – DIY Outdoor Tic Tac Toe Game
Not Just a Housewife – DIY Outdoor Scoreboard
My Repurposed Life – DIY Molkky Game for Camping
Ugly Duckling House – DIY Wooden Puzzle
100 Things 2 Do – DIY Game Challenge Sliding Puzzle
Joyful Derivatives – Chalkboard DIY Tutorial
Don’t forget to check out the plans to make your own wardrobe! Happy building!
Benjamin Justice
Sunday 20th of December 2020
Your cut list diagram says that the shelves be cut at 11 1/2" x 16". When you get down to assembly, your shelving assembly diagram says the shelves are supposed to be 1' 1/2".
Sarah
Thursday 1st of April 2021
Fixed, thank you!
DIY Ring Toss Game - How To Make A Collapsible, Easy To Store Version
Tuesday 3rd of March 2020
[…] Dress -up Wardrobe – The Created Home […]
Simple DIY Tutorial for Framing a Chalkboard - Joyful Derivatives
Monday 16th of December 2019
[…] The Created Home – DIY House-Shaped Dress-up Wardrobe […]
Katie Cleveland
Monday 29th of April 2019
I love this so much, Sarah! And that tiny chandelier is the icing on the cake! I never had a dress up chest growing up, let alone a wardrobe. This is every little girl's dream!
Stacy Risenmay
Monday 29th of April 2019
This is adorable! My kids loved playing dress up.