
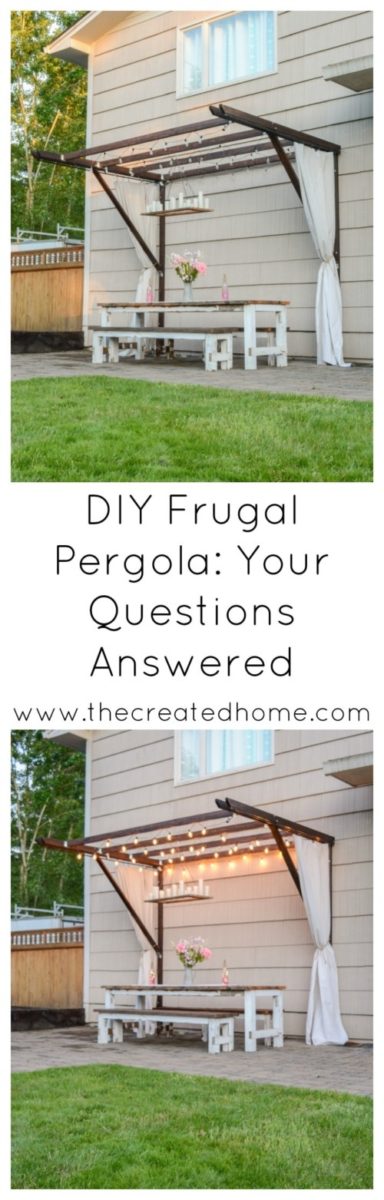
This pergola is the heavyweight champion of my website. That still surprises me, as I thought it would not be very popular when I first conceived of the idea and built it. Mostly I just wanted to try something different, and we were kind of broke. Fast forward nearly a year, and I get a lot of questions about this thing. So I’m going to do my best to answer them.
You can find the original pergola post here, which details the building process, right down to the mathematical equation we used to determine the length of that 45 degree arm.
*I will include some affiliate links here as I do my best to point you to what I used. You can check out my policy on that here.
What are the measurements?
-The two boards braced to the house are 9 feet tall.
-The 45 degree arms measure 7 feet long, long point to long point.
-The four arms extending out from the house are 8 feet long
-The four crossbars on top are 113″ long
Now, that said, we determined those measurements based on the location of the house studs. This seems a good time to reiterate that as with any DIY project, you will need to take proper safety measures, follow best practices, and always know where your studs are. I am happy to share what we did, but the responsibility is your own. (And you will rock it, of course.)
Can I get a supply list?
Sure!
6 – 2x4x8s
6 – 2x4x10s
8 – joist hangers
2 – Simpson Strong-tie adjustable L-angles
22 – 5-6″ bolts + nuts (calculate for the depth of the 2×4, siding, plywood, and then enough extra to drive well into the stud)
How long did it take you to build?
The main structure only took a day.
What hardware/supports did you use?
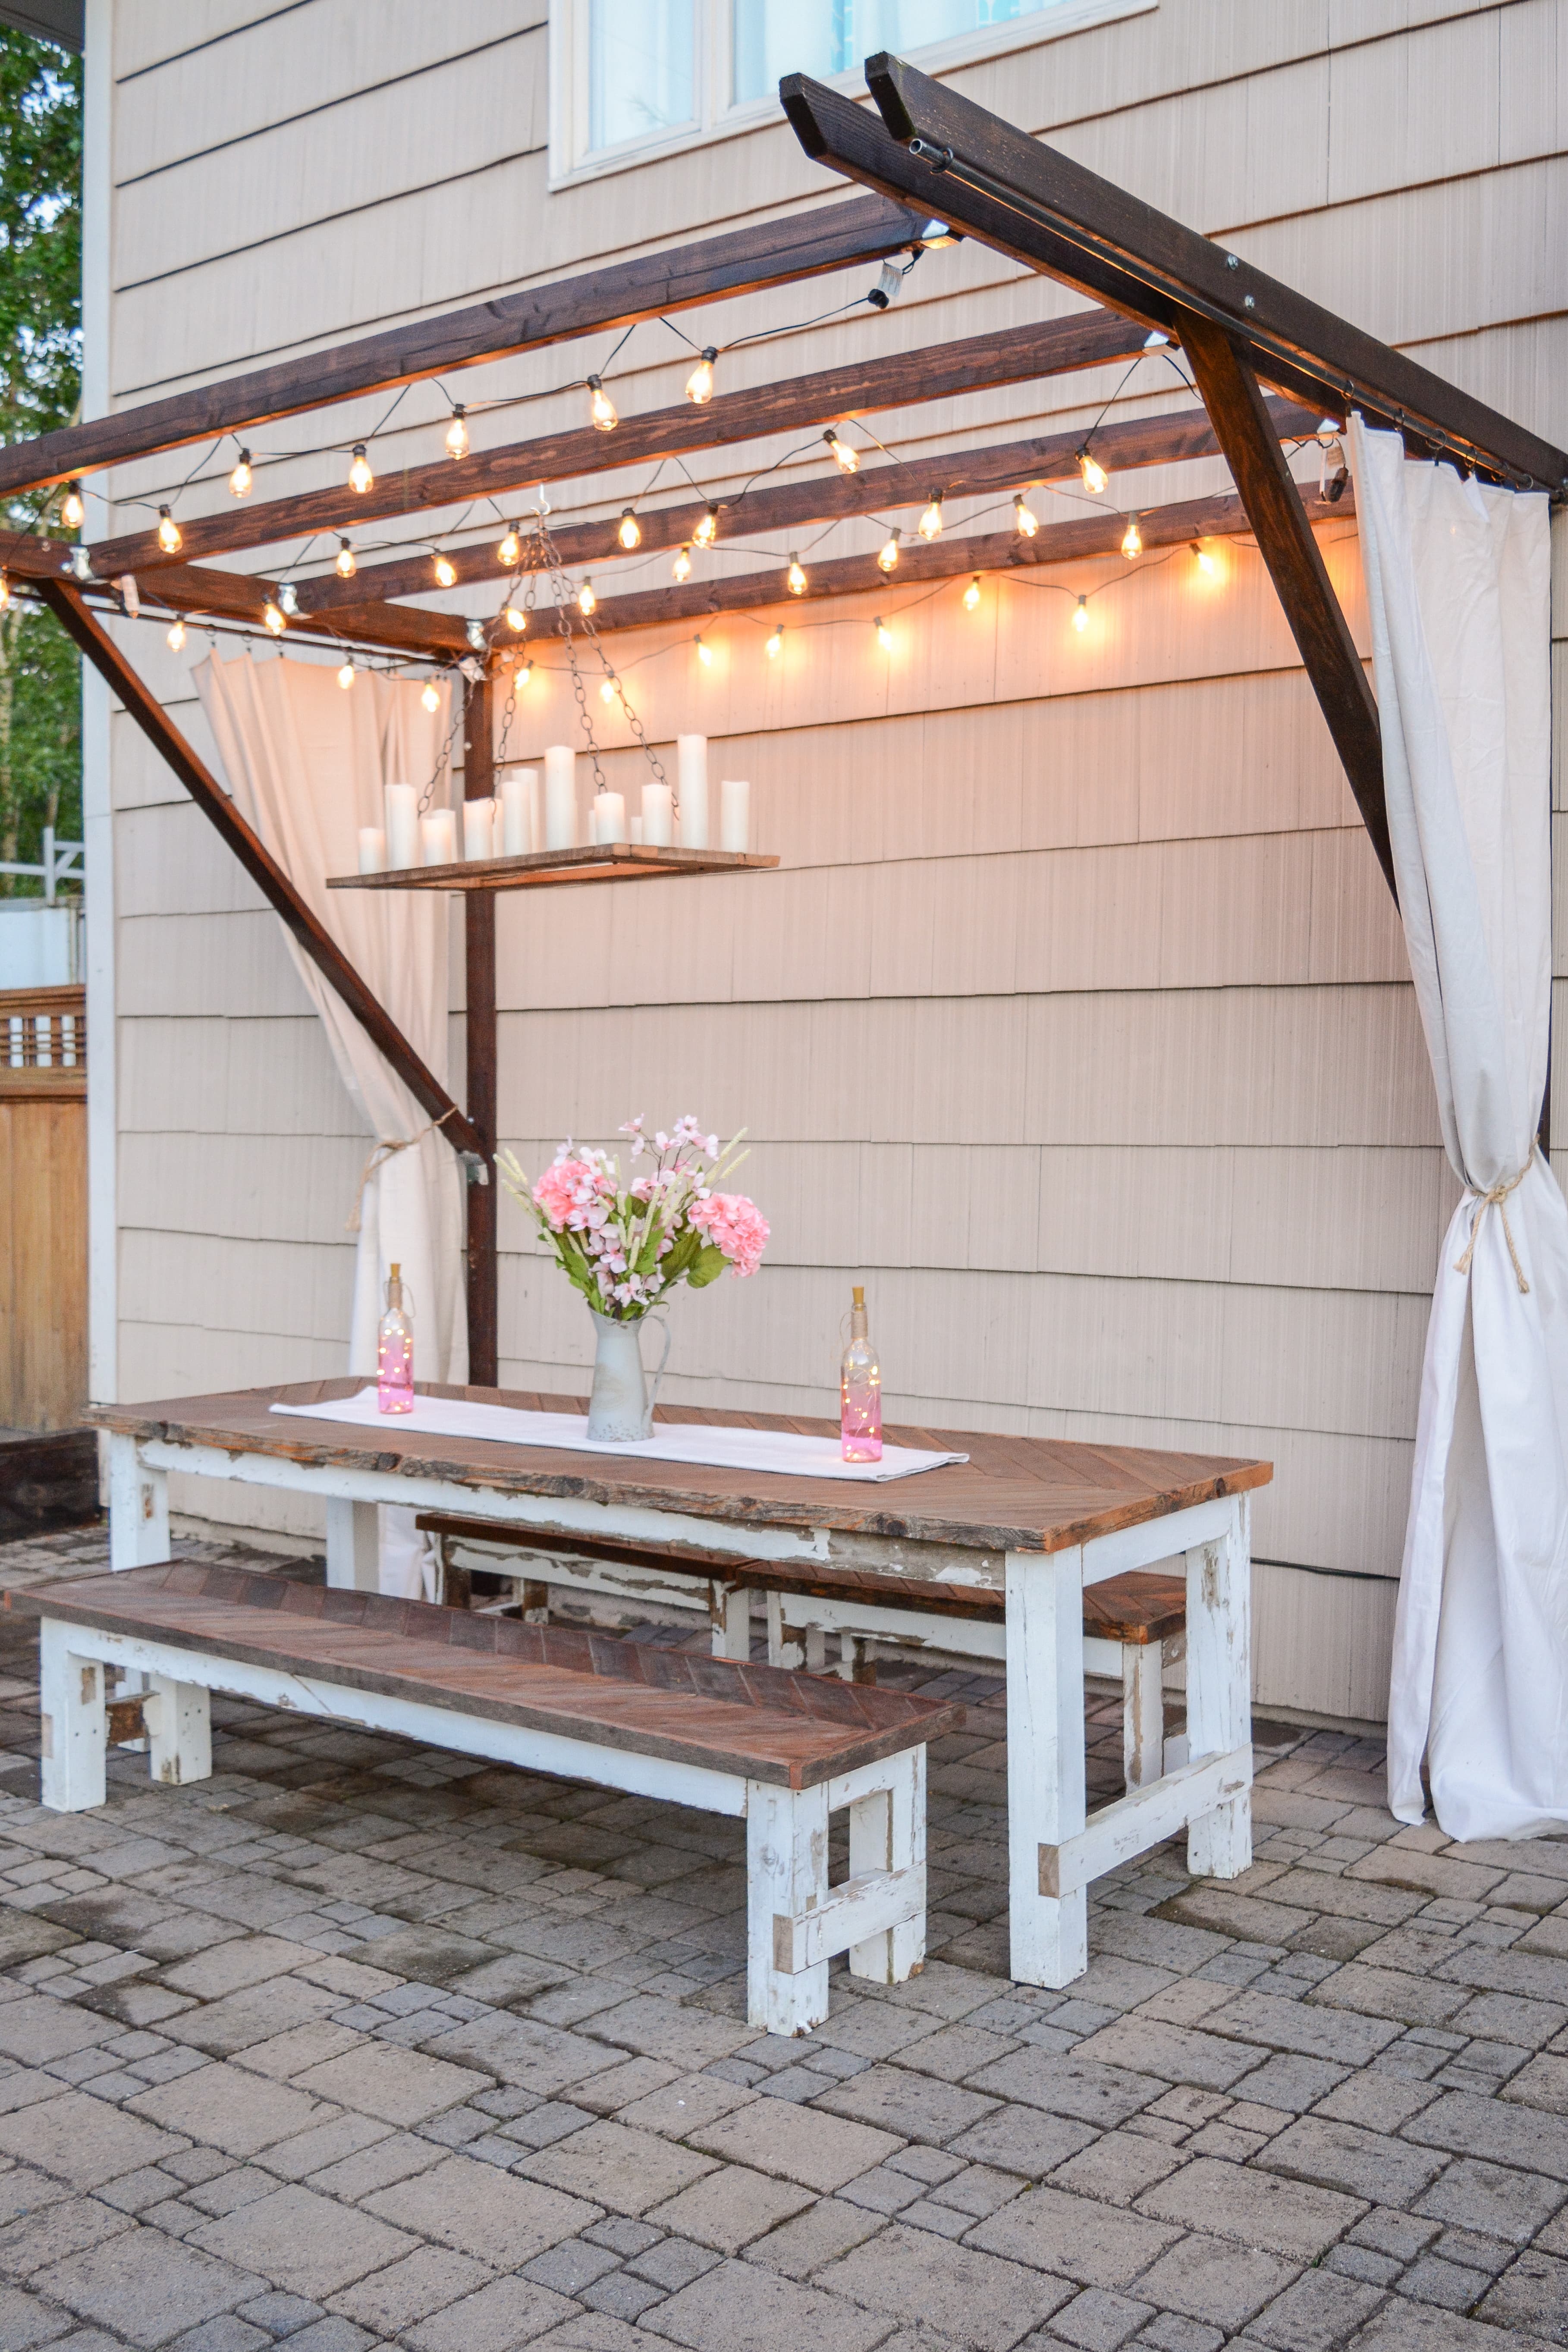
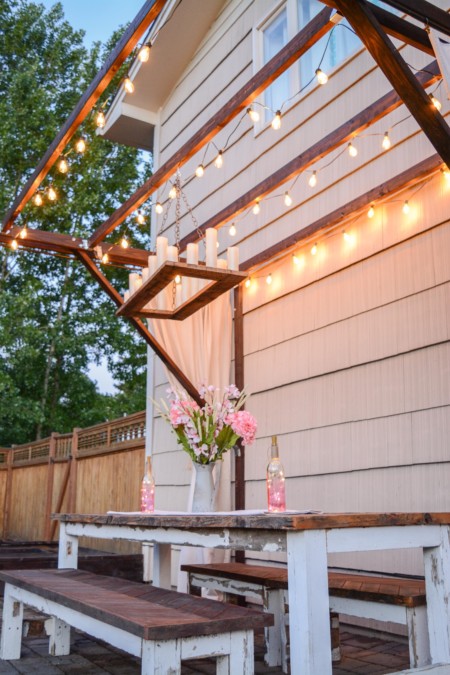
Simpson strong ties join the base of the 45 degree arms to the “legs” that brace the structure to the house. We also used joist hangers for the cross arms up top.
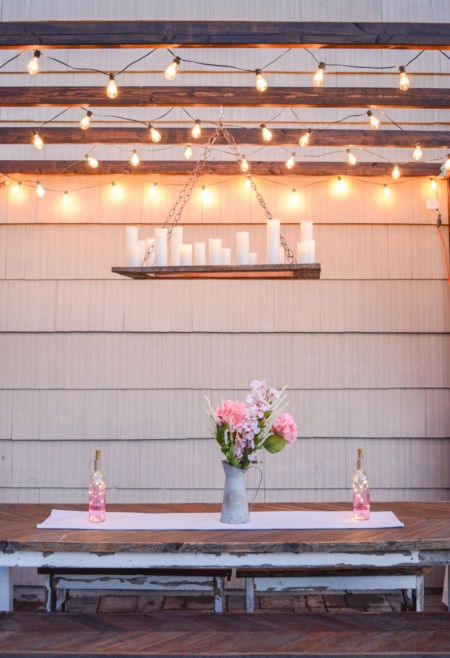
What is that stain color?
It’s Brown Mahogany water based stain by General Finishes. Isn’t it fantastic?
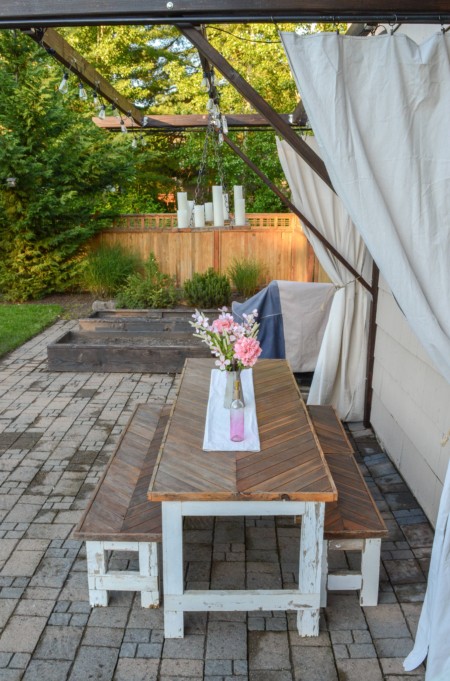
Where did you get the table?
I made it using my neighbor’s old fence (he was going to take it to the dump), and the 20 year old cedar boards from our hot tub. (We replaced that hot tub wrap and shared that process here.)
You can learn more about the table here.
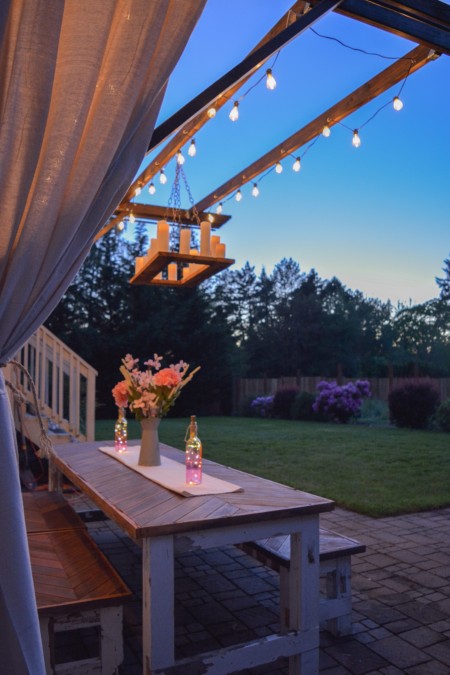
The cover is ugly
That’s not a question. And I agree. We put it up so that we would be able to use the pergola even when it is raining. Yes, we did use it. It rains a lot here in the Pacific Northwest. But, as you can see in this photo, we recently removed it. The algae would not come off, and that’s an ambiance killer.
I like the cover. How did you attach it?
The plastic corrugated material has specialty screws that go with it. You can find them in the aisle right next to the cover material.
My home is brick. Any suggestions?
Don’t do it.
Just kidding. You would have to drill through the brick with a concrete drill and bit, then tap in an anchor to set the bolt. You will need longer bolts and will have to find the studs.
Does building code allow this? I’m not sure my HOA will approve it.
Always a good idea to check, yep.
How much did it cost to build?
The structure cost about $100.
We added lights, drop cloth curtains, and the table set.
The entire thing cost about $200.

Where did you get the chandelier?
I made it. You can read the tutorial on Remodelaholic.
When you did have a cover on top was snow load an issue and did you consider moisture?
No, snow load was not an issue. We don’t get much snow here.
Except that this winter we did. More than we have had in 34 years. And ice. It was miserable, actually. The pergola held up just fine.
As far as moisture, we tilted the top arms down somewhere around 3-5% to make sure it drained away from the house.
There you have it! Hopefully that answers all of your questions. If I missed anything go ahead and ask in the comments and I’ll do my best to answer. Thank you so much for your questions, and for all of the very nice comments and feedback I have received. If you build one of these be sure to share a photo so I can brag you up!
Happy building!
Philip McMullin
Saturday 13th of March 2021
Hey, I'm building something similar to this. The wall the two vertical posts is being screwed to is a quite a bit shorter than the posts themselves. Posts I'm using are 100mm x 100mm, your mitred arms support system surely would affect its structural strength with there being no wall behind the the upper half of the posts? With that said, Would you recommend two posts out front too? P.S, what degree fall on top have you got for the rain to drain off the roof?
Sarah
Wednesday 31st of March 2021
Ours is sloped by only about 2 degrees. And while I don't dare give specific structural advice - other than to say when in doubt, have a structural engineer take a look - support posts are never a bad way to go. If we didn't object to digging up part of the existing patio I would have gone that way for sure.
Anna
Tuesday 18th of August 2020
Reading through to research as much as possible, I saw you said vinyl siding would compress. Meaning that when the joists were attached properly to the studs it would essentially smush and crack? We have pavers so this was such a good solution, but we also have vinyl siding. Thank you for sharing your creation, very inspiring!
Sarah
Thursday 1st of April 2021
Correct. I have not tried it personally, but probably would not do it with vinyl. Sorry!
Christine
Friday 10th of April 2020
I see it calls for 22 5-6" bolts and nuts. Do you recall what the diameter of the bolts were? I'm building it this weekend.
Sarah
Tuesday 16th of June 2020
Apologies for the delay. I believe they were 1/4" in diameter. I believe there is a link under materials to what I used. Best of luck!
How to Build a Super Frugal Pergola - The Created Home
Thursday 2nd of April 2020
[…] ***I have received a number of questions about the pergola since writing this post, and I have attempted to answer them all here.*** […]
Shelly
Monday 21st of October 2019
Love it! How did you attach the curtains, and do they slide?
Sarah
Monday 17th of February 2020
They are attached by hooks and rings to a rod (actually, it's just electrical conduit), and yes, they slide.