Service Spoons: A Project to Help Kids (and Parents!) Remember the True Meaning of Christmas
(Or any time of year!)
The idea for service spoons comes from the desire to find ways to help our kids understand the reason for the season. That said, it’s great for any time of the year in teaching kids (and ourselves) to focus outward and think about others.
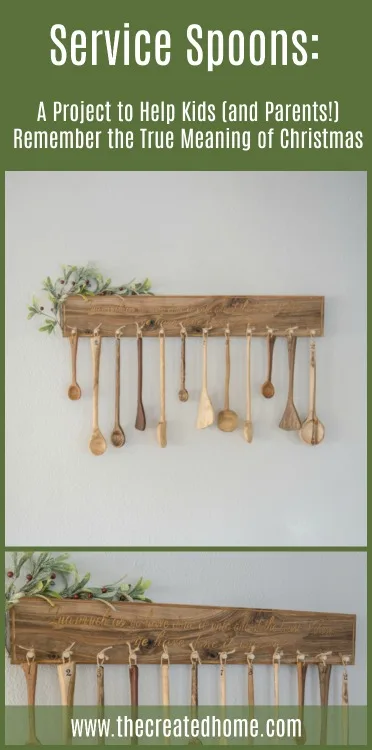
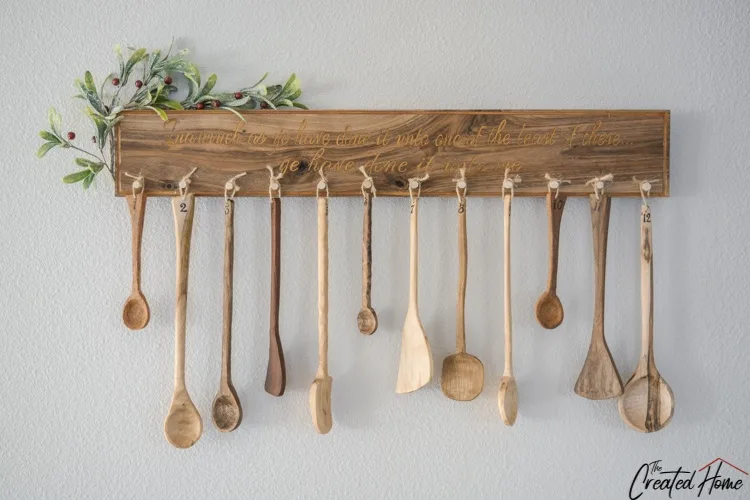
How it works is that there are 12 spoons correlating with the 12 days before Christmas, or any 12 days that you like at any time of the year. Each day we hang a spoon and accomplish the associated task.
Why spoons? The spoon is an excellent symbol for service, and what I love about these wooden spoons is that they are simple, they are each unique, and they are humble. These ideas are not huge or expensive. They are small ways to make a difference.
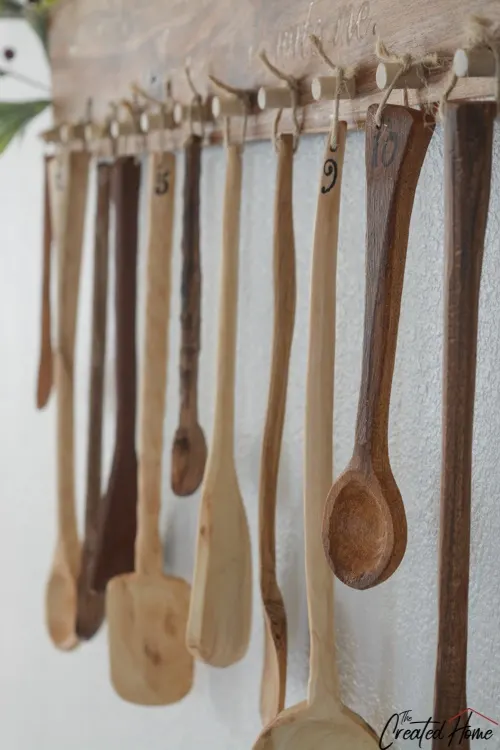
On the backside of each handle I’ve written a few words to queue us into what we will do that day. Here is our list, as well as a few extra ideas:
25 Service ideas for families
- Make treats for family and/or friends and deliver them
- write notes for service members
- Delivery goodie bags to first responders
- Make something for teachers
- Make cards and visit a nursing home
- Go caroling
- Make and hand out homeless kits
- Make and deliver grab bags for hospitalized children
- Leave candy canes and a simple message on the card in a hospital parking lot
- Do things for family members as Secret Service Santa’s
- Donate to a woman’s shelter
- Read the nativity as a family [I realize this one is not specifically a service project, but it fits well as a Christmas Eve activity and discussion time]
- Shovel a neighbor’s snow or rake their yard
- Donate clothes or toys to kids in foster care
- volunteer at a pet rescue
- pick up litter
- donate to a wishing tree
- do a knock and run for a family in need
- Make something for your neighbors
- invite someone to play and say nice things to others all day
- pay for the car behind you in a drive through
- make a homemade gift for someone
- buy someone’s dessert at a restaurant
- invite someone new to play
- help out at home, do chores without being asked
For the tutorial part of this post I am going to show and tell you how I carved the spoons. The display method is up to you. I’ve also included a video so that you can see the tools in use, which can be a lot more helpful than simply reading about the process.
*As an Amazon affiliate I earn from qualifying purchases. This disclosure pertains to all the links in this post. You can learn more about affiliate links here.
Materials and tools:
Wood scraps
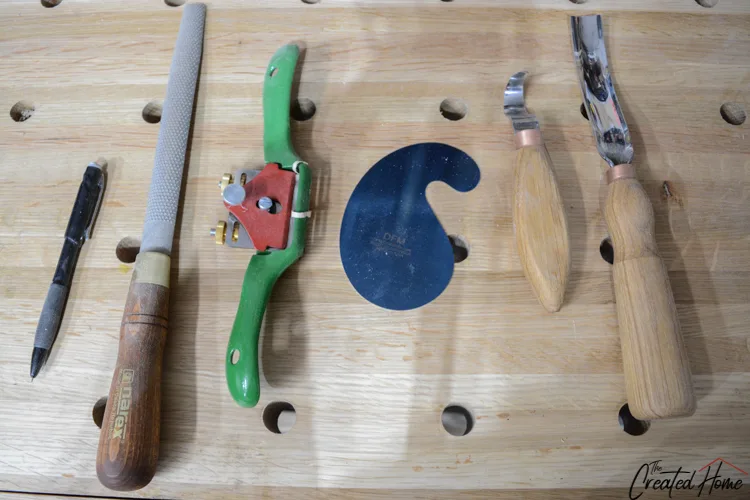
spoon gouge (I started with this cheap one and switched to this one, which I’ll talk about below)
hook knife
card scraper
rasp
bandsaw
sander (See below)
oil or other finish (I used Walrus oil)
Spokeshave
So completely optional:
Arbortech ball gouge
multipurpose tool (if using Arbortech gouge)
small hand plane
How to Carve a Wooden Spoon
Note: I’m not going to fill this tutorial with photos. It’s such a video depending process that instead I’m going to rely mostly on the video.
Step 1: wood selection
This is a great project for those wood scraps you have laying around. If this is your first spoon you would do well to take the advice of one of the Woodcraft employees I spoke with, and start with basswood. But if you have no sense or reason, and like me you believe in jumping in the deep end before you learn to swim, go ahead and use whatever is prettiest.
Step 2: sketch rough spoon shapes
Use a pencil to lay out some basic spoon designs. My advice is not to look at anybody else’s spoons, just go for it and draw whatever looks good to you. You do want to be aware of wood grain. Don’t try to carve a spoon across the grain, go with it.
Step 3: cut the spoon shape
I consider myself a hybrid woodworker, meaning I like to use a combination of power and hand tools. Both have their strengths, and learning hand tools has definitely helped me in my machine work. So for this I prefer to use the bandsaw to cut out the shape, and then a number of hand tools thereafter. You can certainly carve this with hand tools entirely if you like. Given that for this project I made 12 spoons, that wasn’t really something I gave any thought to.
Step 4: sketch shape of spoon bowl and carve with spoon gouge
I started out with this super cheap spoon gouge from Amazon, and absolutely killed it on some hard maple. Despite numerous close observations of Paul Sellers sharpening methods, I was unable to get the tool as sharp as I would like it, and finally went to my local Woodcraft and picked up a new Pfeil gouge. The difference was fairly dramatic. Given it to do over again I would buy the nicer gouge from the start, even though it was a little more money. So I’m going to give you the links to both.
Hold the gouge firmly with both hands, one by the handle, and the other gripping the metal close to the carving surface for stability. The purpose here is rough gouging – that is, removal of material. Don’t try to make it perfect, just get the shape you want gouged out.
Step 4.5: When you need more power
Remember that maple I mentioned? If you aren’t feeling the hand tooling, you can take a high powered route. I gifted my husband the Arbortech ball gouge some time ago, and suddenly remembered it while struggling with that hard wood. The ball powers material out like a beast. It’s also a lot of fun. Full disclosure: it’s not the cheapest toy tool in the world, but it’s hecka fun. If you use the ball gouge you can pick up just the same with the next step – the hook knife.
Step 5: clean up the carve with a hook knife
The hook knife is a fantastic little inexpensive tool that takes just a bit practice to start using effectively. It excels at carving a concave shape cleanly. Just be aware that one edge is really sharp, and of which side that is, or you may give yourself a nasty cut. (Don’t ask me how I know.)
Optionally, you can follow up the hook knife with a curved card scraper. I did find it useful to do a little extra smoothing in the spoon bowl area, but it’s up to you how smooth you would like the end product to be.
Step 6: reshape the head as needed
I found it helpful to use the bandsaw once again to add a curve to the back of the spoons and remove any material necessary where the head of the spoon ran into the handle.
Again, this is purely a time and ease preference. For more of a spatula shape I found my little 102 hand plane was ideal, but for the most part, I like removing excess material quickly.
Step 7: Shape the handle
If you are new to hand planes, let me introduce you to the spokeshave. This fun little tool is a champ at planing curved lines. You can pick up a fairly inexpensive one like this and get a lot of mileage out of it. I use the spokeshave to carve out the handle. It allows me to decide whether I’m going to simply give a gentle round over to the edges, or go for more of a complete round shape.
At this stage I also like to use a woodworking rasp to work on the neck area where the spoon joins with the handle. This is a tough spot because the grain changes direction, so you are going to get tear out with any other tool.
Something I’ve neglected to discuss: holding the tools. Perhaps the trickiest part of all of this is figuring out how to clamp the tool so that you can use the gouge, or the spokeshave. The hook knife seems to work best by simply holding it. The spokeshave presented the tricky situation to me, and I don’t know that I have any great tips.
Anne of All Trades has an excellent spoon carving tutorial and mentioned that she uses her gooseneck vice. I don’t have one. But I did make extensive use of the front vice on my workbench.
Step 8: sanding
Finalize your shape with some sanding. If you have an orbital sander you may find it helpful to turn it upside down and hold it in place like a bench top sander. A bench top sander would also be useful if you have one. Use what you have, unless you were looking for an excuse to buy another tool. In which case you have my permission. Feel free to tell your spouse. The sander I found the most useful was my spindle sander, which allowed me to follow the curves of the spoon.
Honestly, there’s a little bit of back-and-forth here between the steps while you get the spoon where you want it to be. You may decide to go back and gouge out a little more material, to change the shape of the bowl or handle, or just sand a bit to see if you’re going to like the shape. It’s a bit of an organic process in terms of finding what you want to do with each spoon. I don’t want to sound all hippie-ish and say “let the wood speak to you”…but yeah, kind of.
Step 9: Oil
This step freaking rocks. It’s where you get to see the results of your hard work truly shine. I like to use Walrus Oil for this, as it is food grade and has a nice combination of beeswax and oils. It is also super simple, which is a big win in my book. Simply rub it on, and wipe off the excess.
Displaying the service spoons:
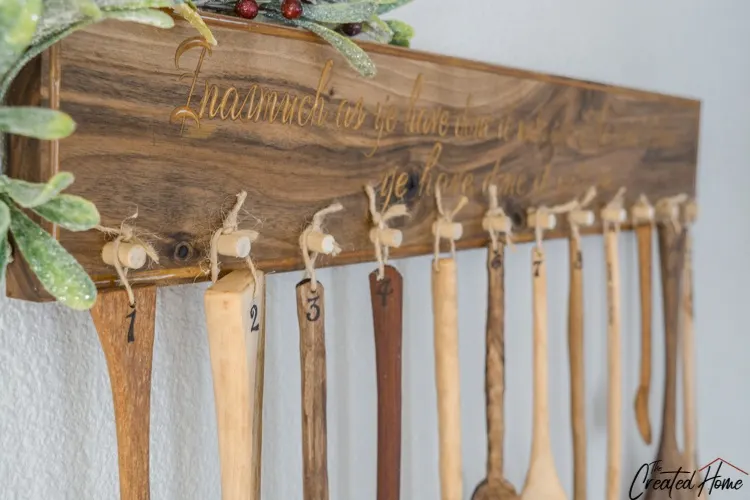
There you have it, the steps for carving a spoon. I carved all 12 of these in one evening, though admittedly it was a number of hours worth of an evening. Next, I drilled a hole at the end of each handle for hanging, and wrote a number on each spoon with sharpie. I was planning to burn the numbers into the handles, but I think it looks just fine in marker.
There is no tutorial for making the sign. I put it on my X-Carve CNC and carved it, but that’s just one way. Painting would be another great option. Alternatively, you could hang them on a tree or use them or something. Use whatever display method strikes your fancy. I plan to make a fancy box for these before Christmas, but do not have it finished yet. (Or started, for that matter.)
We are excited to introduce this new tradition to our family this holiday season. Hopefully it will help center all of us on the true meaning of the season and become something we look forward to every year.
I would love to hear if you decide to give this or something like it a whirl. And if you have more service ideas for kids, add them in the comments!
Happy carving!

DIY Wine Dispenser
Saturday 28th of November 2020
[…] Sarah – Created Home […]
gail
Thursday 7th of November 2019
wow! Your project and service ideas are fabulous! I'm so impressed with your skills, I can't imagine making one spoon, let alone twelve!
pinning!
gail
Mindi
Wednesday 6th of November 2019
I love the meaning behind this, and the spoons are so pretty!
Cara
Monday 4th of November 2019
Sarah!!! This is absolutely sweet as can be, and then there are those spoons...I want every last one of them! I LOVE what you did here to display them and what you are teaching your little ones! The real reason for the season, you are so correct...but we are still giving gifts right because I now need a wood carving set to make me some spoons! Lol! I kid, but I really do LOVE this idea!
Katie
Monday 4th of November 2019
This project is so beautiful in both sentiment and in looks! I love this idea so much and I think its a perfect tradition to start.