I never really planned to paint our door handle.
Here’s the thing. It often happens that I’ll get this awesome, amazing, wonderful diy idea in my head. And I just have to do it. But if I’m going to do A, then B really ought to be done, too. And if I’m going to do A and B, then it only makes sense to do C…
My front porch is a classic example. I’m not even going to tell the whole story here. Just know it’s funny and I’ll get to it in my next post. Today I want to talk about C, as in, what happened after A and B were finished. Or mostly finished. I have a terrible habit of doing 20 things at a time.
C in this case is my front door handle…which I had not realized was woefully inadequate until A and B happened. Well, not inadequate exactly. Just suddenly the wrong color. Well, maybe not wrong, per se. But it could be better. And so it must be.
In brief [too late], it needed to be black.
Here it is before:

Now, for the purposes of this post you are going to kindly not notice that the red paint on the door is in need of a touch up, mmmmkay? It’s on the docket.
Figuring conservatively, a new door handle would run us between $100 and $200. But it would also mean changing out the locks, and that would mean replacing the back door hardware as well, and probably the garage entry as well. So that escalated quickly.
And I really hate changing locks.
I have been familiar with the basic process for painting door hardware, as we considered doing so with the last house we renovated. All of the doors in that house were brass when we purchased it. But in the end we decided it just wasn’t worth the time in the middle of a top to bottom renovation, and we picked up new hardware. Interior door hardware, however, is pretty inexpensive. Front door hardware….not so much.
Guys, if you have thought about doing this, go for it. It really is not a bad process at all. I think it took me a couple hours at most. And my kids loved it because I let them watch a show while I did it, which they rarely get to do.
Okay, so here it is.
How to paint exterior door handle
*This post may contain affiliate links for your convenience. See my full disclosure policy here.
Prep work is everything. Start by buffing up the hardware so the paint has something to adhere to. Total short cut, I took a power sander and hit it up quickly. It took a couple minutes. Awesome.
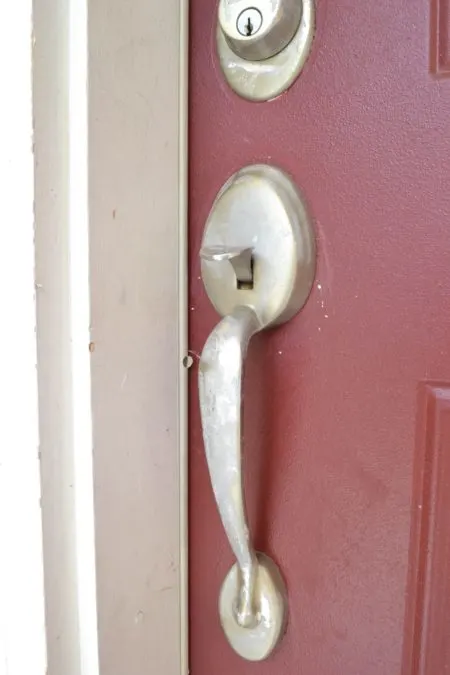
This is what we call the point of no return.
After buffing you need to tape it all off. I am a compete devotee to Frog tape, which I find works better than the blue variety. Of course, for this application, blue would be fine. I just didn’t have any.
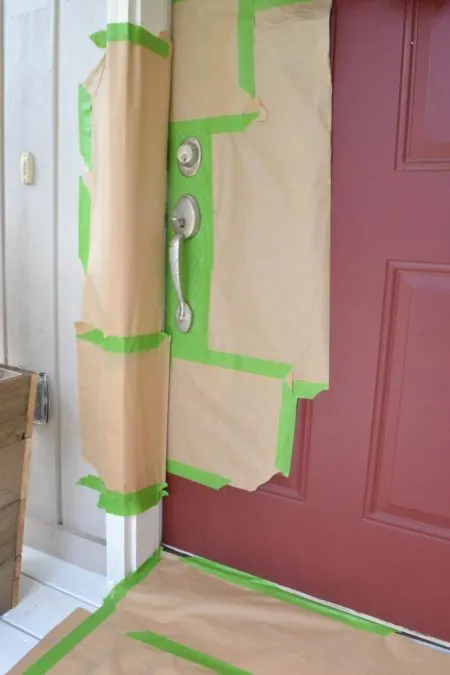
Now your neighbors will wonder what in the world you are doing. Excellent.
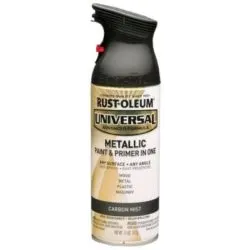
Paint. I used this stuff. Because it’s awesome.
The key to getting this right is numerous light coats. Don’t push and try to get too much on or it will run, and that does not look good. You can recoat after a few minutes only, so it really doesn’t take long to layer up enough coats.
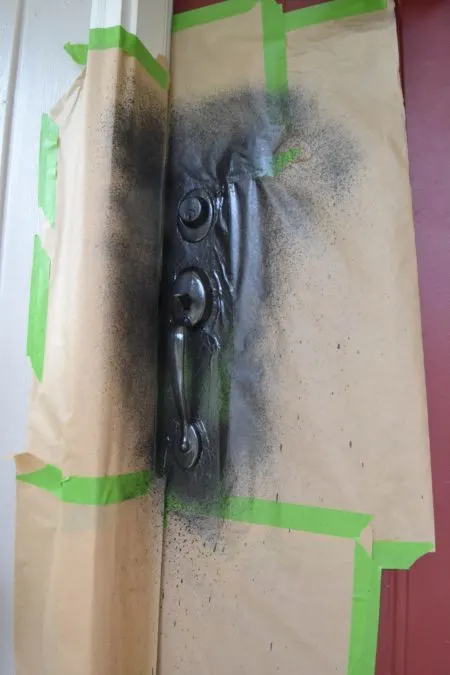
That’s it! Seriously. I let it be for a couple hours, then removed all of the tape and paper. We use the garage door when we come and go, so this has had the chance to dry without being bothered for a couple days. In part because it doesn’t get a ton of traffic I’m not worried about how this will hold up. But I will try to remember to follow up on this after some time and let you know how it is doing.
For now, check out this “new” beauty!
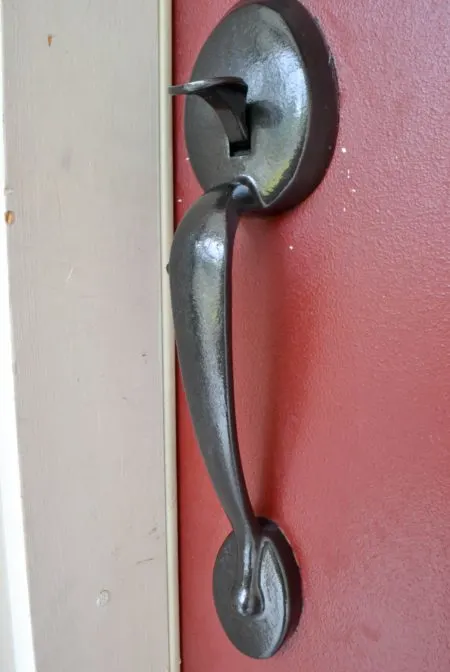
I think it goes great with the other details I added to the front porch, which I will share with you next.
What do you think? Would you paint your door handles? Have you already done so? If you are considering it I say give it a go!
Happy painting!

LennieRenae
Sunday 17th of January 2021
Exactly what I was looking into for the next diy project. Thanks for the tips!
Sarah
Wednesday 31st of March 2021
Thank you!
Carrie BROWNLEE
Monday 8th of June 2020
Hello! I don’t have a power sander; and plan on just sanding by hand. What kind of sandpaper do you recommend? Also, would you suggest a coat of clear sealer when you’re done? I’m curious how the hardware has held up over time/weather? Thanks!
Sarah
Tuesday 16th of June 2020
I would pick up a few sanding sponges from your local home improvement store in various grits. Start with something rougher and work your way progressively to a higher grit (smoother). You could certainly try a clear coat. It wouldn't hurt and might help! Mine held up well, something I would attribute to having roughened up the hardware by sanding first. Good luck with your project!
joyce
Saturday 23rd of May 2020
How has your front door hardware held up with the spray paint? We have the same hardware in desperate need of help!
Sarah
Tuesday 16th of June 2020
It held up well. I replaced the hardware when I painted the door black several months ago. But for the years it was painted it did just fine. Making sure to rough up the hardware with sandpaper is really key to paint adhesion. Good luck with your project!
MIA
Tuesday 26th of November 2019
Did you find that the paint got in the key hole??
Sarah
Tuesday 16th of June 2020
No, but I was very careful to insure that it did not.
Simple Entry Way Makeover with Painted Mat - The Created Home
Saturday 25th of June 2016
[…] decided that the door handle just had to be black now. Fortunately painting a door handle is a pretty simple diy, and after a couple hours it looked like […]