This little entry table is one of my favorite builds because it is so simple and fun to make. I love it because it is just a little table I got it into my head to build one morning and turned into reality in a few hours.
Our house has an open floor plan. That is, the living room and the kitchen are completely open to each other. Which is great, but after two homes in that style I yearn for an actual entryway. There really is no good way to create an entry in this house. However, I got to thinking one day that if I simply placed a small entry table to the left of the door it would set the area apart as its own visual space. But I didn’t have such a table.
So I made one.
And there was joy.

The best part of this project is that it is constructed of three salvaged 2x4s from Restore. They were 25 cents apiece. That’s right, this table cost me 75 cents to make!
…with the caveat that when I finished I decided to add some galvanized metal to the bottom, and that was like $20. Still, $20.75 is a pretty sweet deal for a table.
How to build a simple entry table
*This post contains affiliate links for your convenience. See my full disclosure statement here.*
This wood was pretty scuzzy looking. It was full of nails, and dirt, and, well, time. It was full of a lot of time. Normally when you are working with reclaimed materials you want to remove all the nails. But in this case I decided to leave it in. That meant being sure that I didn’t cut through any metal with the miter saw. I was able to use a nail punch to knock down some of the nail heads and points that were protruding just a bit, then sand the wood until it was mostly smooth.
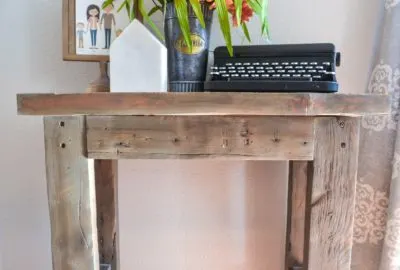
Let me show you how the rest of it went together.
First, the cut list:
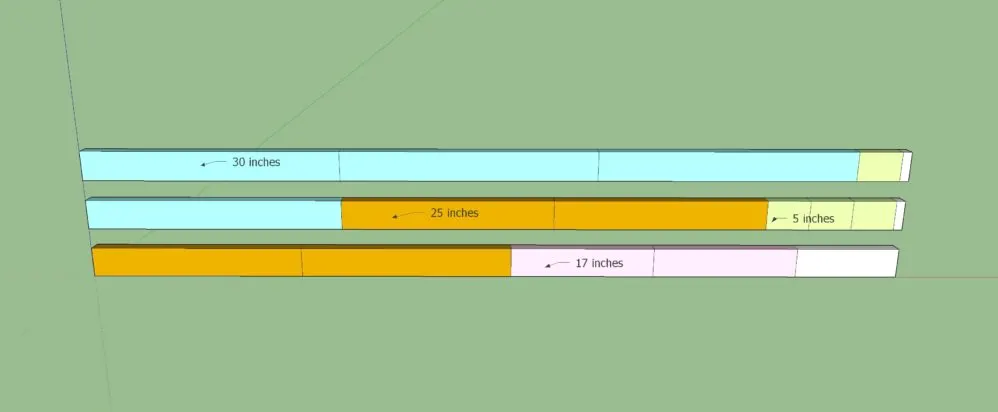
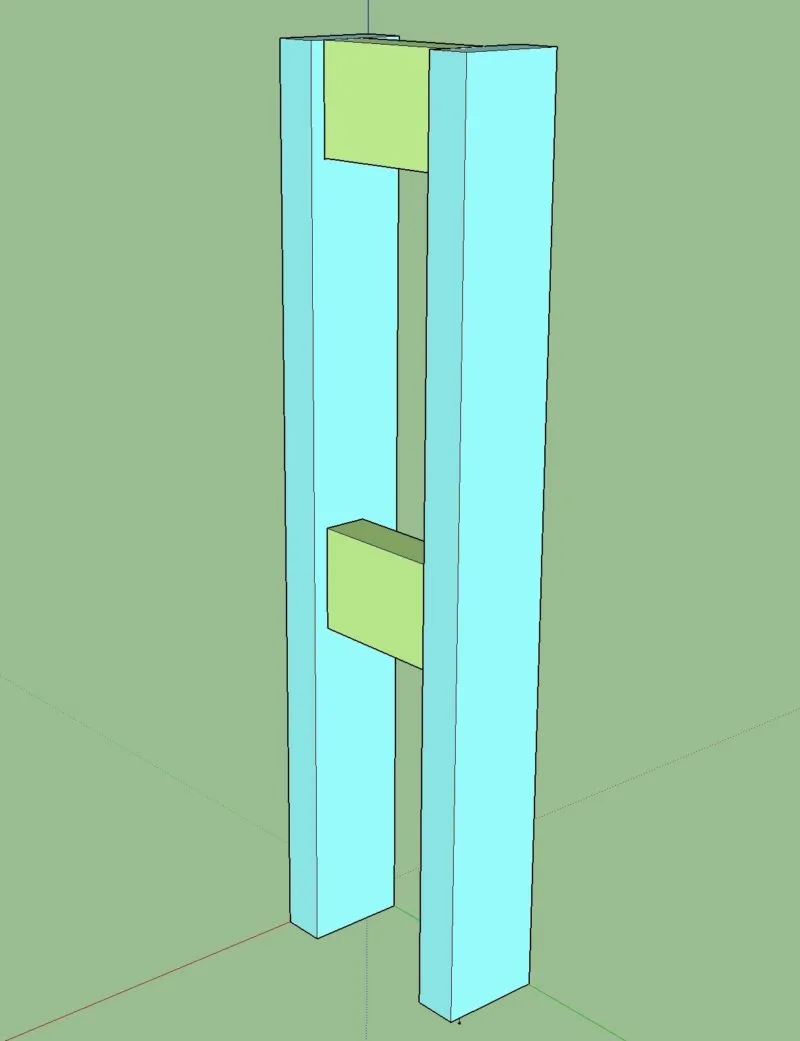
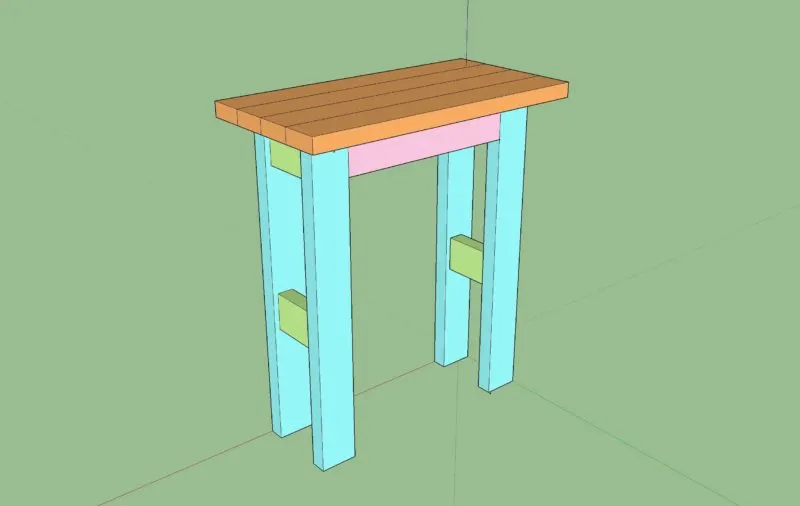
I cut and sanded the 30″ legs first, then attached them using 5 inch pieces. Mine are set back from the inside of the table by half an inch, but it’s really about whatever look you like. The lower apron on mine is 12″ from the bottom. My plans are never very specific because I believe you should trust yourself to build what looks good to you. Feel free to say “Hey, I kind of think she screwed that up,” and do it your way. Promise, my feelings won’t be hurt.
I next attached the legs with 17″ long aprons, thusly:
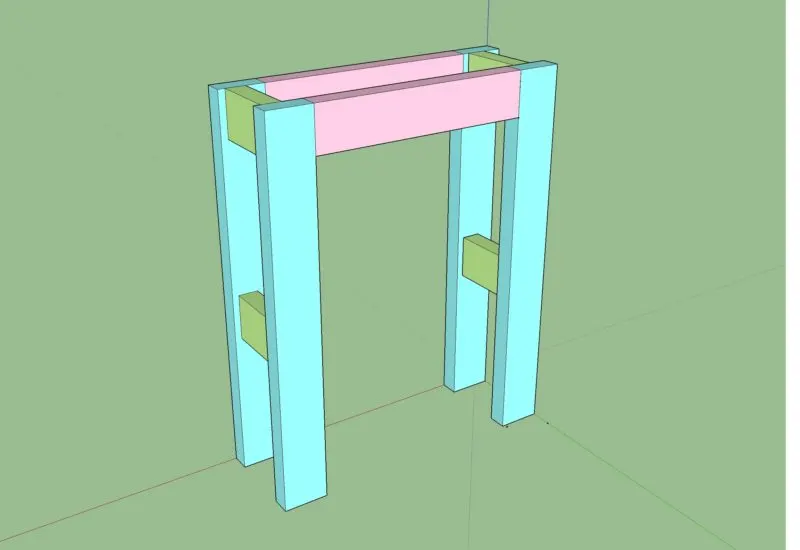
See how simply this is coming together? It’s like cooking mac and cheese. You can’t mess this up. Of course, that’s what they say about jello, and I can’t get jello to set for the life of me. Why is that?!
I attached my pieces using pocket holes and 2 1/2″ pocket hole screws. Same with the smaller aprons. Don’t forget to glue before you screw these together. It just makes for much stronger joints.
Then I made the top. It is simply 4 pieces of 25″ long 2x4s pocket holed together and then pocket holed to the top.
Really, that’s it.
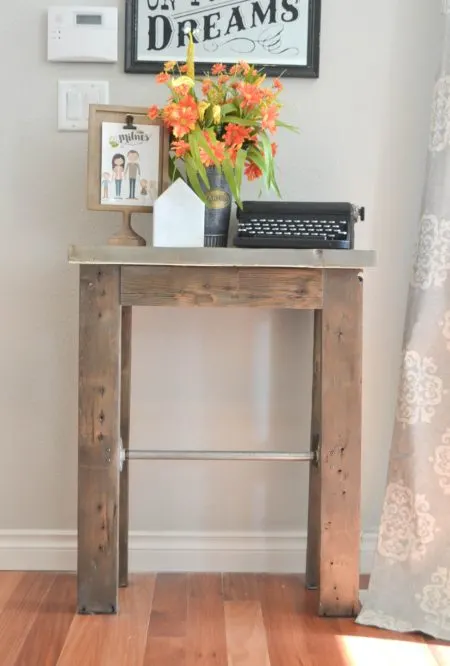
I threw some Weathered Oak stain on it just to get a little more desirable color. Then I sealed it with my favorite finish, Varathane Triple Thick Polyurethane in satin.
I put a couple coats on, and let it fill some of the rough spots. The table is fine just like that, or you can add some galvanized pipe. I used 1/2″ floor flanges and an 18″ length of pipe. Simply hand tighten the pieces together (they will not thread all the way, and that’s fine) and then screw the flanges to the lower short aprons.
This is a fantastic little project to use with “junk” wood you might find laying around. I have the most success with wood piles people leave out for the taking or that friends give me. This time the pieces came from Restore, and that can be a great source if you keep and eye on it.
I love what this has done for our faux entryway. While we use it as an entry table, but it would also be handy in a lot of other places. By building the legs a bit shorter it would also make a great nightstand. Or a side table in a living room. How about you? Where might you use a little table like this?
Happy building!


25 Beginner Woodworking Projects - The Created Home
Sunday 16th of February 2020
[…] Entry Table […]