Guys, building a bed has been on my to-do list just about forever. Or as long as I have been building things. So when my kids asked for new beds naturally I overthought the crap out of it.
Then I stepped back and decided to just keep things simple. But build it without any visible joinery because even simple needs a little challenge, amiright?!
Look, I love pocket hole joinery. It’s an absolute game changer in many ways. And yet it’s kind of like showing your panties in public…just a little…maybe? I knew I didn’t want to paint these beds, so I was going to have to find a different way too join everything. So with no more adieu, let me introduce you to my dowel joint bed frame. Want to make one? All you need are some simple pegs for this one – well, that and a few other tools. Come along and give it a try!
Let’s go over the supplies you will need for this build. But first hang on for just a second so you don’t get confused…or annoyed…or something. I am going to offer options here. You can build this bed super basic (you can even use pocket holes, I promise I won’t judge.) Or you can reach for the challenge and build it a bit more intermediate level – whatever that means. So don’t be overwhelmed if the supply list seems long. You may not need all of it. Really.
Oh, and I’m going to use affiliate links here. ‘Cause mama needs to a few cents here and there to cover my own late night Amazon shopping sprees. You can read about affiliate links here.
Materials:
3/8” wooden pegs @2” long
Wood glue
Bed rail fasteners
Tape measure or straight rule
3/8” bit
Hole plugs
1 ½” wood screws
Tools:
Dowelling jig
Miter saw
table saw
sander
chisel
pipe clamps
jigsaw (optional)
router (optional – plunge and trim)
drill press (optional, but really useful)
speed square
drill
Lumber List:
3 – 2x8x8
2 – 1 ¾ x 1 ¾ OR 2x2x8 (see tutorial)
2 – 2x3x8
5 – 1x3x8 furring strips
2 – 2x6x8
2 – 1x3x8
Cut List:
2 – 2×8’s @76” (long rails)
2 – 2×8’s @ 39” (short rails)
3 – 2×6 @39” (headboard slats)
2- 1 ¾ x 1 ¾ @ 14” (short legs – footboard) OR use 2x2s (see tutorial)
2 – 1 ¾ x 1 ¾ @ 50” (long legs – headboard) OR use 2x2s (see tutorial)
9 – 1×3 furring strips @ 39” (slats)
2 – 1×3 @ 71” (mattress supports)
2 – 2×3 @ 39” (headboard slats)
Here’s a look at the entire process in about 4 1/2 minutes.
Step 1: Mill the wood
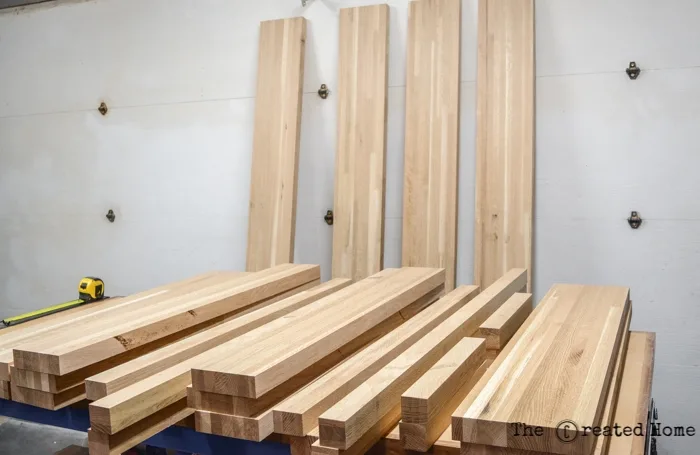
Right from the start I should tell you that the wood I’m using is a bit different. It is glued up white oak intended for use as railroad car flooring. It’s all edge grain, 1 3/4″ thick, heavy as the day is long, and for some reason was rejected by the company. I picked it up for a song, and held on to it until deciding to use it for these beds. What that means for purposes of this tutorial is that my measurements are based on the wood I was using.
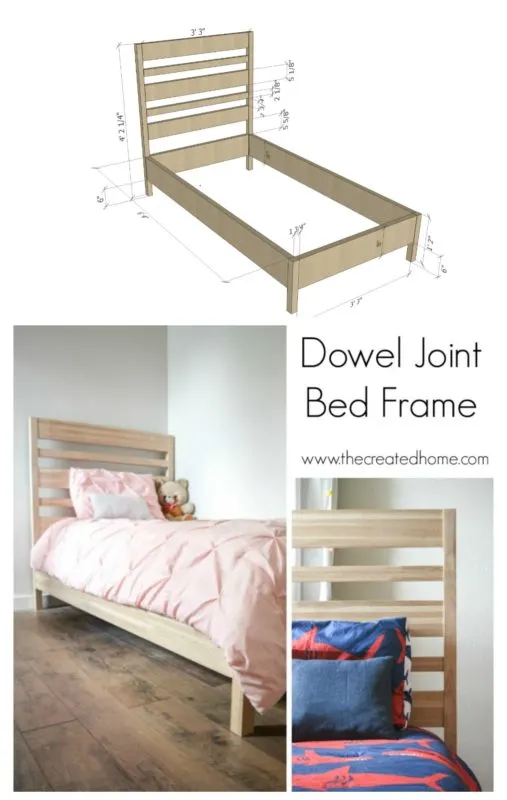
The legs on my beds are 1 3/4″ square. The rest of the boards – rails, footboard, headboard – are all 1 1/2″ thick, centered on the posts so there is a 1/8″ reveal in front and back. You can choose to make it that style, while will mean milling stock to 1 3/4″ (or larger), or use 2x2s and have the rails and headboard slats sit flush to the legs. It’s entirely up to you. The doweling jig I recommend later is self centering and works the same no matter what you decide.
All of the adjustments here based on wood choice/size, etc. will be here in the first step, so this will be the longest. You totally have this. Stick with me.
-Start by cutting the legs – 2 at 14″, and 2 at 50 1/4″.
-Next, cut the two long rails from 2x8s at 76″ long and the two short at 39″ long. Note that if using 2×8 material your rails will be 7 1/4″ wide, so you will need to adjust the measurements in the 3D sketch such that the rails are elevated 6 3/4″ from the floor rather than 6″.
-Cut the 2x6s into three precisely equal 39″ pieces. Cut two 2x3s into the same 39″ lengths. Set a stop to make sure these are precise. My measurements called for 5 1/8″ and 2 1/8″ pieces for the headboard, so you will either need to rip your pieces down or adjust the measurements on the diagram. I recommend ripping if you are using boards from a home improvement store so you can get rid of the rounded edges. It will make for a cleaner look.
That’s it! You are through the decision making, have nearly all of the pieces cut, and are ready to build!
(I made two at once, so don’t freak out about the number of pieces.)
Step 2: Clean up the wood
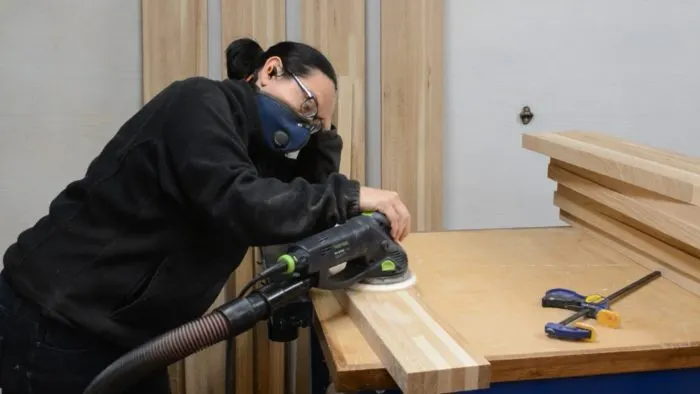
That sounds better than sanding, right? Sorry, this part is not fun. Put on some tunes or a podcast or something, and sand like it’s going out of style.
This is one of those times that I really wish I had a drum sander. Feel free to send one if you happen to have an extra, okay?
Tip: I use my ISO Tunes Pro when I’m out in the shop, and they are a huge help, mentally and auditor…ily?
Another tip: Yes, the sander I’m using here has excellent dust collection. But I was still working on getting over a bad cough here and didn’t want any chance of dust in the lungs. Pretty much we should always take it that seriously. The RZ Mask is a pretty comfortable option if you are wearing these things a lot. Which you should be.
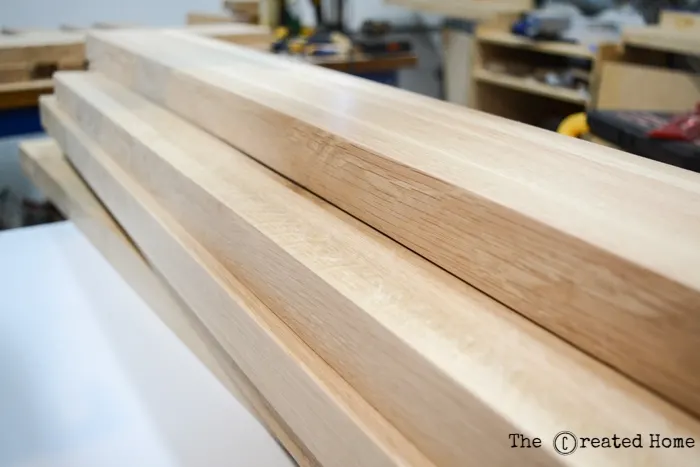
I sanded up to 320. You do what feels right to you. Oh how I wish you could feel these boards. They are silky smooth.
Step 3: It’s Dowel Time, Baby
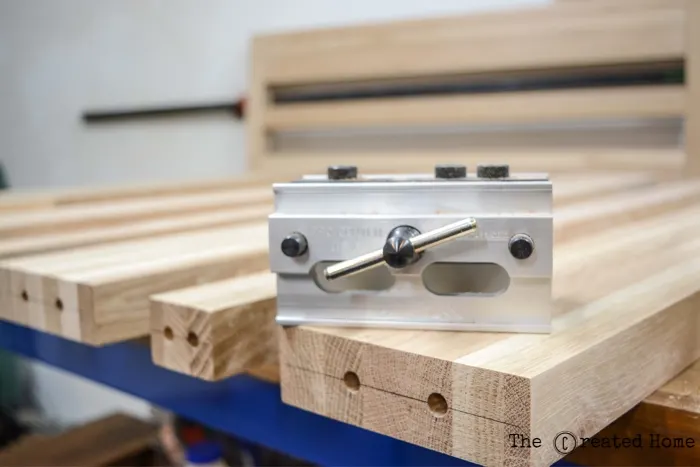
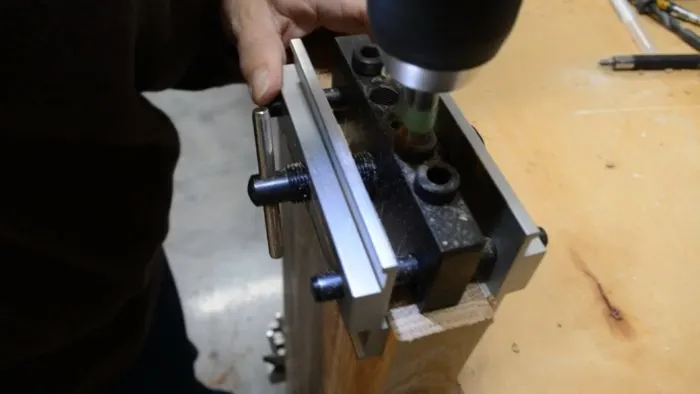
Congratulations! You are ready to start joining this thing together. Dowels or pegs are a great joinery option. They are strong, very inexpensive, and relatively simple to use. That said, I cannot recommend enough that you spend the money on a good self-centering doweling jig. This is the one I used, and it is absolutely the best option for the job. There are less expensive options, but they either don’t clamp into place, or they aren’t self-centering. Believe me, you want both. Save yourself shipping and pick it up at your local woodworking store if there is one nearby.
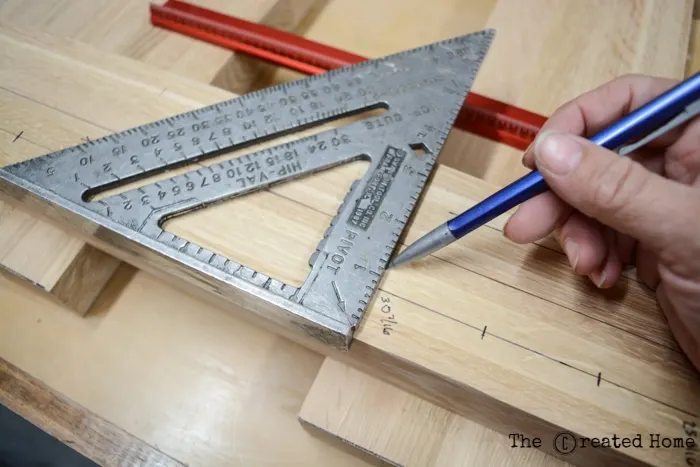
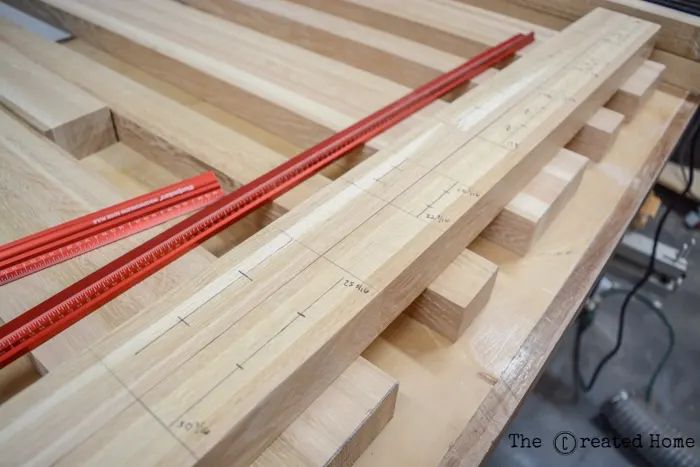
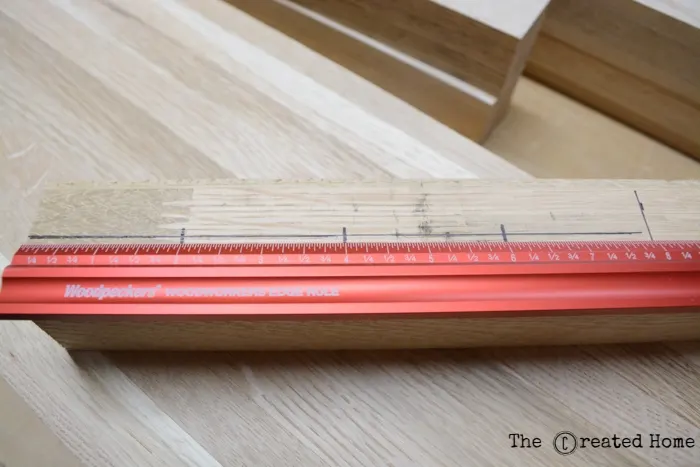
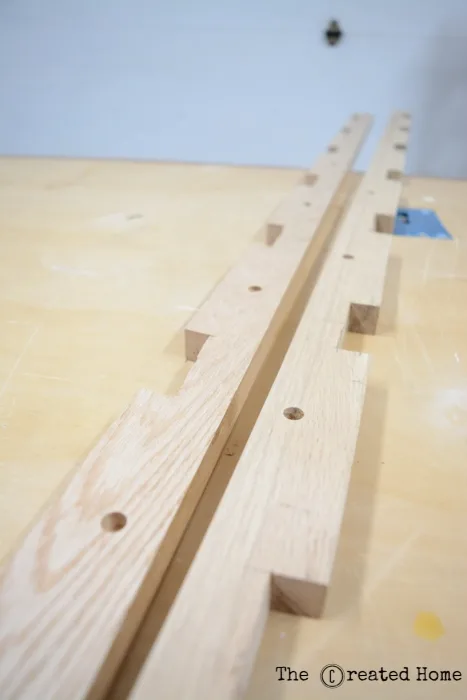
You’ll need to mark the exact same spot for the dowels on both the headboard slat pieces and the posts to which you are joining them. To do this set them all side by side and first mark the posts. Lay them side by side and using a speed square to insure that everything is perfectly lined up on both posts.
You don’t need to make sure the peg holes are evenly spaced from top to bottom, but you will need two per slat so they don’t have a pivot point.
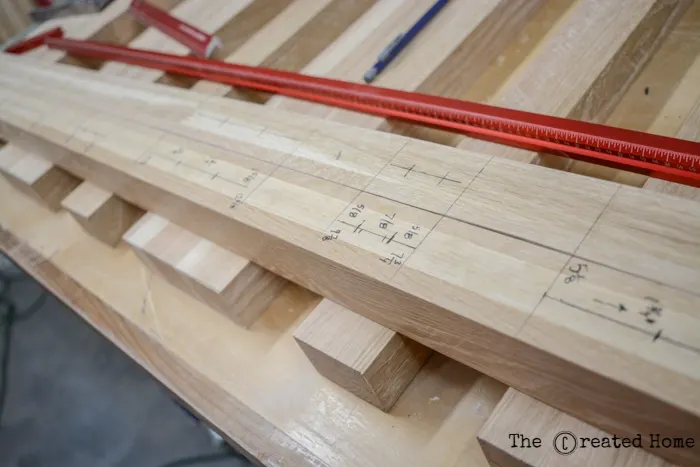
You can see the measurements I used written on the boards in these photos. What was important wasn’t so much the measurements I decided as that I was consistent. A straight rule makes a world of difference here. I use this one by Woodpeckers. Nope, not inexpensive stuff, but I save my pennies for these because they make measuring and layouts darn near a pleasure and make shooting for perfection and darn near attainable thing. Here’s a less expensive straight rule that will also get the job done.
Take your time laying these out. It will make all the difference.
Step 4: Drill the peg holes
Use a 3/8″ bit and 3/8″ pegs. Set the bushing so that you are drilling just over 1″ down. That’s probably more than necessary, but I like a little overkill.
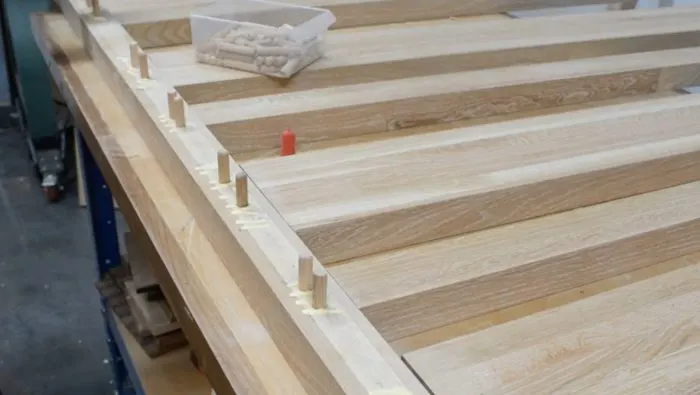
Drill two holes in the end grains of each of the 5 headboard slats, and exactly corresponding holes in the 50 1/4″ posts. Do the same for the foot board. I did three dowel holes for each end of the foot board. That’s 64 holes. Onward.
Step 5: Glue and join
Get some glue on all of those joints, and lock it all together. It will fit very snuggly. I recommend clamping to bring them fully together. Pipe clamps worked like a dream for this. They are also lone enough for the job and relatively inexpensive. If you don’t have any now is a good time to splurge. A helpful tip: Skip the Besseys and pick up some Harbor Freight H-style clamps to fit on the galvanized pipe. I’ve had mine for years and they work great. Leave the who contraption in clamps for 24 hours, and boom, you have a headboard. And footboard. You are well on your way.
Step 6: Add rail hardware
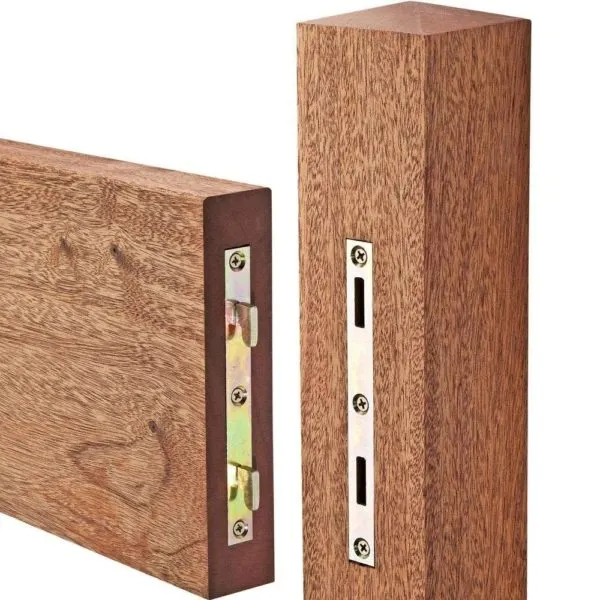
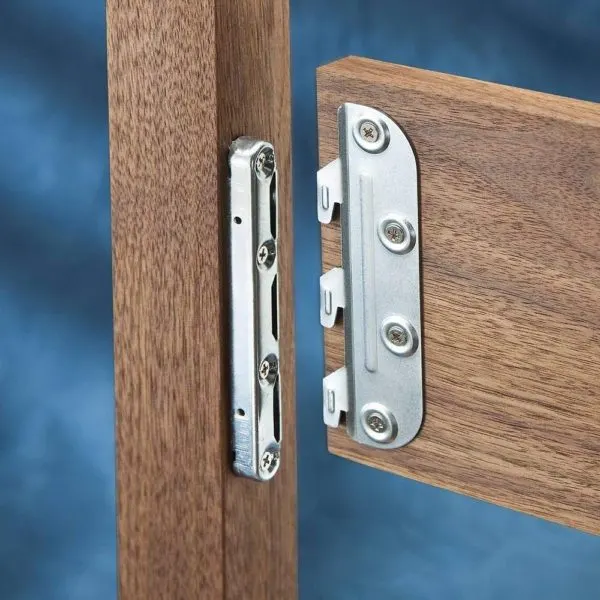
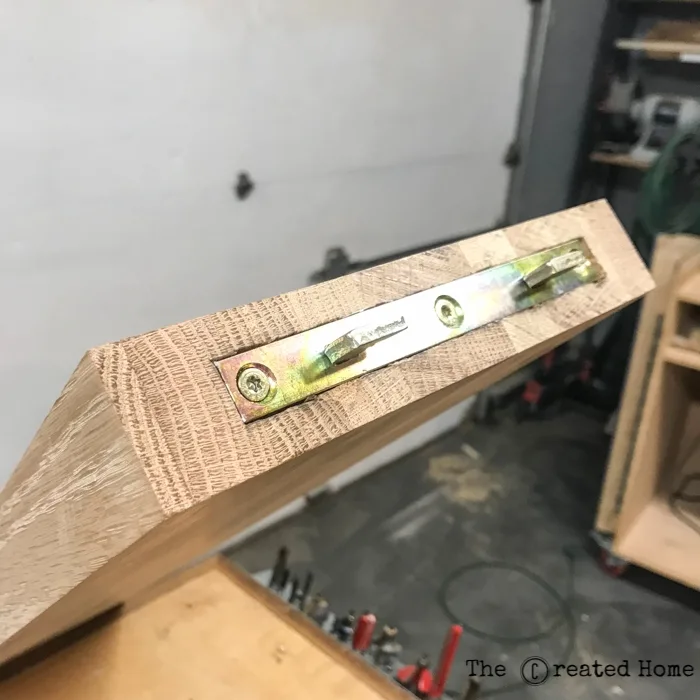
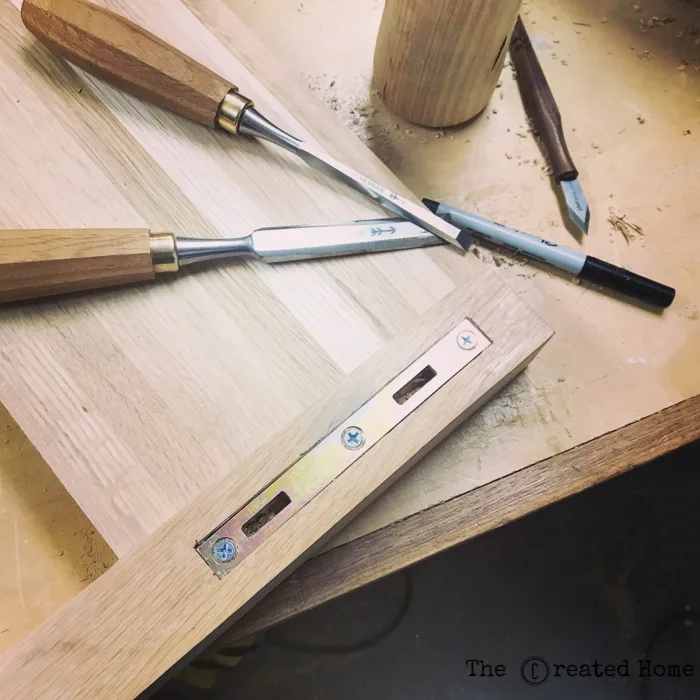
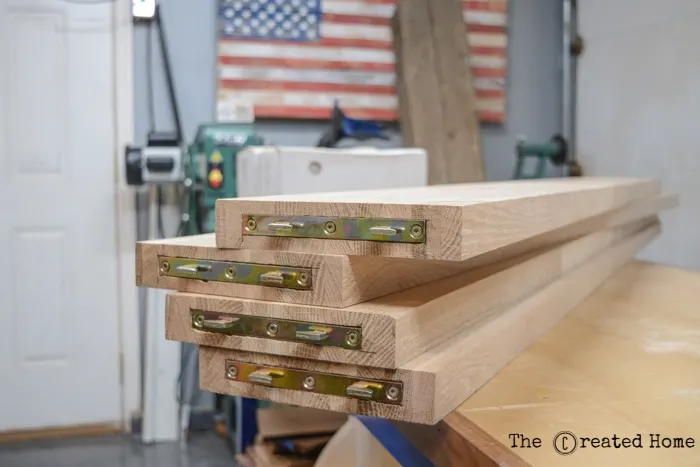
While the headboard and footboard are clamped up, you can prep the rails. I used these steel bed rail fasteners from Rockler. (Again, save yourself shipping and go get them if you have a store nearby.)
I like these because they work, they are inexpensive, and they have been around forever. They are actually quite simple in function. That said, if the thought of mortising these out is enough to drive you to drink, here is an even simpler option that does not require mortising.
But I think you should go for the first one, particularly if you haven’t done it before. Why? Because! Challenge yourself, do something hard! Actually, it’s really not hard. And once the bed is all connected it won’t even show if your lines are not perfect. So go for it.
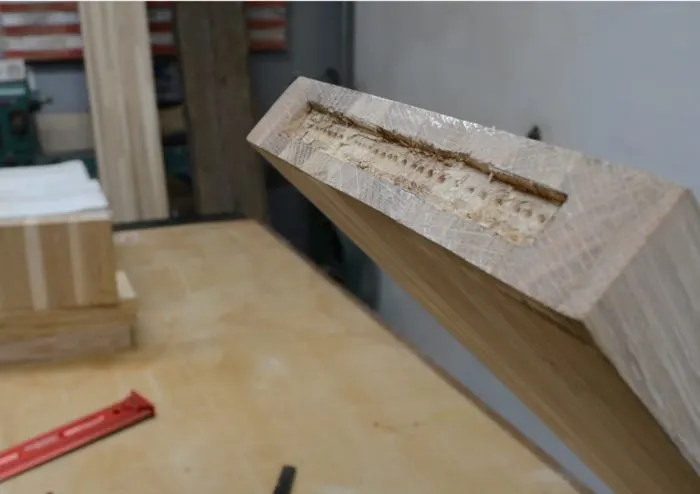
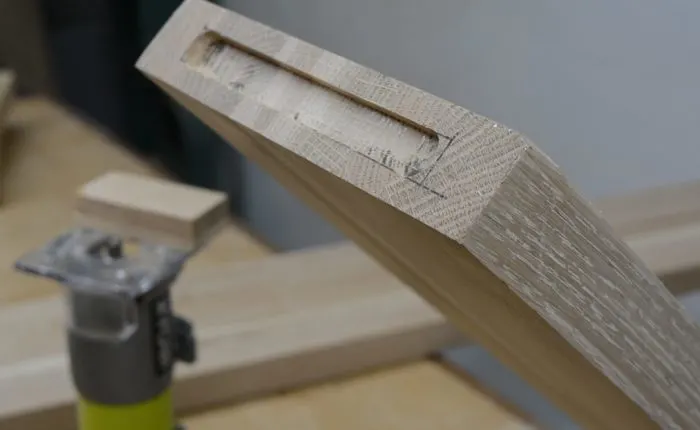
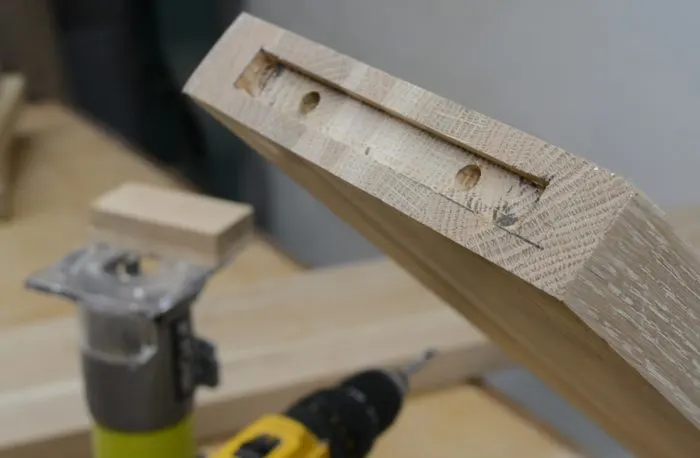
To cut the channel for the fasteners it’s easiest to use a router. That’s easy enough on the flat portions, but a little trickier on the end of the rails. There’s two solutions here. First, you can use your drill and a bit to remove material. Your doweling jig comes to the rescue once again with this option! Use it to guide the drill. Then clean up the sides with a chisel. This takes more time than the router, but it’s a totally accessible method.
Router Option:
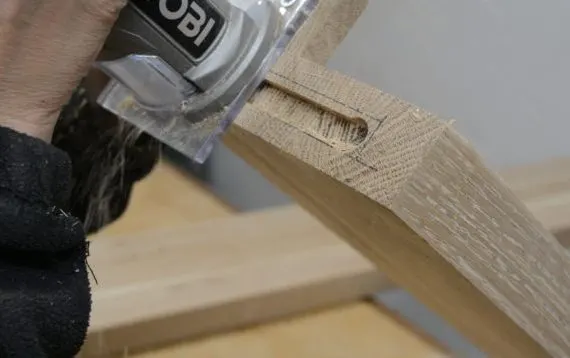
The faster, cleaner option is to use a router.
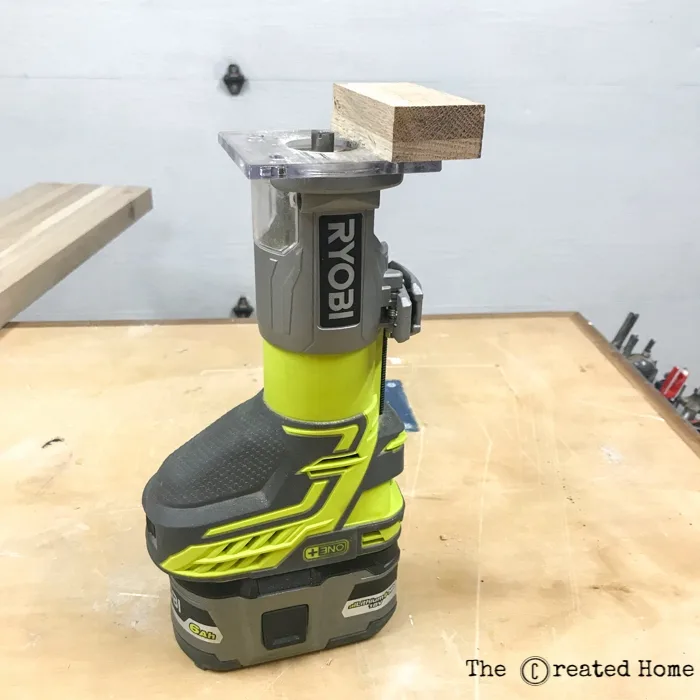
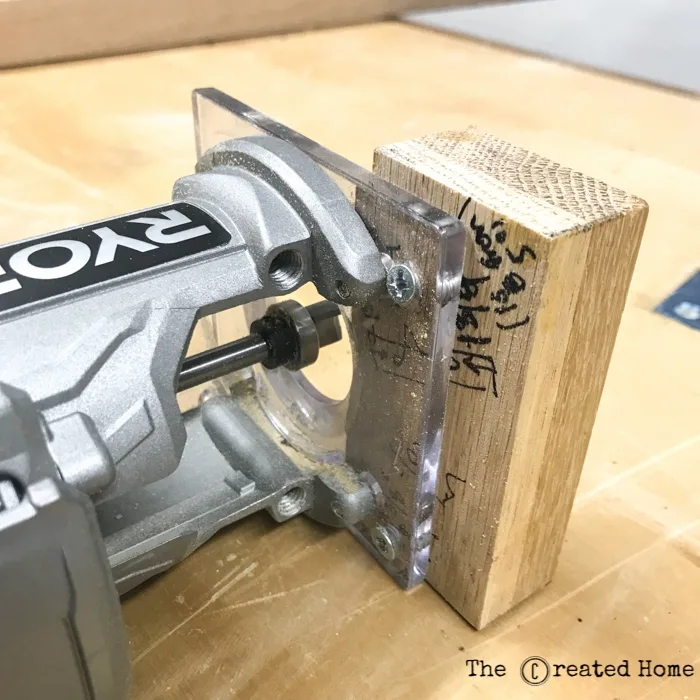
Okay, I found this router guide on Rockler, but it wasn’t available locally and I needed to get them cut. If I had it to do again I would definitely try this. Buuuut, I didn’t so I threw together my own ghetto-rific jig.
All I did with screw a block of wood into the plate on my trim router. I wasn’t about to try maneuvering my larger plunge router on end grain. A trim router isn’t meant to plunge, but we aren’t going very deep here, and something easy to handle is key. Yes, this puts holes in the plate. It’s probably replaceable…
Besides, it totally works. Like a freaking boss.
Don’t forget to drill holes for the…uhhhh, nubs? on the back of the fasteners.
That’ll do!
The hook end of the fasteners is easier, as it is not into end grain. For those I used my plunge router with a guide. There are a million videos out there showing you how this process works, and this tutorial is already crazy long, so I’ll let you consult with more expert craftspeople out there if you want to see more of the fastener process.
My advice is just to go slow. This was my first time, and I love how it turned out.
Step 7: Make the Mattress Supports
Guess what? Your bed frame is done. I mean, a mattress would fall straight through, but still, it’s a frame.
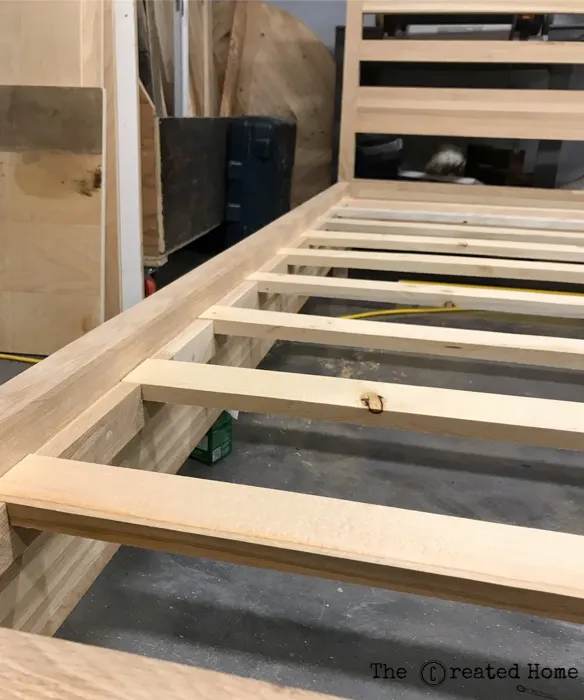
For the supports I used something like 1×3 pieces cut to 72″. You can either screw the slats down to the supports, or you can use a jigsaw to cut grooves where the slats will sit. I choose the latter option because I like that assembling and disassembling the beds doesn’t require any tools whatsoever.
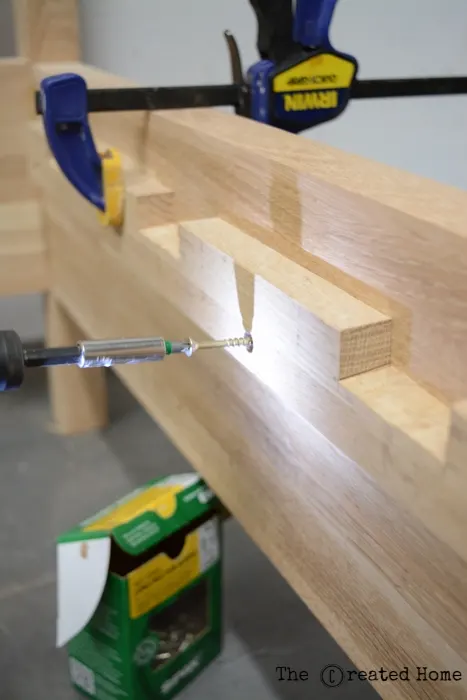
Screw the supports to the sides. I attached mine 1 1/2″ down from the top of the rails.
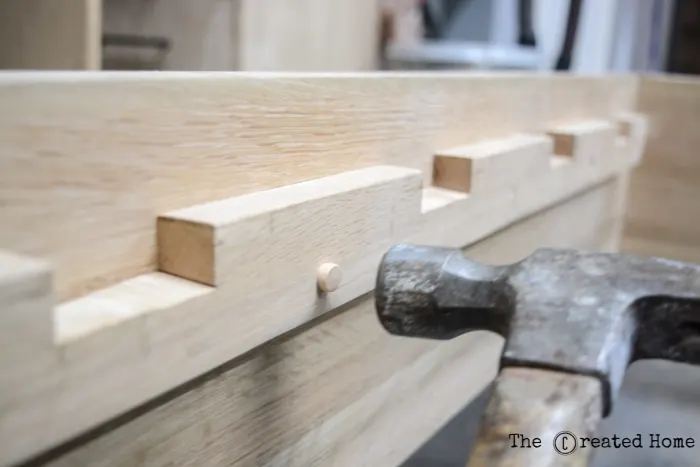
Countersink and use plugs to cover the screw holes. Because after this much work you don’t want screw heads showing, right?
Voila! The slats can be made of cheap furring strips and fit without having to screw them down.
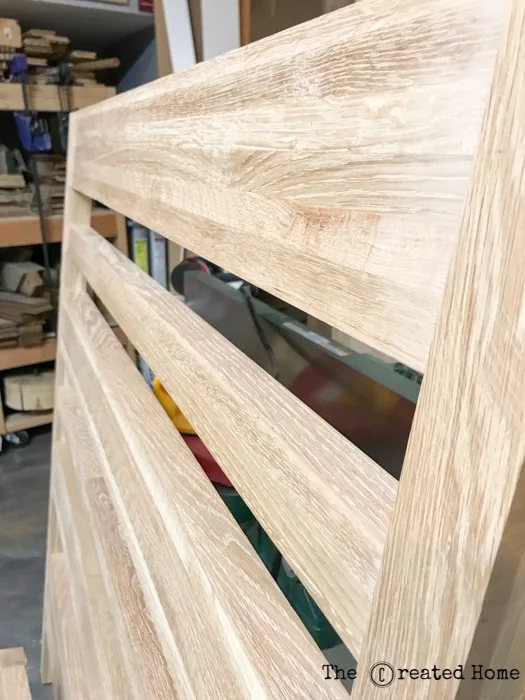
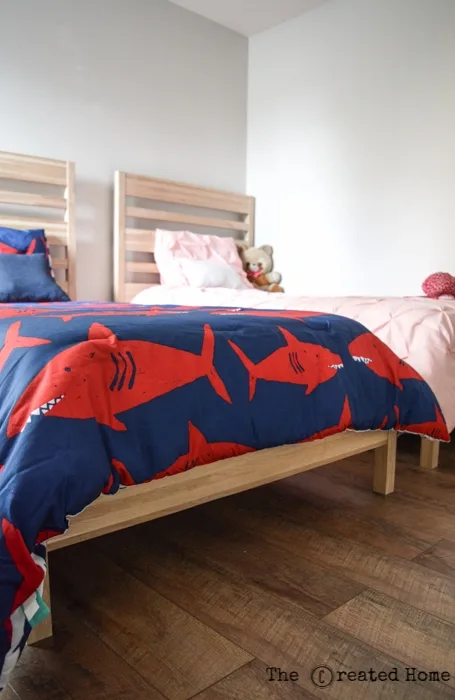
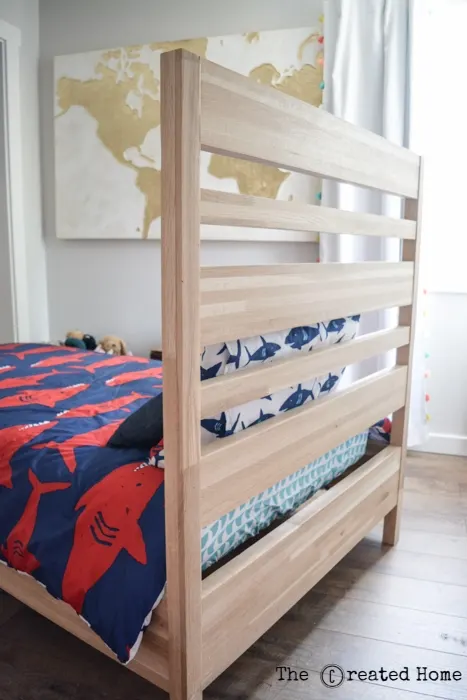
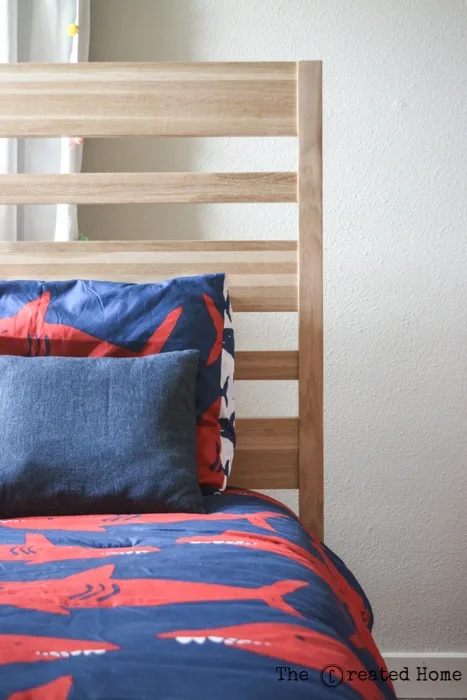
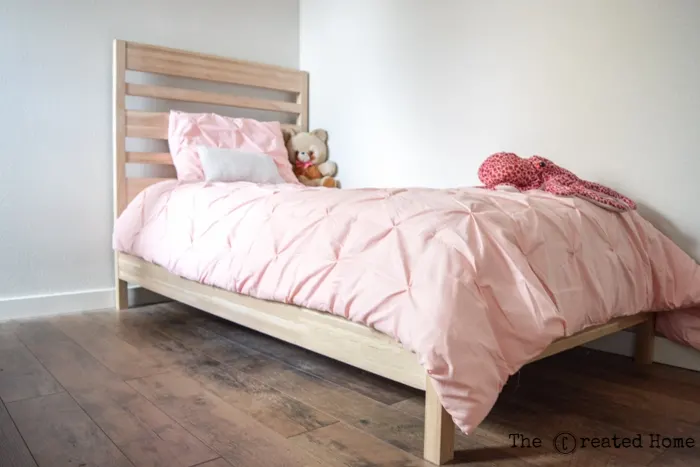
That’s it! Let’s check out how they look all finished…
Look ma – no pocket holes!
Front view:
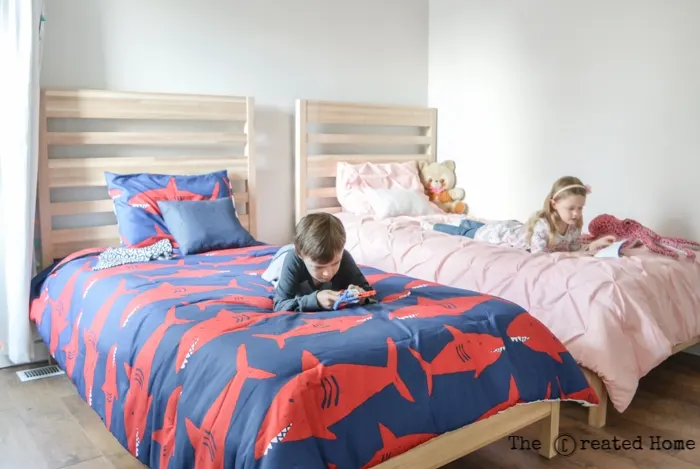
Ah, one more…
These beds were a lot of fun to make. Most importantly, my kids love them.
If you have any questions, please don’t hesitate to ask, and be sure to share photos if you make one!
Happy building!

Annabelle
Thursday 26th of March 2020
I'm going to handle a ruler without a headboard in the blink of an eye. We need to gather together the HD pocket opening dance and sections. The most extreme weight burden would be the base most pessimistic scenario. Include a third or is that needless excess? Sort of eager to check out this. I'm not a working specialist so I measure twice, cut once.
Katie
Wednesday 22nd of January 2020
I have been searching the high heavens for a straight forward overall description of how this done and this is so spot on! Thank you and incredible work! I am about to embark on my first work working project ( a bed frame) with the help of an experienced woodworker and this helped me get out of my self-doubting headspace. Thanks again!
Sarah
Tuesday 16th of June 2020
Thank you! I'm so glad to hear it. Best of luck with your project, and many more to come!
That Sassy Life coach
Thursday 18th of April 2019
Thanks for sharing!