
Walk in closets get all the love, but let me tell you that a custom closet design for a reach in is a pretty awesome solution to closet envy.
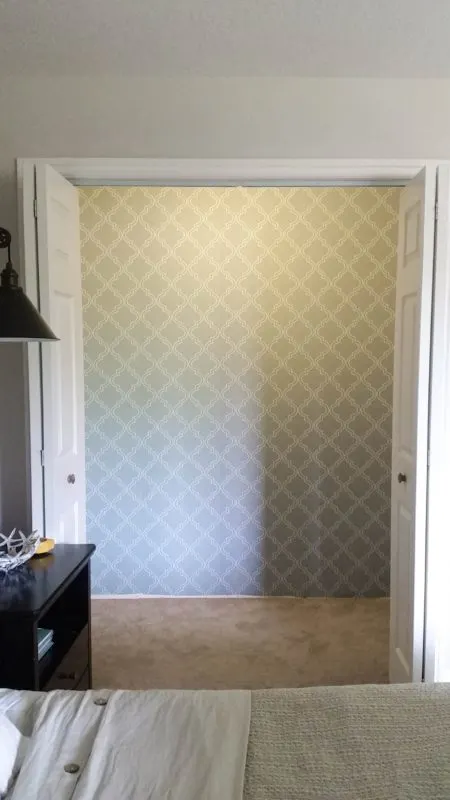
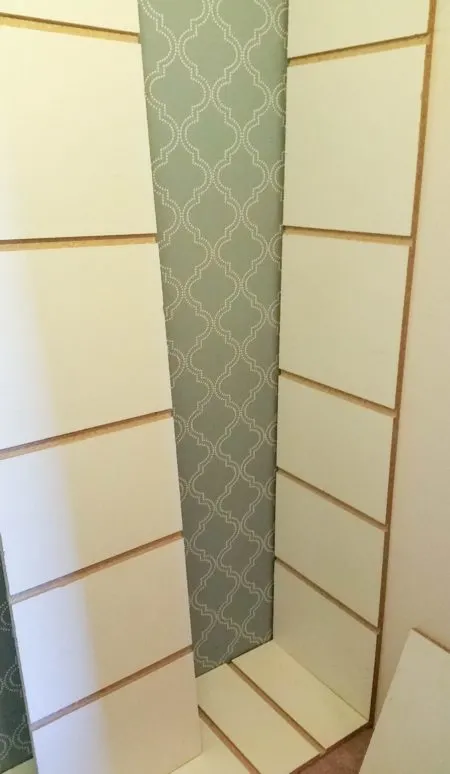
I’m going to show you what our closets looked like for a brief period as I kicked off this custom closet makeover. Are you ready for this?
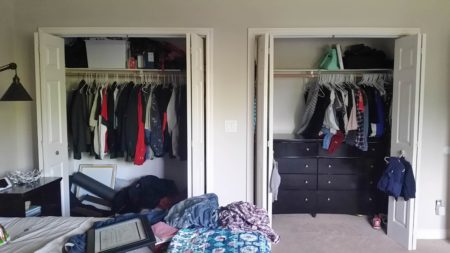
Some explanation is in order. I recently pulled off an awesome eight hour complete bedroom makeover to surprise my husband. It was kind of awesome. I’ll post about that later. Part of the design called for custom closets, but then initially the makeover surprise was supposed to be a couple day thing, and it ended up being limited to eight hours. So I shoved the dresser in one of the closets and called it good for the time being.
These closets are pretty well identical in size. They are generously sized for reach ins, but they were not fancy. Actually, initially this room didn’t have closets at all. Actually, this room was two bedrooms. When my husband gutted the house he formed closets out of what was formally the main hallway. I think he made pretty good use of the space personally. But they needed an upgrade.
That met moving everything from my husband’s closet over to mine, plus dresser. Yikes. Things were a bit squishy for a while.

How to Build a Custom Closet System
*This post contains affiliate links for your convenience. You can read my full disclosure statement here.
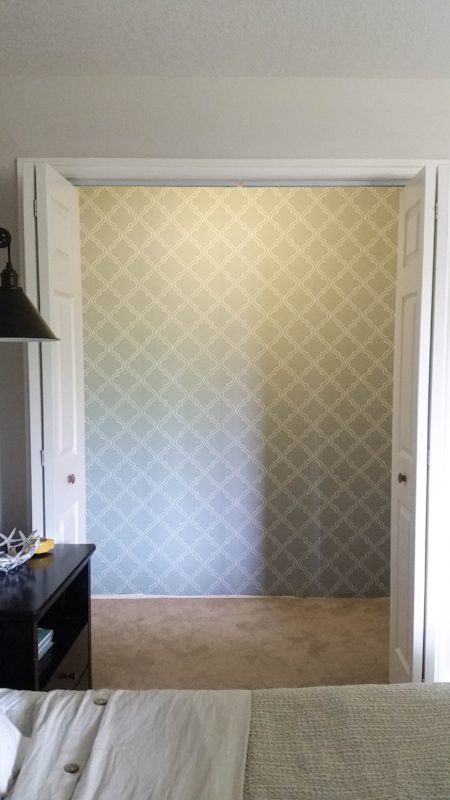
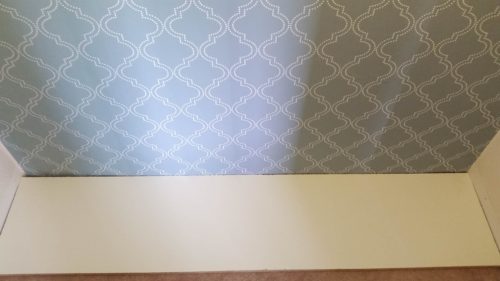
The first step was to remove all of the trim, shelving, and supports. I applied this wallpaper to the back wall for an extra luxurious feel at a nice, frugal price. It didn’t have to be perfect along the bottom because it was going to be covered by the shelving.
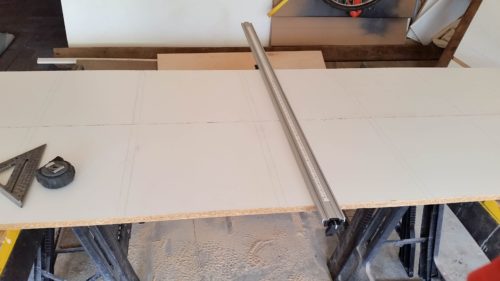
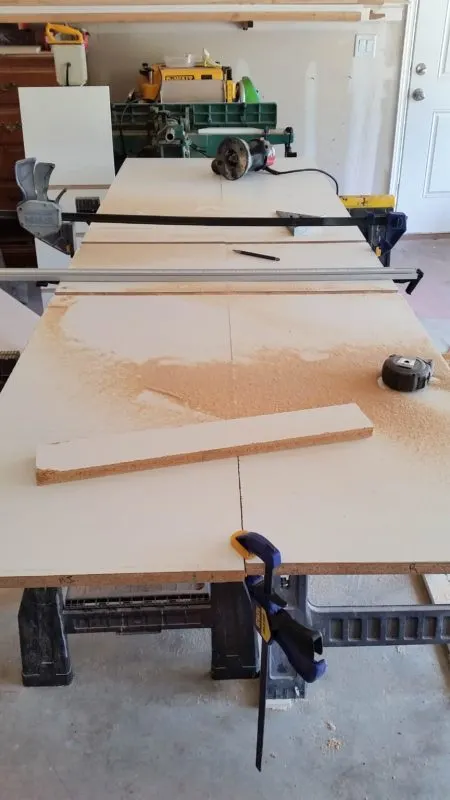
I chose to construct the new shelving out of 3/4″ melamine board. I purchased 5 sheets at $30 each and had Lowes rip them into 16″ sections. That brought the cost for the shelving material for both closets to $150. Not too shabby! I wanted the closets to be really solid, and to be a bit deeper than you might otherwise find in a reach in.
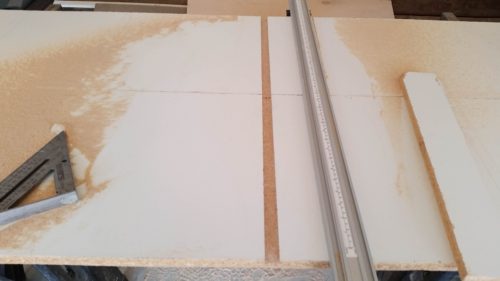
The first thing I did was to cut a board to precise measurements for the floor of the shelving unit. I wrote about out-of-square woes in my post about our fireplace makeover, but it bears some brief repeating. Custom carpentry can be really tricky because measurements have to be taken as you go and constant adjustments are par for the course. To build this closet I made the trip from garage to bedroom approximately 791 times. Give or take a few. Add to all that the extra factor of working in a house that has actually been physically moved, and you get some tricky carpentry situations. So the first thing I wanted to ascertain was just how square – or not square – this closet was.
And here it is.

See the gap along the back of the board on both sides? Guys, that’s pretty darned bad. Ultimately, I made the decision to build the closet up square and allow for a “float” along the back side. I am confident that this was the best decision and can honestly say it has turned out just fine. So if you find that you have an out of square situation (though, likely, it won’t be this dramatic), take heart! It’s all part of the challenge!
Before I started this build I spent a good deal of time sketching out designs and discussing them with my husband. While I often use Sketch Up, sometimes good old-fashion graph paper suits me fine. Sketching the design is important not just for determining what you want it to look like, but how and in what order it will all fit together. I decided that I really wanted to avoid nail holes, and so it was necessary to router out all of the places where shelving would fit together.
This part is messy.
I measured and drew where the lines would be, then I clamped a guide to the board 3″ from the midpoint, since that measurement lined my router up precisely. (I use this guide and love it.)

If you haven’t done a lot of routering before, or you are not blessed with a vacuum system for your shop (we don’t have one) then be prepared for a major mess. And, of course, as a safety reminder, you’ll want safety glasses, earplugs, a sanding mask, and maybe some gloves for this one.

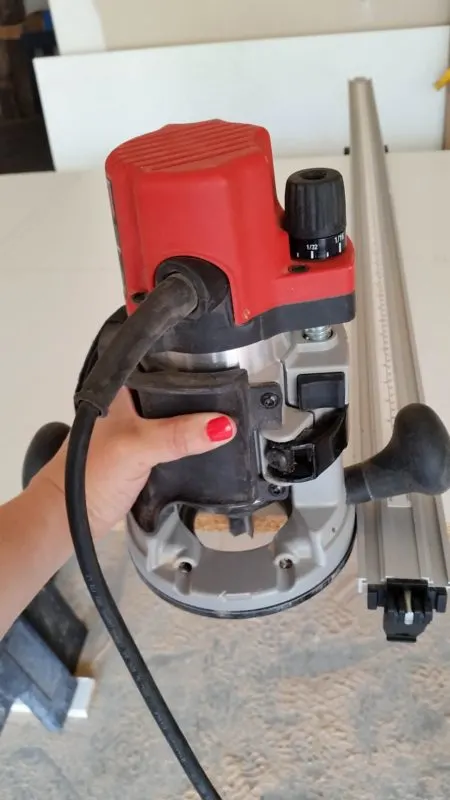

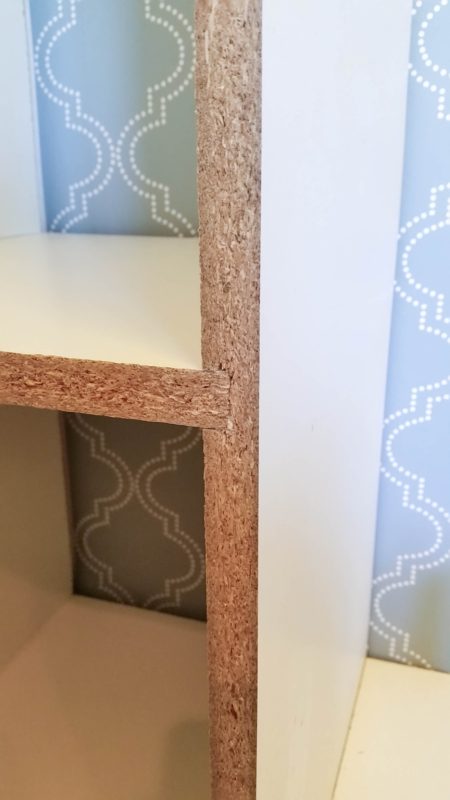
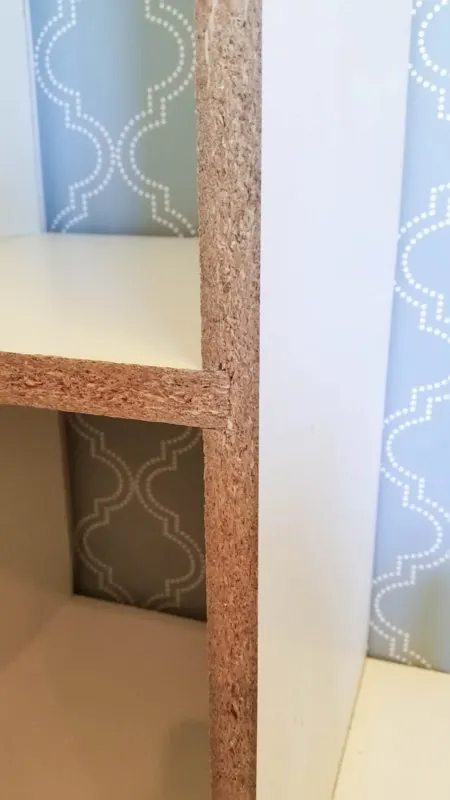
In order to ensure that the shelves lined up perfectly I laid out the two sides of each shelving area next to each other and clamped them together. I then routered one long line.

Here is what one side of the closet looked like as it was coming together. You can see that the grooves line up so that the shelves can simply slide in. I attached the side boards to the wall sides with a finish nail gun, burying the nails in the grooves where they would be covered up.
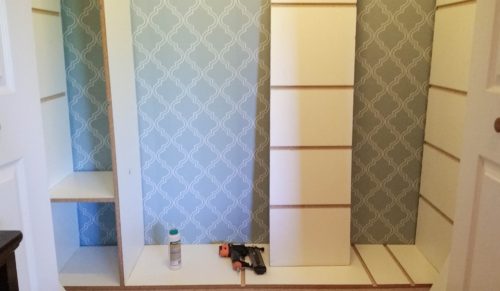

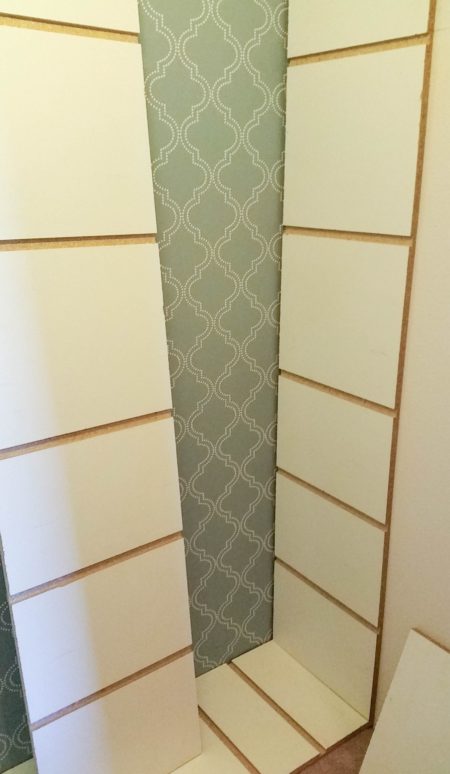
The side shelving areas fit in tightly enough that they can free stand even without the middle supports joining the two sides of the closet together. I also ran a line of glue down the grooves just because I like to make sure everything is extra secure. You can see how tightly the shelving fits together using this method. The exposed edges were later covered with trim.
I then cut and fit the middle supports…which, as you can see made for a fun play area for my little ones.

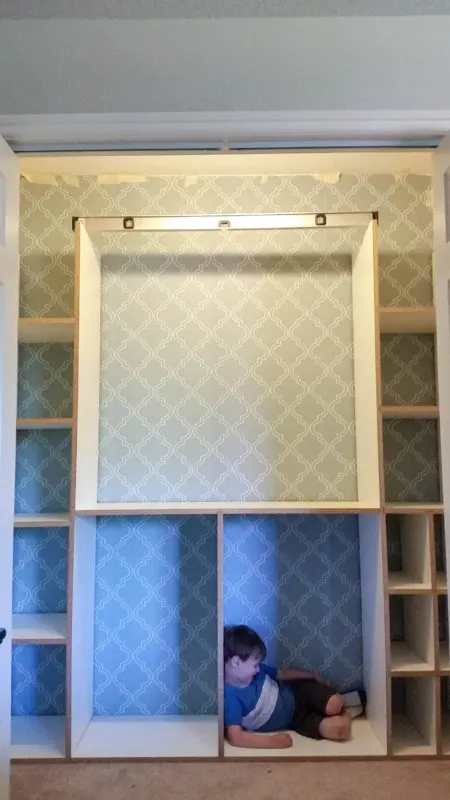
After installing the shelving I went through and caulked all of the lines where shelves came together. Doing so gives the whole thing a nice finished look, as though it was always there.
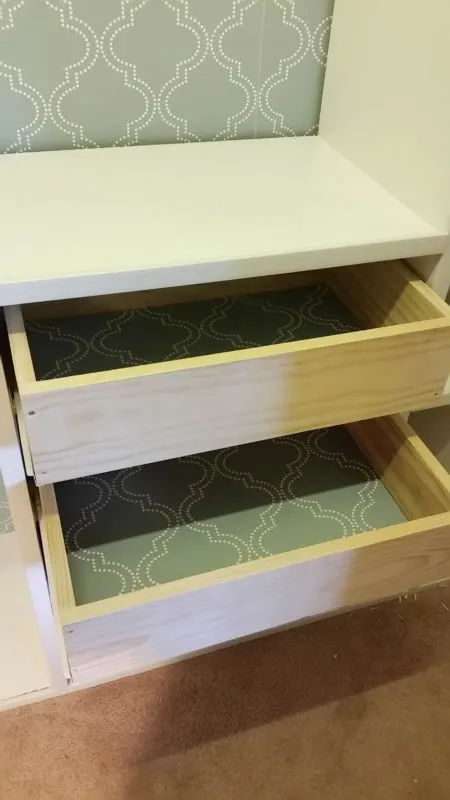
The Drawers
Once the basic structure was in place it was time to tackle the drawers. I’m not going to kid you, this part scared me to death. I wanted the faces to sit flush with the trim, so precise measurements were essential. My advice for custom builds like this is to take the time to make sure everything is coming out square, or you will run into a major problem in building the drawers. Fortunately my measurements were good, so after sketching it out and feeling anxious for a week I got down to it. I built the drawers to a standard uniform measurement, then added faces to fit the closet box opening. Follow the directions for whatever slides you go with to ensure that you allow for enough space on either side of the drawers.
I constructed the drawers out of premium pine 1×8 board and simply screwed them together using 90 degree joints. I countersunk them, and the face plate covered the holes. For the bottom of the drawer I used square dowels to form cleats and 1/4″ plywood for the bottom.
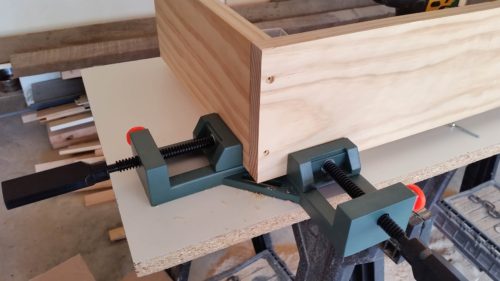

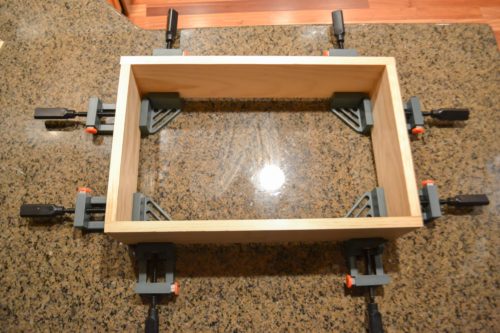
My husband bought me these awesome corner clamps for mothers day. I’m kind of over excited about how useful they are for ensuring that all of the edges join up nicely.

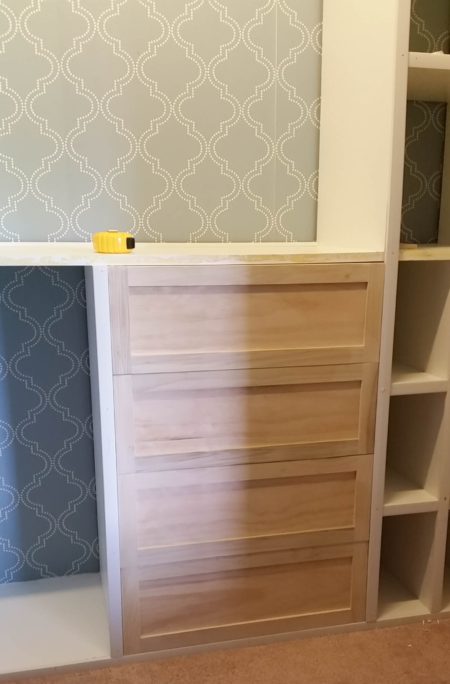
When constructed, my boxes sat back one inch from the trim face to allow for the drawer faces and 1/4 shaker style trim. These drawers could have been a little deeper, and that’s one thing I am doing differently as I build the second custom closet.
As an extra touch I used the leftover wallpaper to line the drawer bottoms.

Before cutting the faces I went through yet another round of measuring and remeasuring to ensure that everything would sit nicely. My recommendation is to hold off on doing the closet trim until this step is done so you can fit it neatly around the boxes. I learned that the hard way.
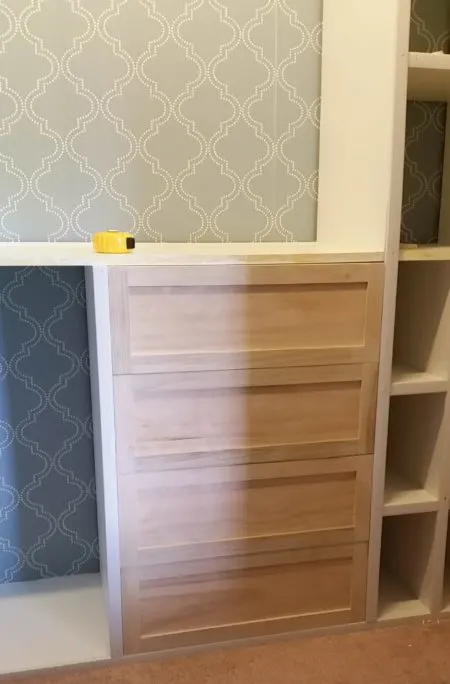
Trying them on for size…
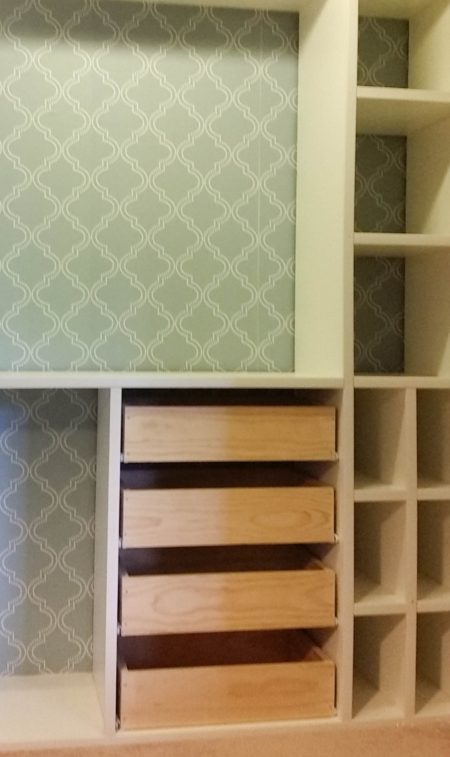
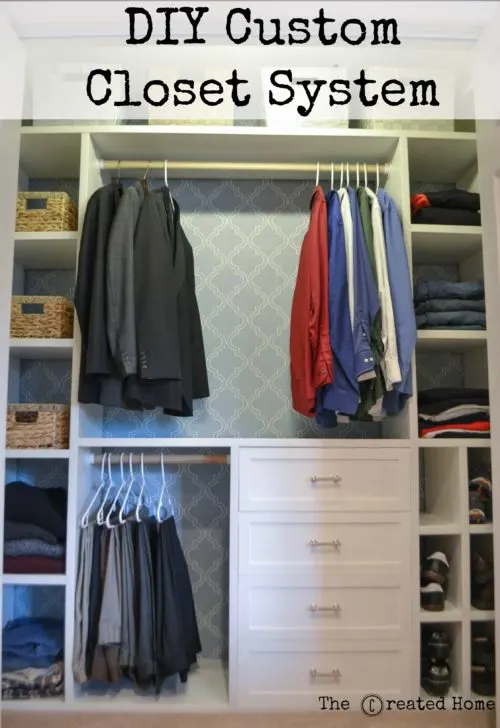
And here it is!
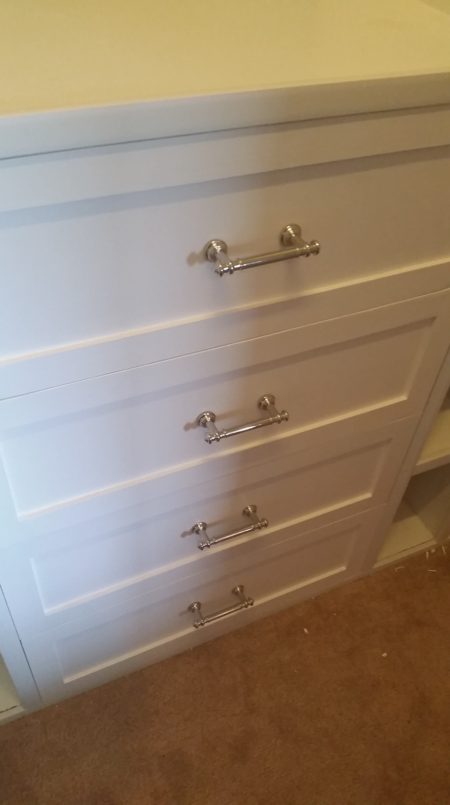
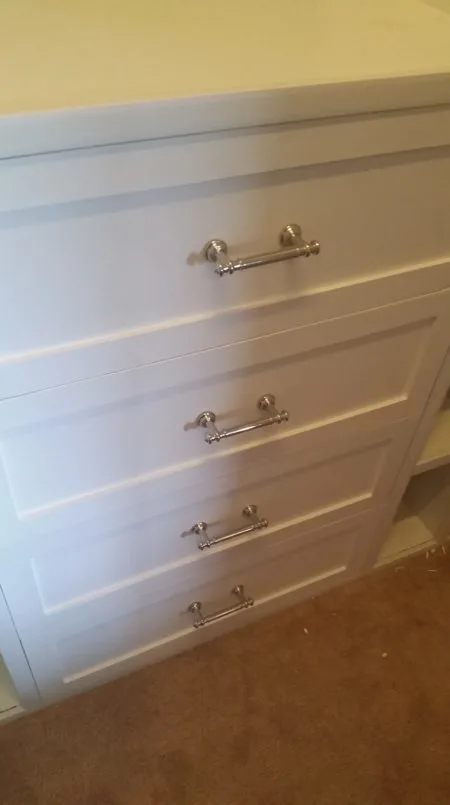
I love the look of the polished hardware. It really gives the closet that glam look I was going for.
The trim work is 1 inch material, which helps bulk up the look of the closet a bit. I attached it with finish nails, making these the only nail holes that had to be filled and disguised. I caulked the lines where the trim met the wall, and reattached the baseboards, cut down to the new measurements as I now had only the space in front of the shelves left showing. Finally I put in the closet rods, cut down from the rod that was there previously. I also added baskets purchased at Home Goods and Michaels.
Sizing it all up
The bottom part of the closet, from the floor to the first shelf measures 35 inches. This is slightly under the recommend allowance of 36 inches for lower hanging clothes in a double hung closet. The top box, where the shirts hang, is about 44 inches, again just slightly under the recommended allowance. The top shelf sits at 79″. I chose this design because I found that it still allowed clothing to hang without touching the bottom, and allowed for about 16 inches of space above for extra storage. Our ceilings are eight feet high, and most custom closet designs would call for taking the shelving unit clear to the top. I decided to go with this design to maximize storage and functionality. The same heights are also going in my own custom closet (under construction now!) and I find them must more friendly for my 5′ 3″ height!

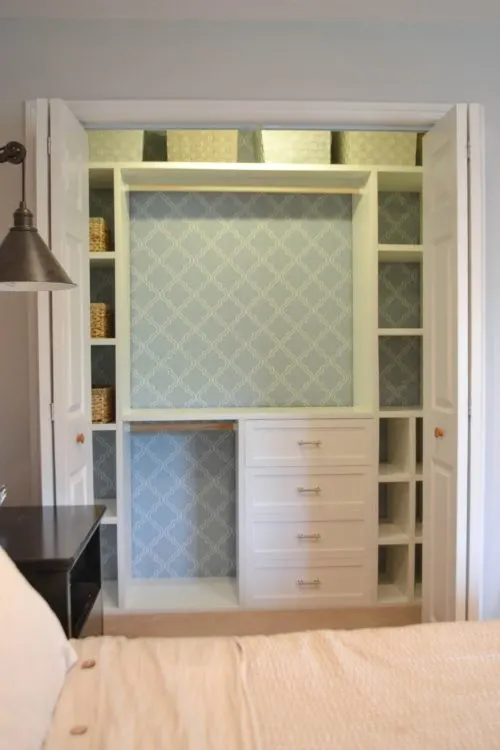
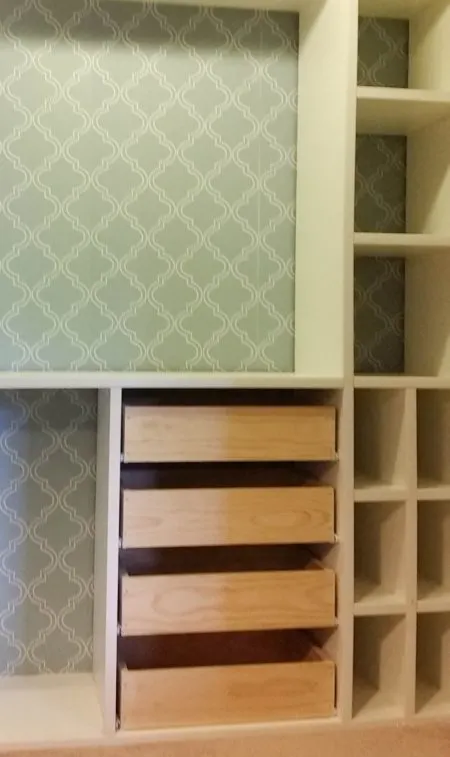
Whew, that was a lot! If you have stuck it out this far, bless you. Here is your reward – the finished product!
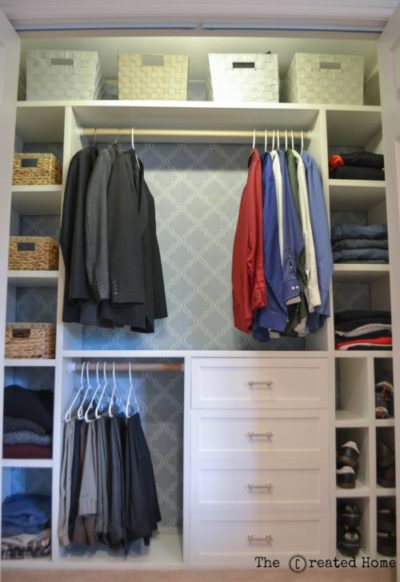

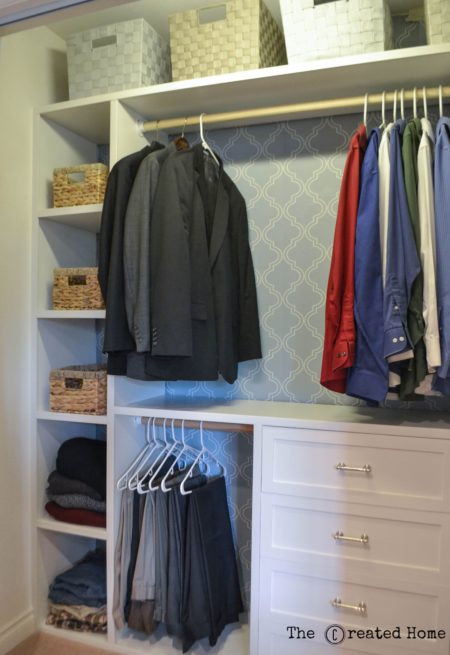


We are thrilled with how it turned out. Obviously it is a little more full now that I am finished taking lovely photos of it! Guys, he is not going to appreciate my saying so, but my husband has not always kept the neatest of closets. This design makes it really simple to do so, and after a few weeks of use it is still looking great. It is amazing how much space there is, and how useful it has been. My own custom closet is nearly complete and I am excited to share that with you soon.
The bottom line is that a custom closet is a terrific way to add value to your home or just create a lovely space for yourself that will make your life that much more simple. Reach in closets get the bum wrap sometimes, but with a little creativity they can be highly functional, attractive spaces that utilize space like a champ. Having these closets built would have set us back nearly $2000, by our estimates. Constructing it myself, our cost, including everything from the wallpaper to the hardware, was about $340.
Please feel free to ask if you have any questions about this project. In custom builds in can be pretty well impossible to create a full tutorial, but hopefully I have been able to give some idea of how this type of build goes together. And, as always, if you decided to tackle your own custom closet share a photo and show off all that hard work!
Happy building!

Sheryl Carls
Tuesday 9th of March 2021
Thank you for this article. Here's my dilemma. Hopefully you can help. We live in a 100+ yr old farmhouse. NO CLOSETS. so we are remodeling a room,My husband wants to do it right with a closet. I guess my question is how deep should I make it? The wall is 115" wide. Ceilings are 9' tall. there is a door on the left end of the wall.It s a 30" door. what should we do to make this look good? I don't want any exposed shelf on top, it should go to the ceilng. Less dusting lol.
Do you have any suggestions? Thank you
Sarah
Wednesday 31st of March 2021
Hi Sheryl. Standard reach in closet depth is 24-30 inches. Mine are oddly sized at 36", which is pretty spacious for a reach it. But I like it! I hope that helps.
Karen
Sunday 28th of February 2021
Dang! I'm impressed! great job and very inspiring! thanks so much for posting this.
Sarah
Wednesday 31st of March 2021
Thanks, Karen!
Woodworking Ideas Instagram – Abalane
Tuesday 12th of May 2020
[…] Download Plan More @ thecreatedhome.com […]
Jen Miller
Thursday 18th of July 2019
This looks great! I have been wanting to do something very similar with my closet. When you first started, how did you remove the rod and the piece it fits into without ruining your wall? My rod does not slide into the piece on the wall so I’m not sure how to take it out carefully!
Sarah
Monday 23rd of September 2019
If you are worried that it won't come out without damaging the wall you could always cut the rod itself in half. Sorry, that was way too late of a reply. I hope you figured it out!
Roger Middleton
Monday 29th of January 2018
My wife and I have been wanting to add a small closet in our home, and we have the perfect position for it. I found it interesting that you had mentioned that it can be important to make sure your measurements are precise to avoid discrepancies. We'll have to start looking around for construction supplies to make sure we are getting perfect measurements when putting this up.